DIY Truck Bed Bike Rack (and L-Track Installation Guide)
One of the benefits of having a truck (and a small truck camper that allows you to still use your truck like a truck) is being able to haul stuff easily in the bed. Sometimes that’s mulch for the garden, sometimes it’s lumber for a house project, and sometimes it’s fun stuff…like your mountain bike!
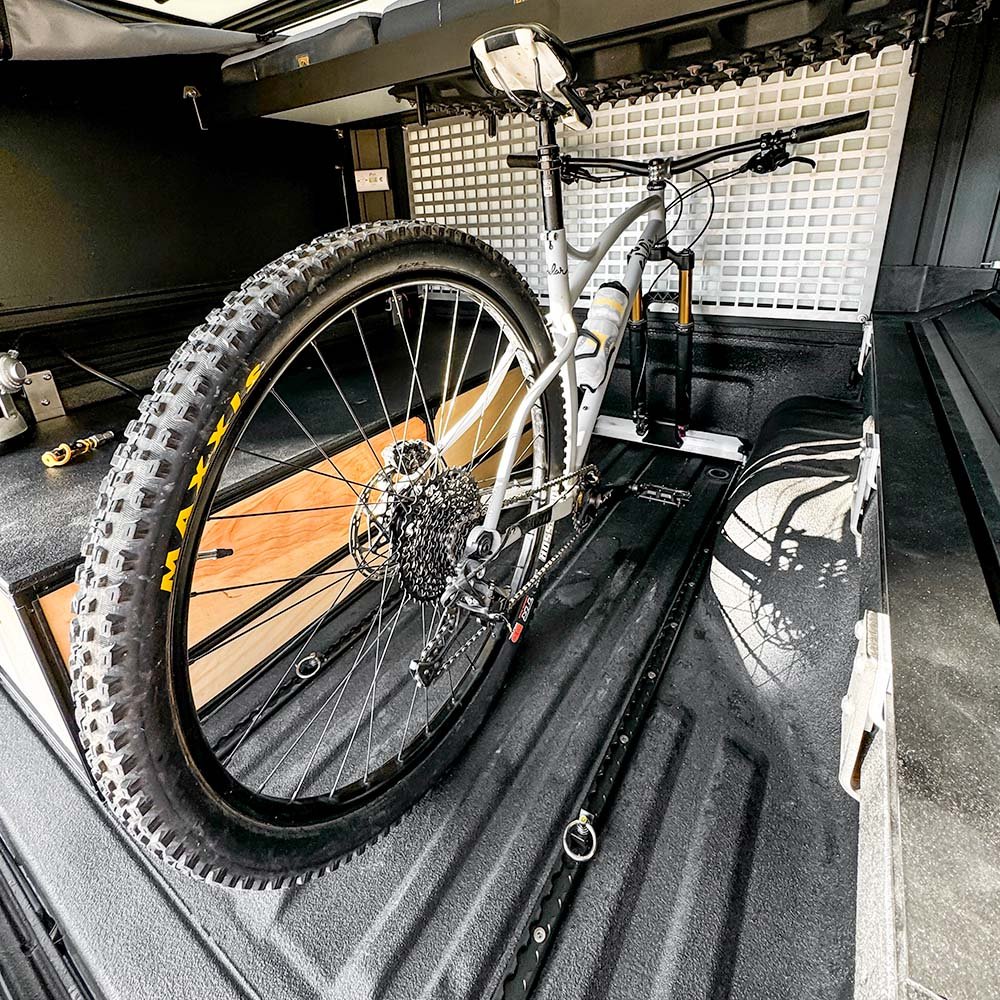
In this guide, we’re detailing a simple and versatile way to make a DIY truck bed bike rack for hauling your bike easily in the bed of your pickup, with an option to easily remove it so it’s not in the way when it’s time to get work done.
Note that the DIY truck bed bike rack options described in this guide do require your bike to have a quick release front fork.
*(This post contains affiliate links. This means we may receive a small commission, at no additional cost to you, if you make a purchase through a link. See our full disclosure.)
Tools Needed:
Rivnut Installation Kit* - this kit includes the installation tool, adapters, some rivenuts, and detailed rivnut installation instructions
Stainless Steel Rivnuts* - we recommend using these stainless rivnuts for truck bed installation (instead of the ones included in the installation kit) for their increased corrosion resistance
Miterbox Saw* with Aluminum Cutting Blade* (not needed if using the Direct-to-Bed mounting option)
Drill with step drill bit* & centering punch* (and hammer)
Measuring Tape, Ruler, Square, Marking Pen
Basic Hand Tools
Supplies Needed:

Direct-to-Bed DIY Truck Bed Bike Rack (Option 1)
Truck Bed Bike Rack Fork Mount
M6* or 1/4-20 Bolts*
L-Track DIY Truck Bed Bike Rack (Option 2)
L-Track
2” Aluminum L Stock
2ft - 2in x 1/8in* (what we used)
L-Track Threaded Studs with Knobs* (pack of 4)
M6 Flathead Bolts* or 1/4-20 Flathead Bolts* (depending on what rivnut thread you choose)
Truck Bed Bike Rack Fork Mount
Thru-Axle Mount* (what we used)
M6* or 1/4-20 Bolts* and M6* or 1/4-20 Locknuts*
How to Build Your DIY Truck Bed BIke Rack
Below we’ll cover, step-by-step, two different DIY options for making and installing your own truck bed bike rack for hauling your bike in the bed of your pickup. Option 1 uses a fixed-location mount that is easier and cheaper to build, while Option 2 uses an adjustable mount that is more versatile and more easily removed when not needed.
Option 1: Direct-to-Bed DIY Truck Bed Bike Rack
If you don’t need your truck bed bike rack to be adjustable or easily removable, the universal fork mounts can be installed directly to the bed or bed rails of your pickup truck. Here’s how:
Choose a Mounting Location
When selecting a mounting location, make sure that there are no obstructions or vital vehicle components behind the area where you’ll be drilling into the bed and installing the rivnuts.
We recommend the use of rivnuts (over sheetmetal screws) for their strength, plus they allow you to easily unbolt the bike mount if/when no longer needed.
Also, be sure to check the measurements of your bike (with front wheel removed) in the proposed location to ensure there is adequate clearance in the bed of your truck - especially if you have a small truck camper or truck topper installed that will limit height.
Mark and Drill
Once you’ve selected a mounting location, use the fork mount you’ve selected to mark its mounting hole locations on the bed of your truck (using a silver sharpie for this step helps). Then use the centering punch on these marked locations; this will help guide the drill bit.
Check the diameter of your rivnuts - typically M6 or 1/4-20 are a hardware size - against the stepdrill to find the appropriate diameter for the rivnut. As you begin drilling, go one step at a time until the desired diameter is reached.
Install Rivnuts
Once the holes have been drilled, use the rivenut installation tool to insert and install the rivnuts (here’s how) into the bed of your truck.
Install the Fork Mount
Now using either the M6 or 1/4-20 bolts (depending on which thread type rivnuts you installed) secure your Fork Mount bike rack to the rivnuts in the truck bed.
Mount your bike in the bed of your truck and hit the trails!
Option 2: L-Track DIY Truck Bed Bike Rack
Installing L-track in your truck bed has a TON of benefits outside of making it easy to add and remove your new DIY truck bed bike rack. You can also add additional tie-down points and anchors to the L-track (when it’s not being used for your bike rack) for other truck stuff - like securing gear or cargo in the bed!
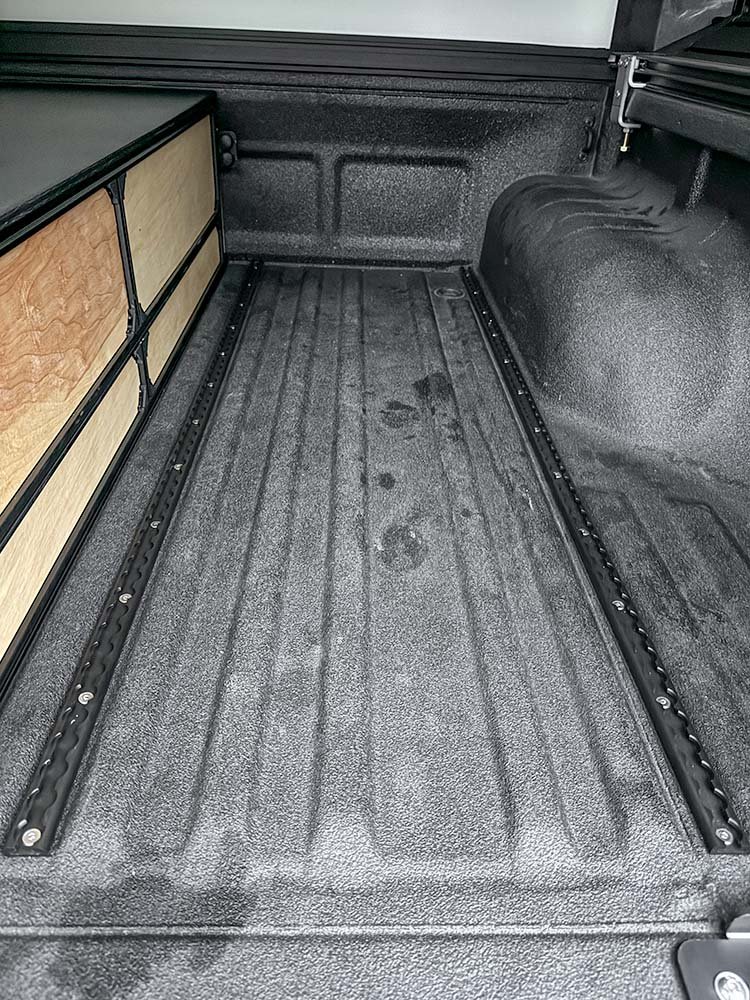
Choose a Mounting Location
Determine where you want to install the L-track - this can be on the bottom of the truck bed or on a flat location on the cab-side bed rail (if you’re not using a camper shell or other small truck camper that will restrict the height). You can use a single piece of L-track (minimum of 12 inches in length) mounted perpendicular to the bike OR two pieces parallel to the bike, that the removable truck bed bike rack will be mounted to. See images above for reference.
When selecting a final mounting location for the L-track, lay the L-track(s) in position and make sure that there are no obstructions or vital vehicle components behind the area where you’ll be drilling into the bed for the L-track’s mounting holes.
Also, be sure to check the measurements of your bike (with front wheel removed) to ensure there is adequate clearance in the bed of your truck - this is especially critical if you have a small truck camper or truck topper installed that will limit height - OR - if you have a short bed truck that may have limited bed length. (Example: our short bed Tacoma’s bed is 60” long and my mountain bike is 58” from the fork to the back of the rear tire - so it’s tight).
Mark and Drill
For mounting the L-track to the truck bed we recommend the use of rivnuts (over sheet metal screws) for their strength, plus they allow you to easily unbolt the L-track if/when it is damaged or no longer needed.
Once you’ve selected a mounting location (Step 1), use the L-track to mark its mounting hole locations on the bed of your truck. We used a silver sharpie for this step, taking care to be precise, and then use the centering punch on these marked locations; this will help guide the drill bit.
Check the diameter of your rivnuts - typically M6 or 1/4-20 are a good hardware size - against the stepdrill to find the appropriate diameter for the rivnut you’re using. As you begin drilling, go one step at a time until the desired diameter is reached.
Install Rivnuts
Once the holes have been drilled use the rivenut installation tool to insert and install the stainless steel rivnuts into the bed of your truck.
Install the L-track
Now using either the M6 or 1/4-20 pan head bolts (depending on which thread type rivnuts you installed) secure your L-track to the rivnuts in the truck bed.
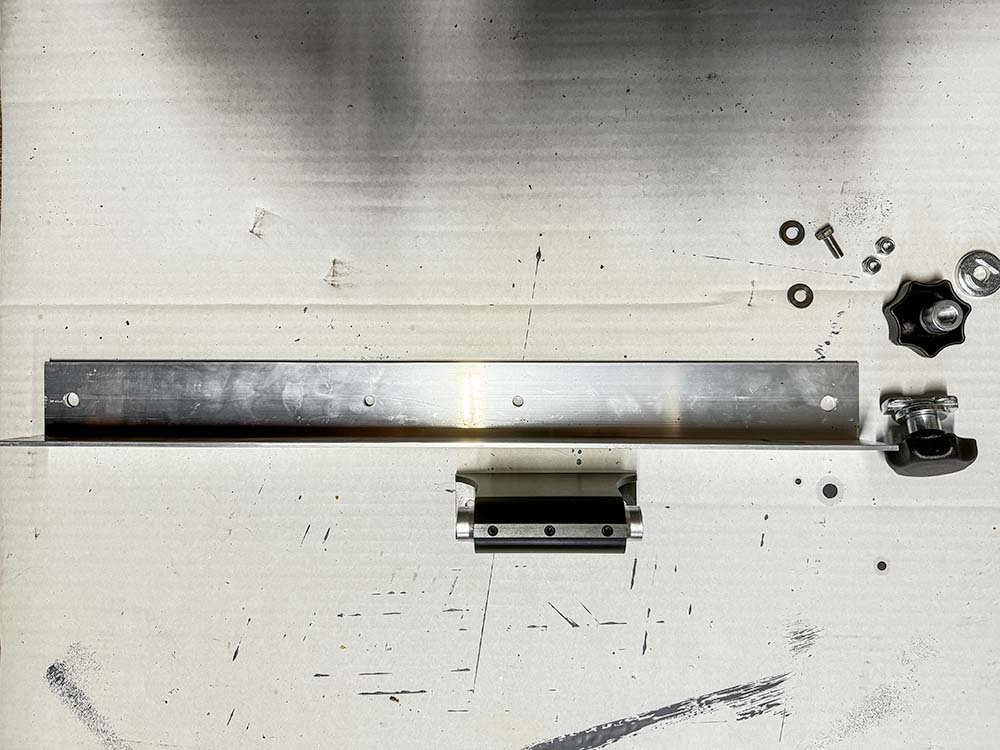
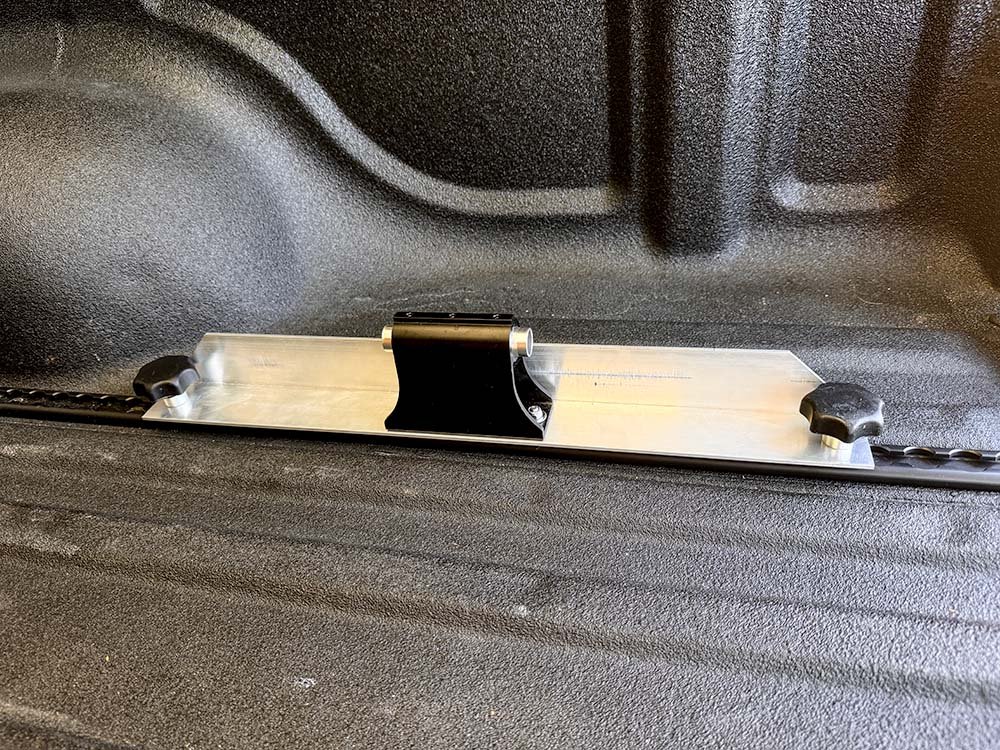
Make the Removable Truck Bed Bike Rack Mount
Once the L-track(s) are mounted in the bed of your truck, you’re ready to build the removable bike rack.
If you installed two pieces of L-track parallel to where your bike will sit in the truck bed, measure the distance from the outside edge of each L-track. Then using the Miterbox Saw with the ferrous metal blade (and appropriate safety gear), cut the 2” Aluminum L Stock to this length.
If you installed one piece of L-track perpendicular to the front of where your bike will sit in the truck bed, cut a 12inch section of 2” Aluminum L Stock using the Miterbox Saw with the ferrous metal blade (and appropriate safety gear).
Now using the marking pen and center punch, measure and mark points for the holes for the L-track threaded studs to pass through.
Once the L-track(s) are mounted in the bed of your truck, you’re ready to build the removable bike rack.
For Parallel L-track - this should be 3/4 inch in from each end of the cut piece of Aluminum L Stock and 7/8 inch in from the bottom edge.
For Single, Perpendicular L-track - this should be 1.5 inches in from each end of the cut 12” piece of Aluminum L Stock, and 7/8 inch in from the bottom edge.
Using the stepdrill, drill these marked locations to 3/8in. diameter.
Next, center the fork mount on the Aluminum L Stock between the previously drilled holes and carefully mark the mounting hole locations of the fork mount you selected with the marking pen. Use the center punch to center the starting point of the drill, and then the step drill to drill these locations in the Aluminum L Stock to 1/4 inch diameter.
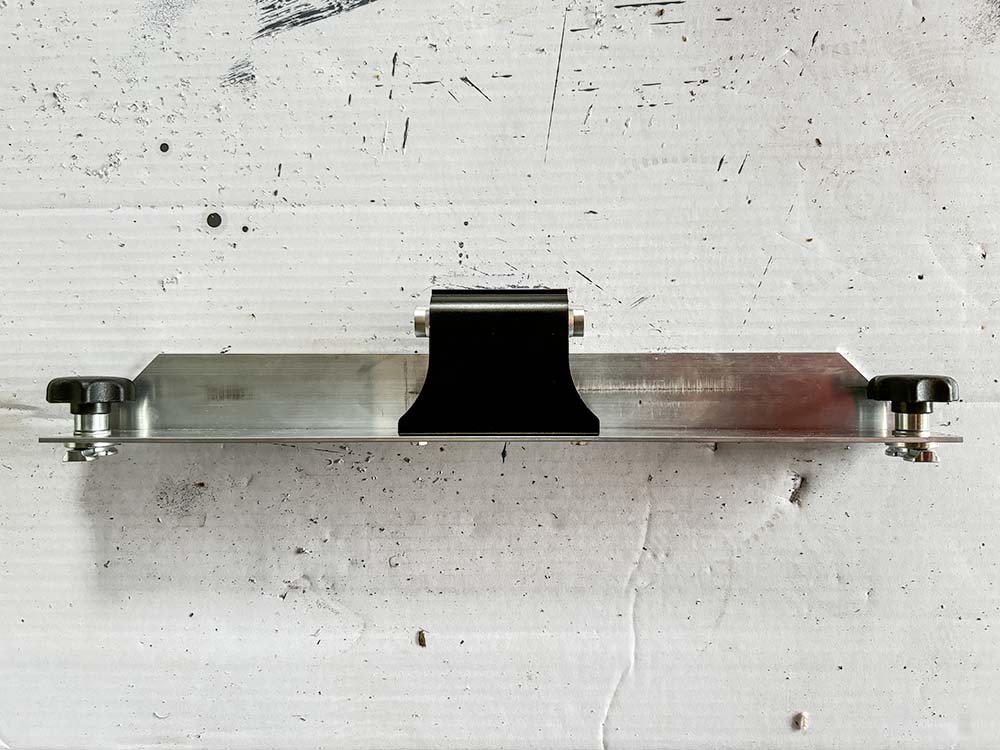
Now, using the Miterbox saw with ferrous metal blade, on the opposite (vertical) half of the Aluminum L Stock, you will dogear the corners by cutting them at a 45degree angle (see images above for clarity); this is done to allow room for the knobs to easily thread onto the L-track studs and securing the finished truck bed bike rack to the L-track.
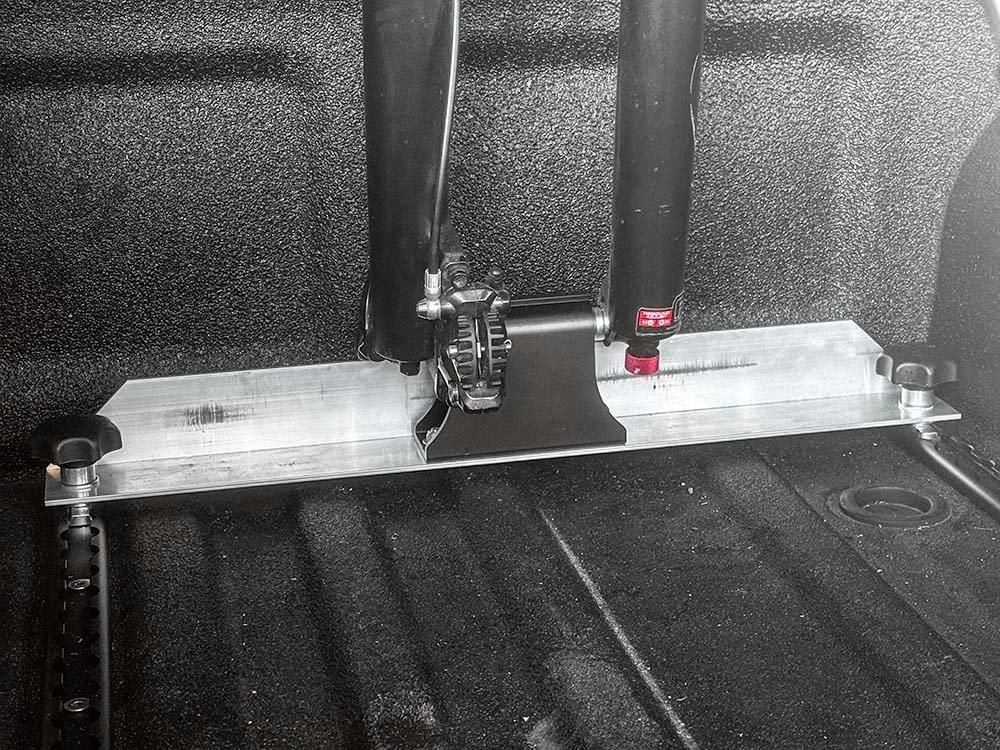
You’re now ready to attach the fork mount to the Aluminum L Stock using the M6 or 1/4-20 bolts and lock nuts, and finally fasten your completed DIY truck bed bike rack to the L-track using the threaded L-track studs and knobs.
Mount your bike to the fork mount on your new adjustable DIY truck bed bike rack and hit the trail!
Optionally, you can add some basic tie downs* (or these heavy-duty tie downs*) to your new L-track and pick up some Front Runner Stratchits* for securing all kinds of other gear and equipment too!
This truck bed bicycle stand was a fun little straightforward DIY project, and only took us about 2-3 hours total to complete. The L-track mounting option added a ton of versatility to our truck’s bed space, and has really come in handy for securing our camping gear and fridge while traveling.
For more helpful truck camping, overlanding, and family travel tips and guides be sure to SUBSCRIBE to our bi-monthly blog updates.
Related Links:
How to Build an Aluminum 8020 Truck Bed Sleeping Platform [with Drawer Storage]
How to Pack a Traveling Tool Kit for Overlanding and Off Roading
How to Choose and Use a 4x4 Winch [Basic Winching Techniques]
👇We’d Really Appreciate a Share!