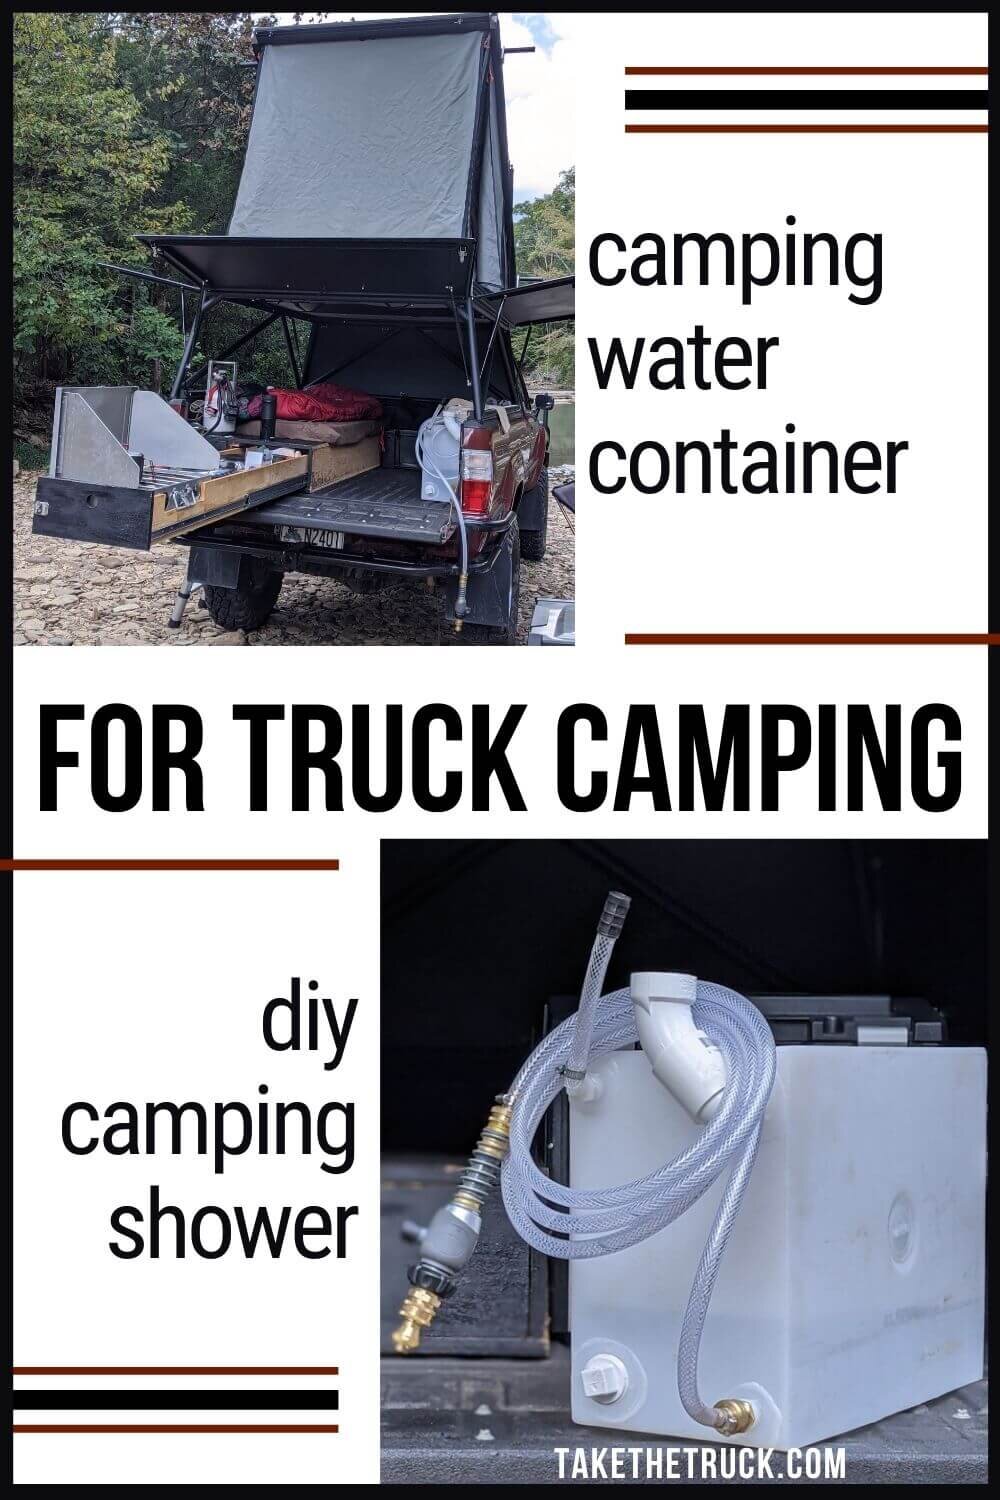
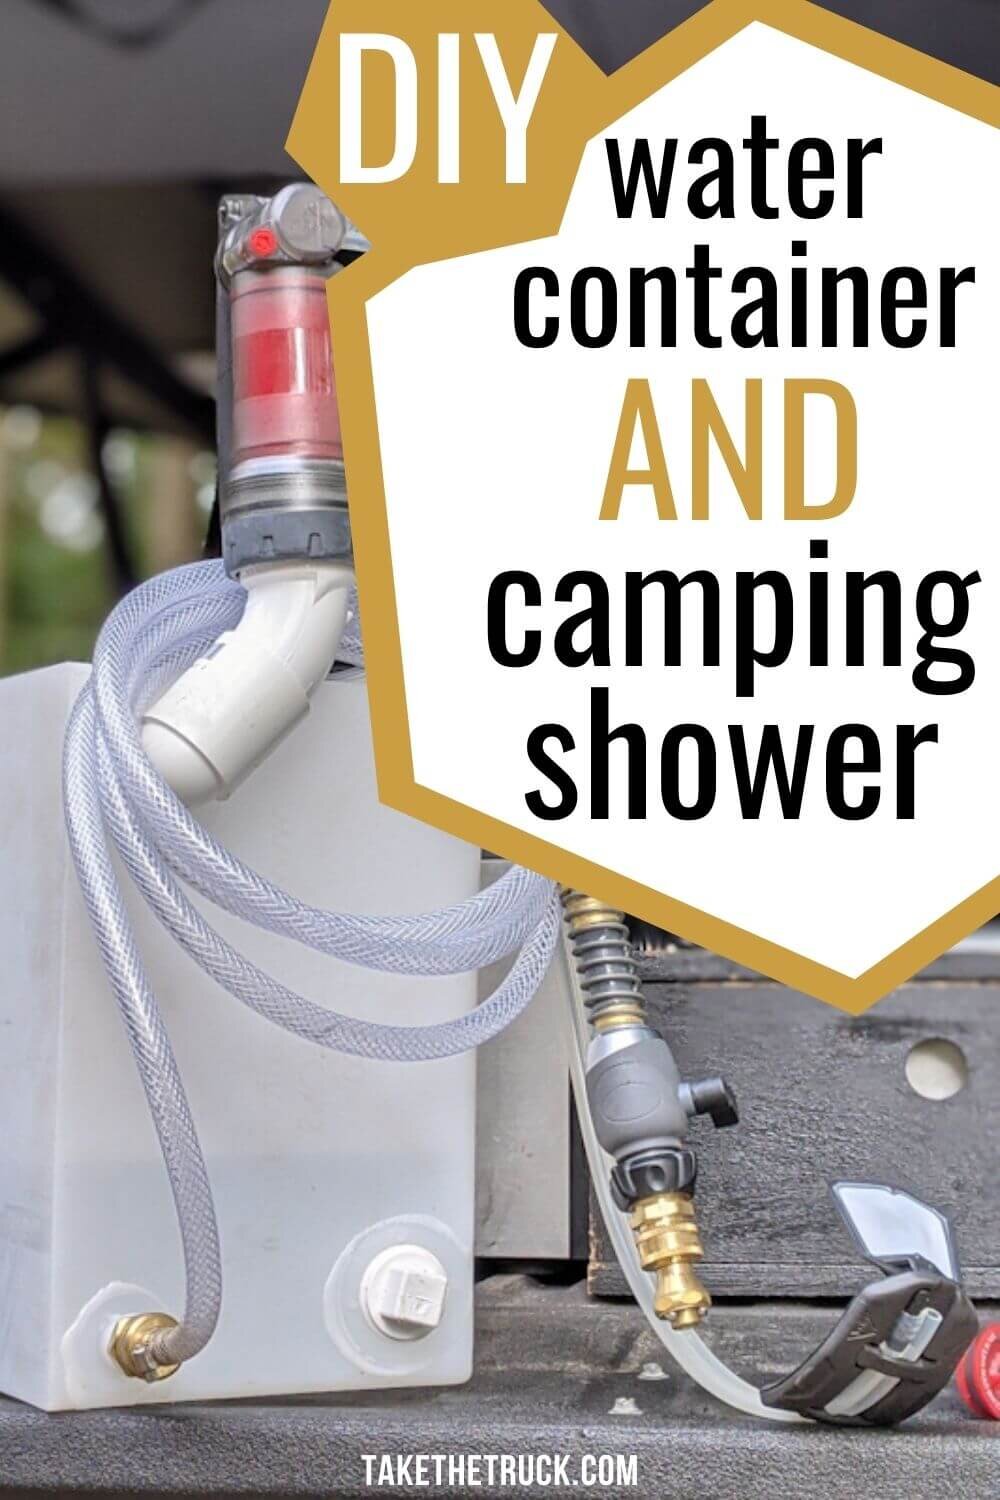
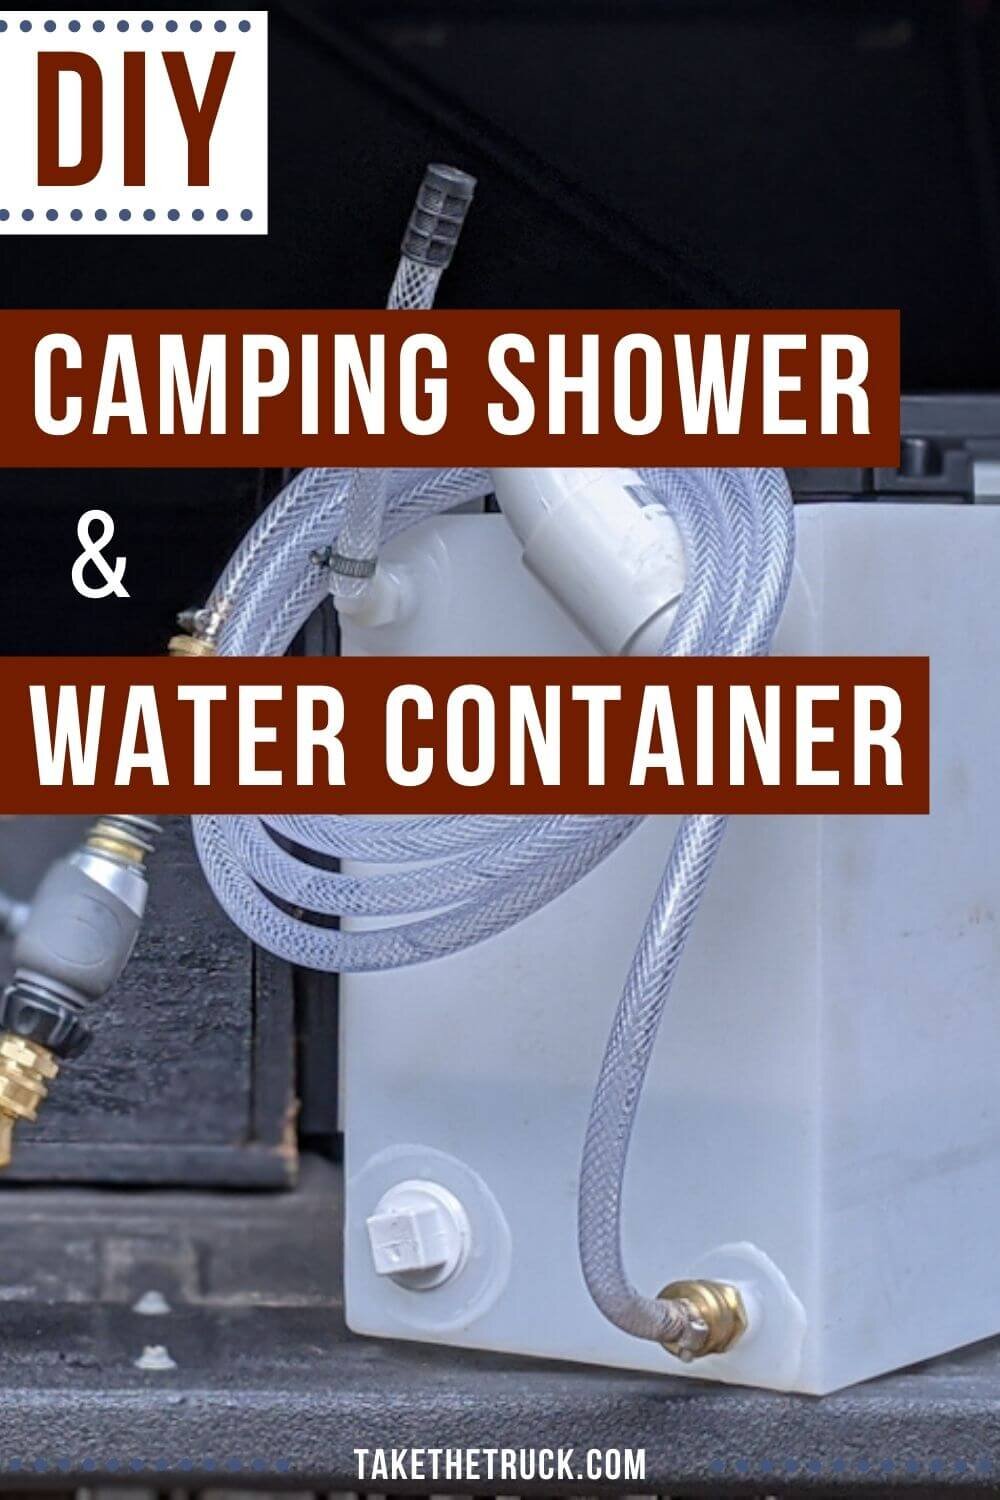
Overland Shower - A DIY Camping Shower and Water Container

When we upgraded to a wedge camper, we decided to say goodbye to our much-loved Road Shower and come up with a budget friendly DIY camping shower and water container to better suit our new truck camping and overland travel setup.
Finding a great camping water container that could also work well as a portable overland shower without breaking the bank took a lot of research and a bit of trial and error.
What we ultimately came up with is a simple, yet versatile, DIY camping shower that can operate as either a gravity fed or pressurized camping shower!
So read on for all the details on parts and assembly to make your own DIY portable overland shower and camping water container!
*(This post contains affiliate links. This means we may receive a small commission, at no additional cost to you, if you make a purchase through a link. See our full disclosure.)
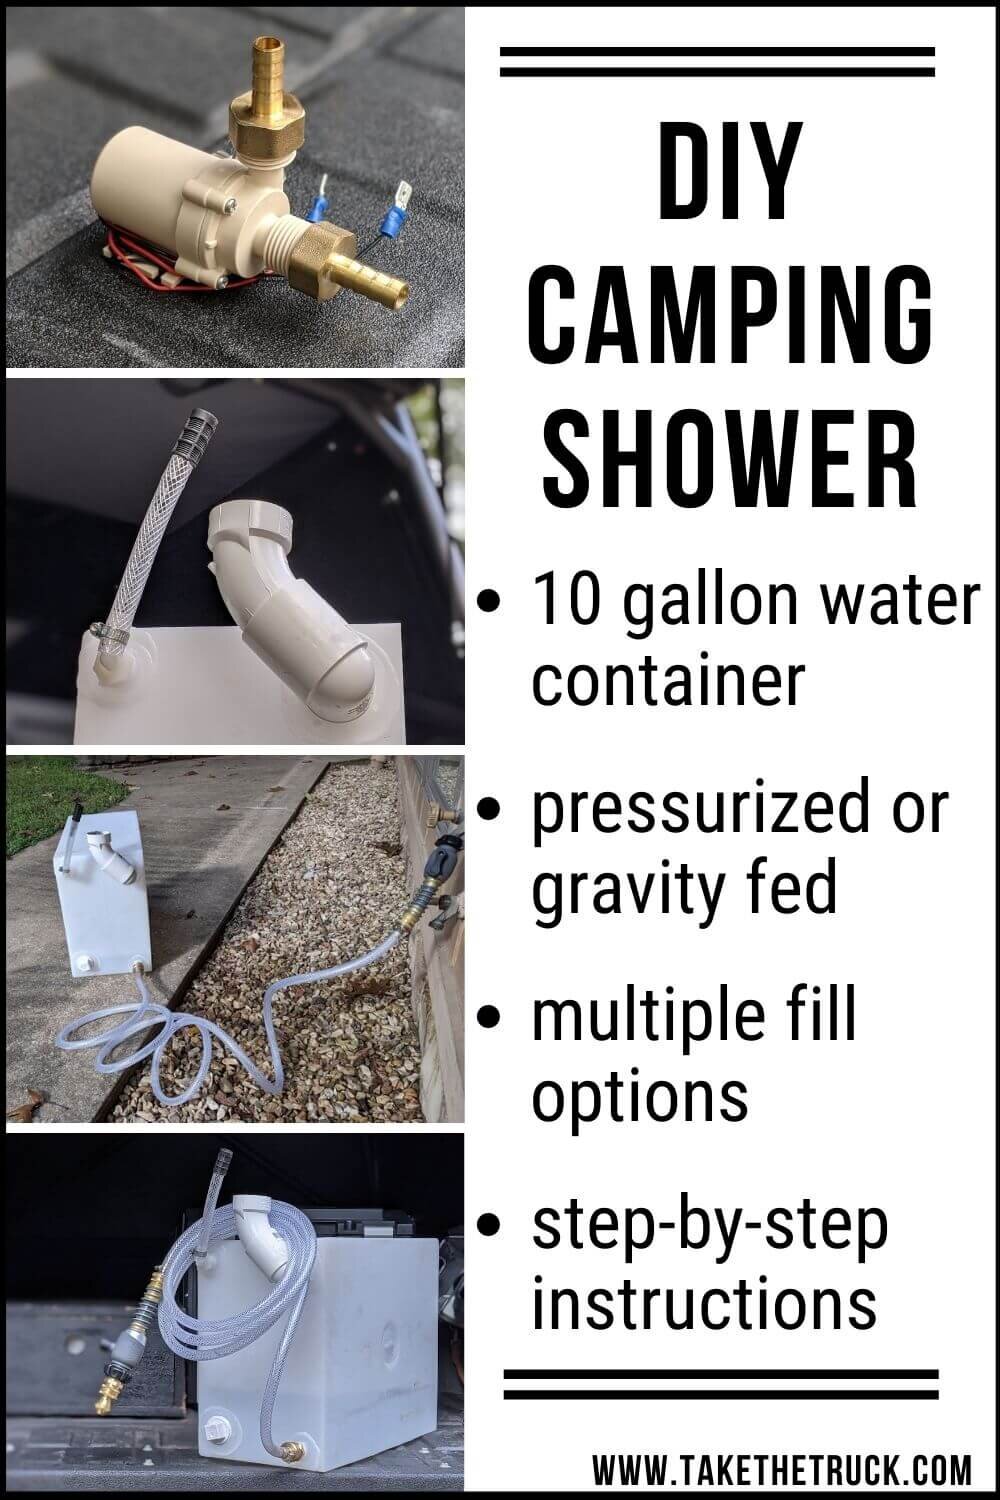
DIY Portable Camping Shower and Water Container Parts List:
Water Tank
Water Input/Output Port
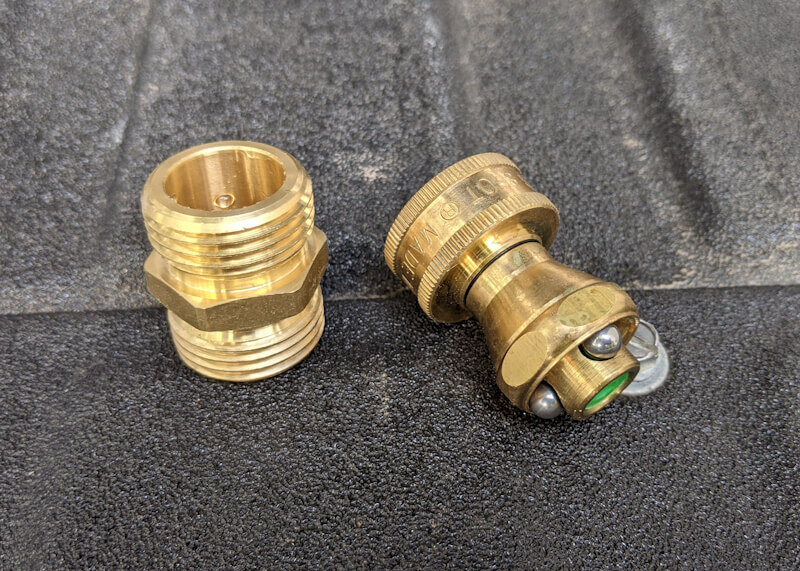
Male Hose Thread to ½” MPT* (only need one, but comes in a pack of two)
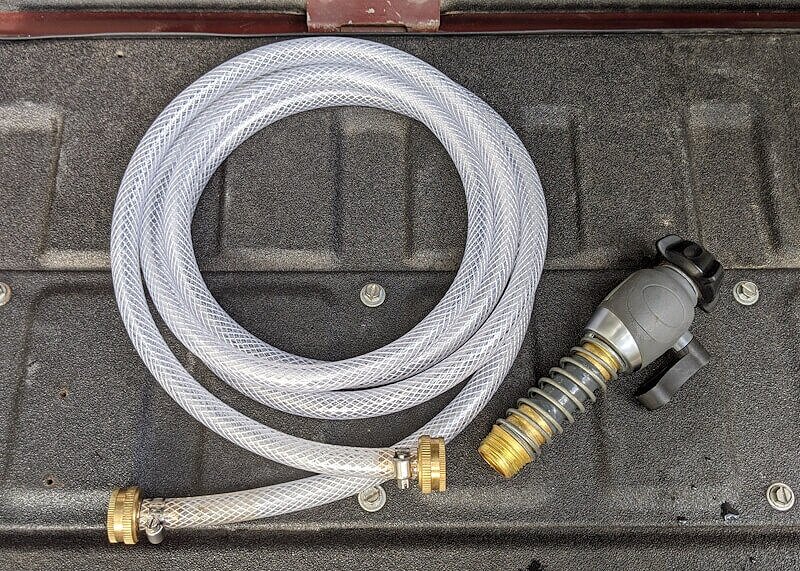
Water Hose Assembly
⅜” Barb to Female Hose Thread Adapter* X2 (sold individually but you need 2)
Hose Clamps* (4pc)
Flexible Shutoff Hose Adapter*
Water Container Breather Vent Assembly
⅜” Vinyl Hose Tubing* (just use a small piece from your ⅜” water hose above)
Hose Clamps* (4pc)
Water Tank Filler Neck Assembly
1-½” MPT x 90-Degree PVC Street Elbow*
1-½” 45-degree PVC Street Elbow*
Tank Drain Plug
Optional Parts/Accessories:
Electric Pump Options for a Pressurized Portable Camping Shower:
12v Standard Self-Priming Pump*
Spray Nozzle & Adapter:
Tank Strap:
Approximate Cost to Build A DIY Portable Camping Shower & Water Container:
Basic Gravity Flow Setup - appx. $150
With Optional 12v Pump, Nozzle, and Carry Strap - appx. $185-210
This puts the total cost of this DIY camping shower well below other comparable non-DIY options like the Road Shower, WaterPORT, Front Runner Water Tank,* etc.
How to Assemble Your DIY Portable Camping Shower & Camping Water Container:
1. Prep the Camping Shower Tank
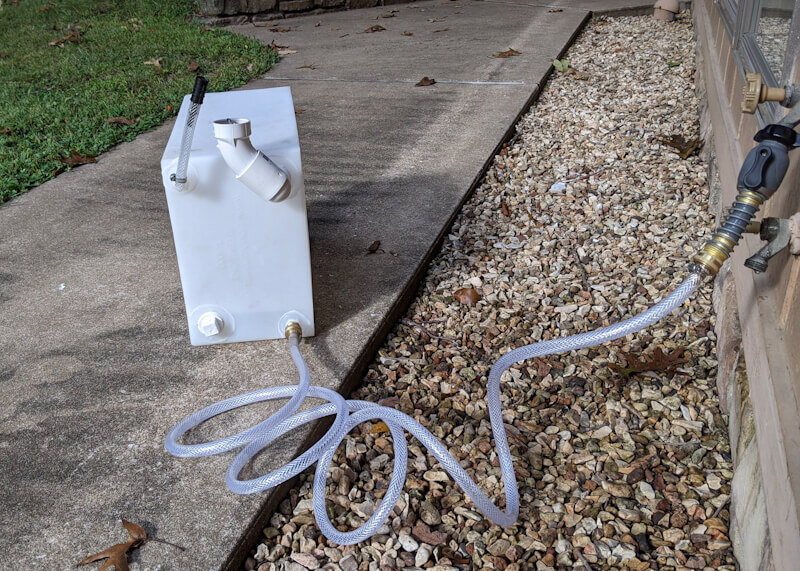
The plastic 10 gallon water tank is the foundation of this DIY portable camp shower and water container. Though there are other tanks available, we feel the size, dimensions, portability, and output options on this tank are perfect for most truck camping, SUV camping, and car camping setups.
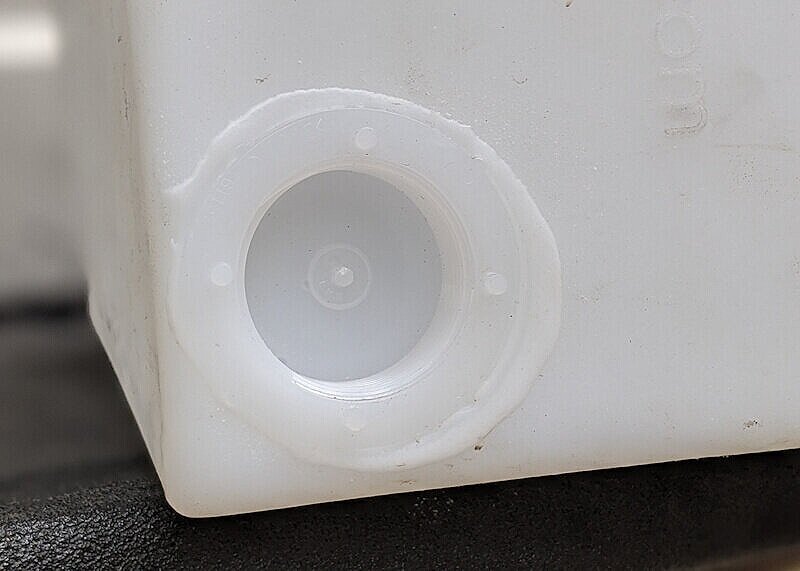
The tank’s 1½” ports have a plastic membrane that will need to be cut out (we simply used a sharp pocket knife) and removed. Once removed, rinse the tank out thoroughly to remove any plastic shavings that may remain inside.
2. Install the Water Input/Output Port
The Male Hose Thread (MHT) to ½” Male Pipe Thread adapter will provide you with a convenient standard hose connection on the DIY camping shower water tank.
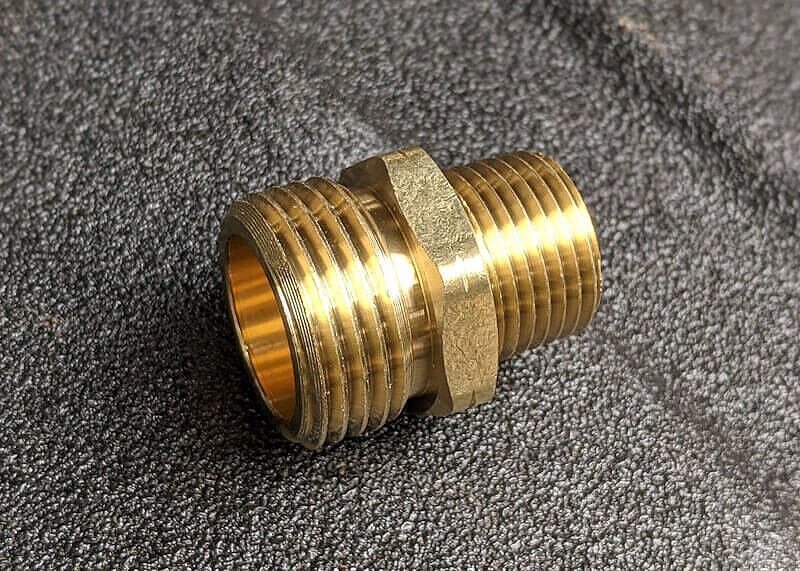

Taking the Male Hose Thread to ½” Male Pipe Thread adapter, wrap the ½” Male Pipe Thread side thoroughly with pipe sealant tape.
With the camping shower water tank oriented with it’s input-output ports facing you and the tank’s short side down, thread the ½” Male Pipe Thread side of the adapter into the ½” Female Pipe Thread port on the bottom right of the tank.
Thoroughly hand-tighten, taking care not to strip the threads on the tank
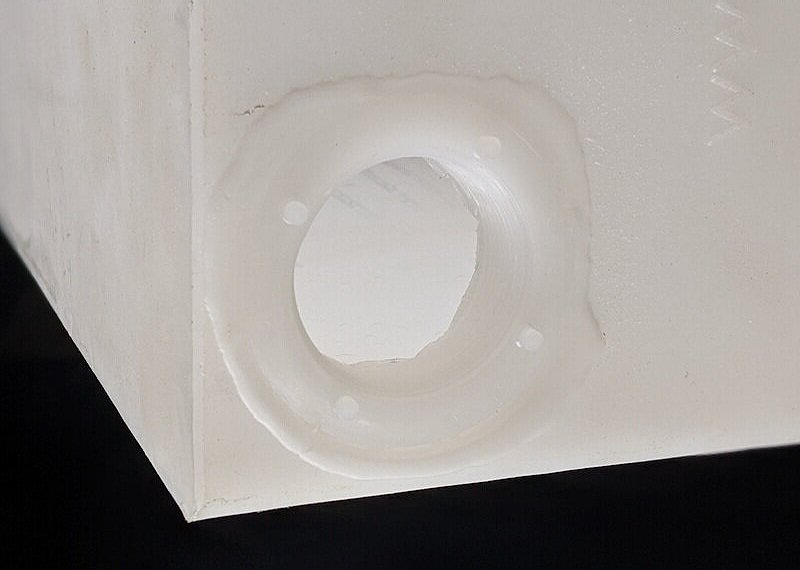
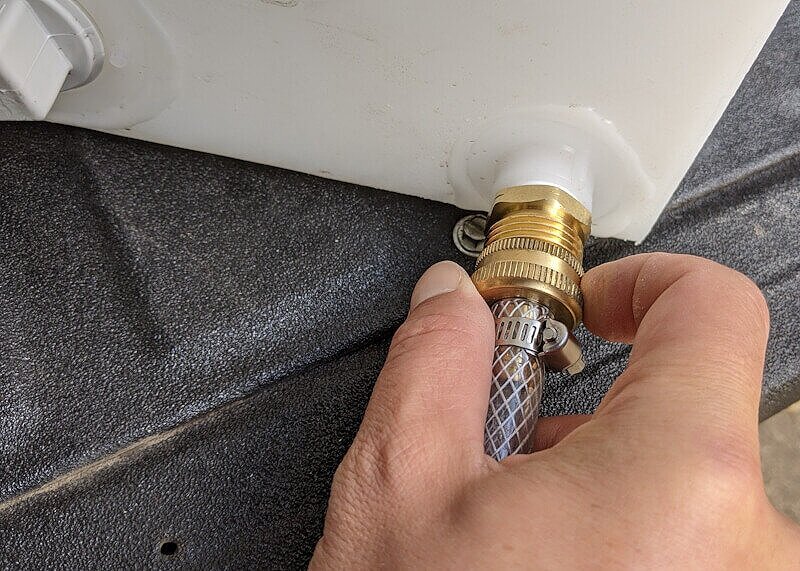
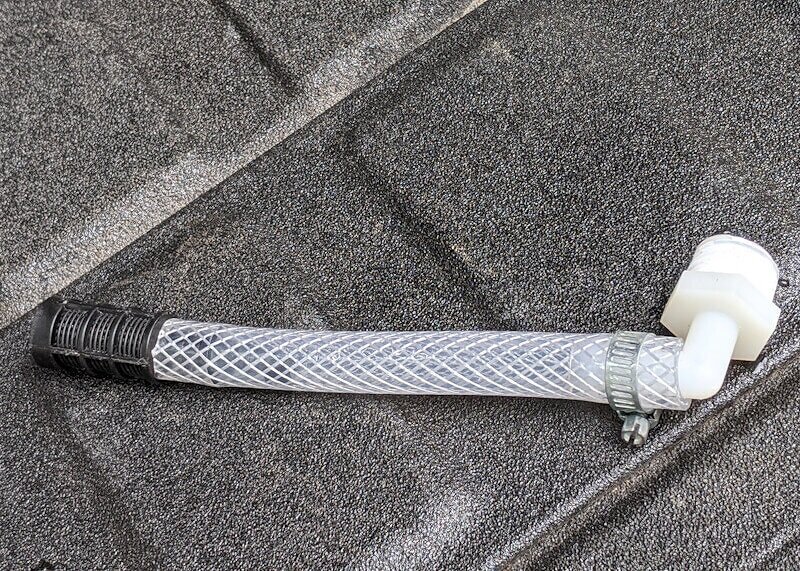
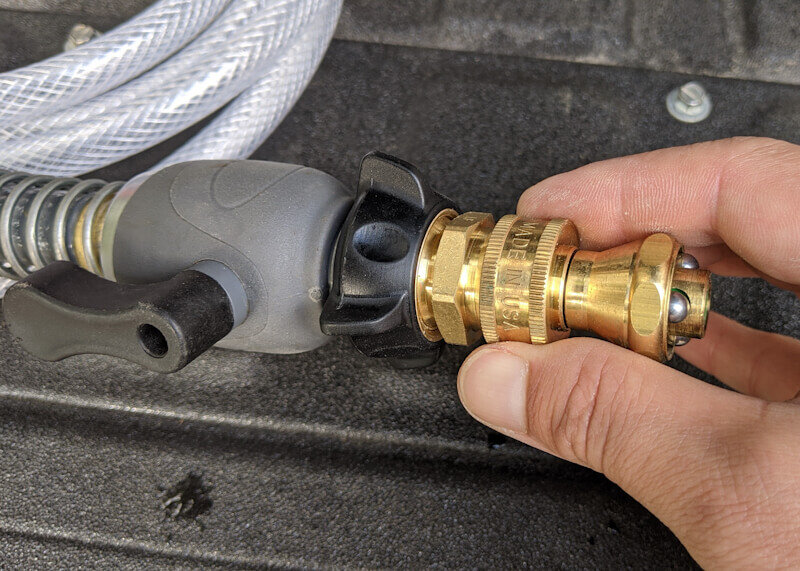
3. Assemble and Install the Water Hose and Shut Off Adapter
This assembly will provide you with a water hose and shut off that will allow you to both control the output of the DIY camping shower AND be able to easily backfill the water tank from a standard hose spigot!
Before assembly, cut a 6 inch length of the ⅜” ID Vinyl Hose to be used in the Water Tank Breather assembly [Step 4]
Taking the remaining ⅜” ID Vinyl Hose, insert one of the ⅜” Hose Barb to Female Hose Thread adapters into each end of the hose
Secure each with a hose clamp
Then install the male end of the Flexible Shutoff Hose Adapter in one of the water hose’s available Female Hose Thread ends
Now you can install the remaining Female Hose Thread onto the Male Hose Thread of the Water input/output port [from Step 2].
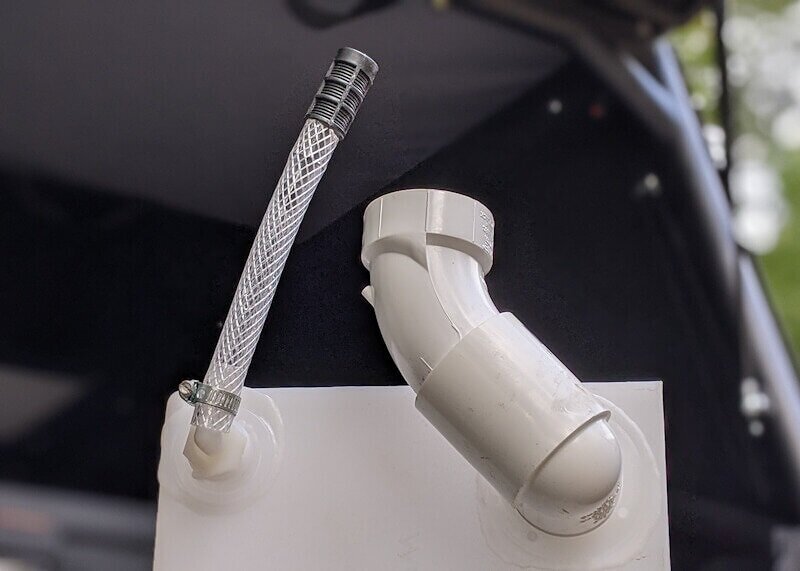
4. Assemble and Install the Breather Vent Assembly
The Breather Vent Assembly makes filling the diy camping shower’s water tank much easier by allowing air to escape easily from the tank while filling.
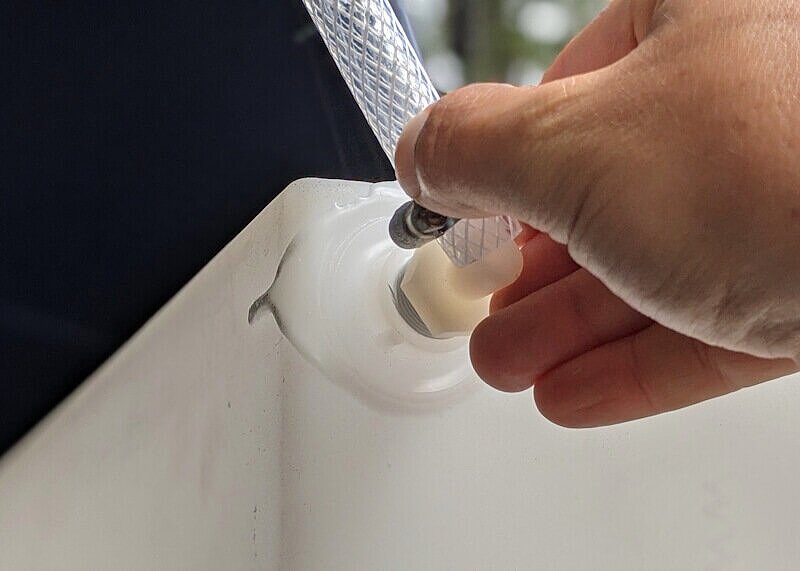
Taking the 6 in. section of ⅜” ID Vinyl Hose [which you cut from the larger section in Step 3], insert the ⅜” Hose Barb to ½” Male Pipe Thread adapter into one end of the 6 inch hose and secure with a hose clamp
Then insert the ⅜” Breather Vent into the other end of the 6 inch hose
At the opposite end of the assembly, wrap the ½” Male Pipe Thread with pipe thread sealant tape
Now you can thread the Male Pipe Thread end of the Breather Vent Assembly into the only remaining ½” Female Pipe Thread port on the upper left hand corner of the water tank. Again, be sure not to over-tighten or strip the plastic threads in the water tank
You want the breather to stand vertically and above the top side of the water tank when installation is complete
5. Assemble and Install the DIY Camping Shower Water Tank Filler Neck
The Water Tank Filler Neck provides another flexible filling option for the camping water container. You can fill from a water bottle, bucket, hose, or even use a water filter (such as the MSR Guardian as pictured below) to fill directly from a stream or other fresh water source.
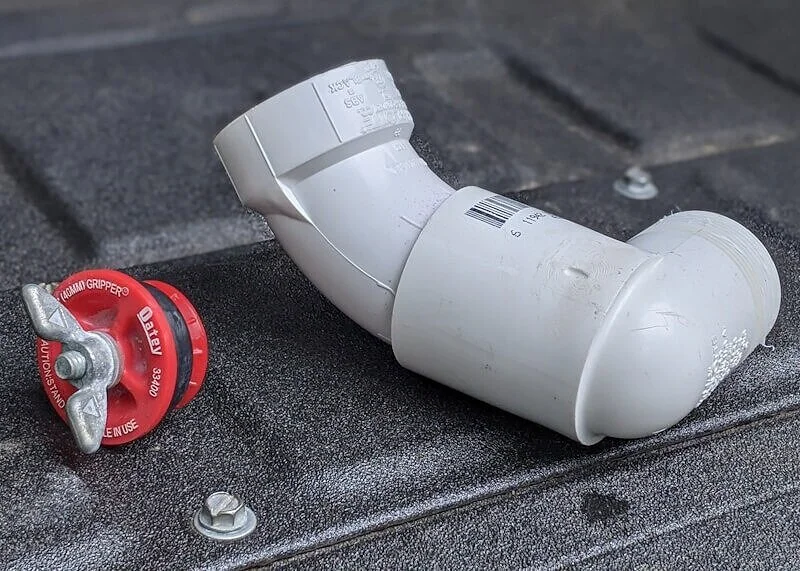
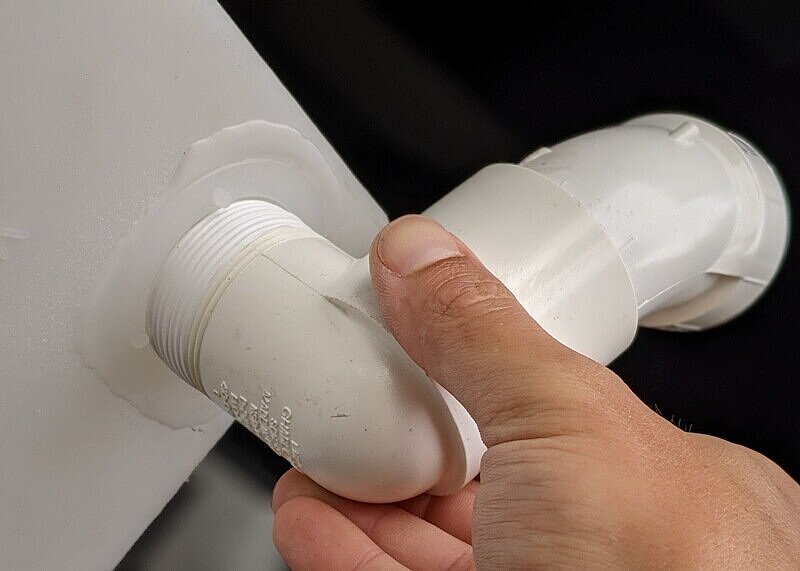
Taking the 1½” MPT x 90-Degree PVC Street Elbow and the 1½” 45-Degree Street Elbow, apply a thin coat of PVC Cement to the inside of the female end of the 1½” MPT x 90-Degree PVC Street Elbow and the male end of the 1½” 45-Degree Street Elbow
Now insert the male end of the 1½” 45-Degree Street Elbow into the female end of the 1½” MPT x 90-Degree PVC Street Elbow in the orientation and configuration shown in the image below
Allow sufficient time for the PVC Cement to cure per the manufacturer's guidelines
Now wrap the 1½” Male Pipe Thread end of the assembly with pipe thread sealant tape, and install into the 1½” Female Pipe Thread port on the upper right-hand corner of the water tank (alongside the installed breather vent) - again taking care not to over-tighten, strip, or cross thread
The female end of the assembly should be level and sit above the top of the water tank once installation is complete
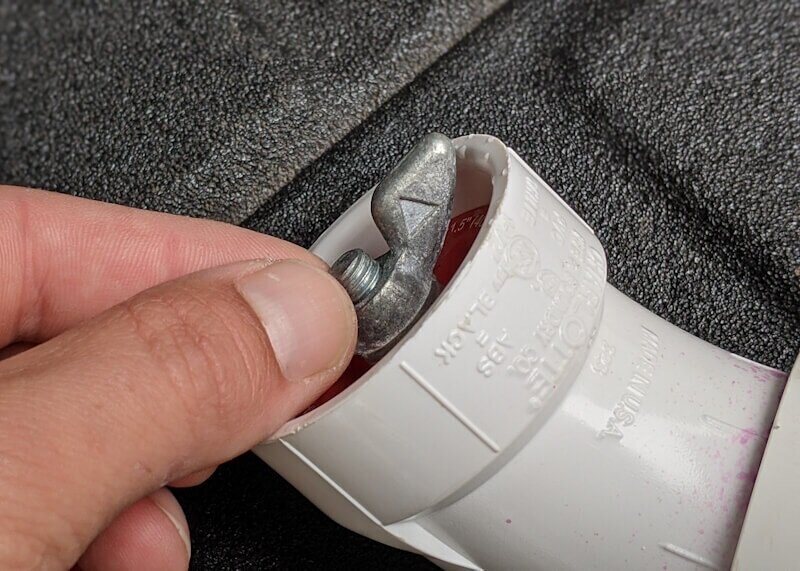
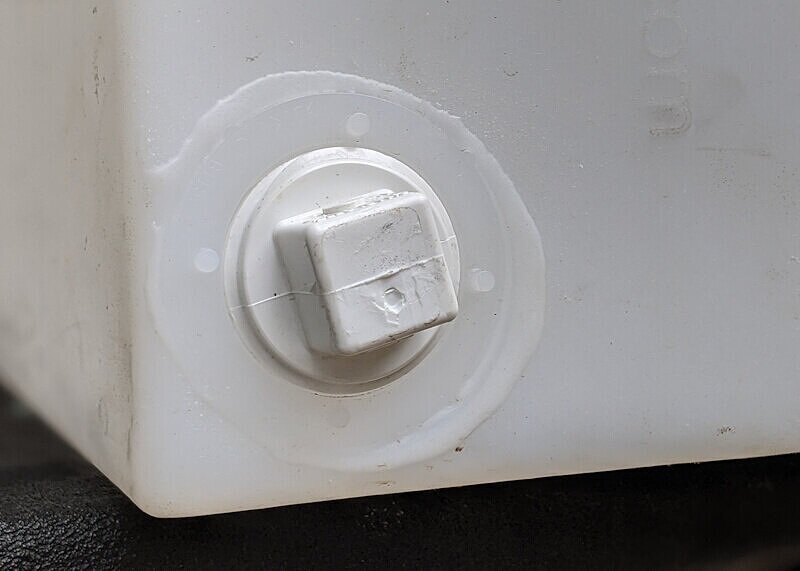
You can now insert the 1½” Expanding Plug into the top of the installed Water Tank Filler Neck. When tightened after filling, this will serve as a cap and ensure water does not slosh out of the water tank’s filler neck while driving
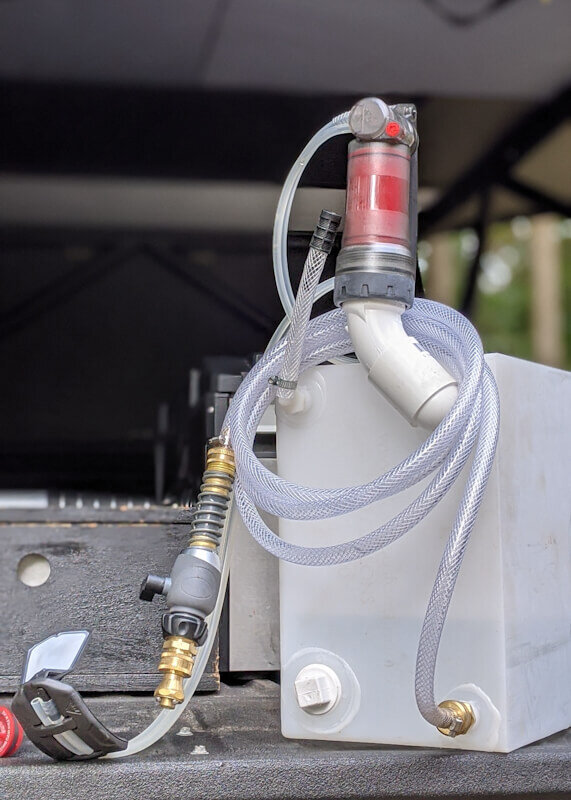
6. Install the Tank Drain Plug
The drain plug will allow you to easily drain, flush, and clean out the water tank when needed.
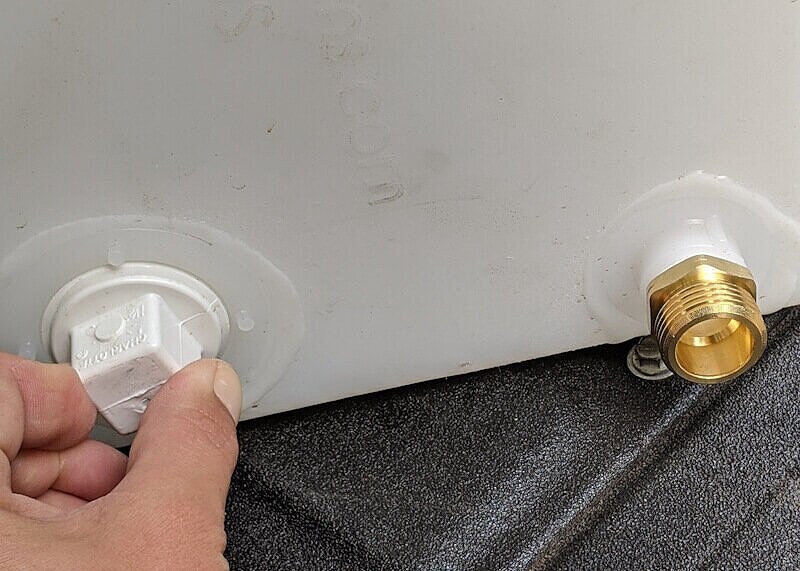
Take the 1½” PVC Cleanout Plug and wrap the threads with pipe thread sealant tape
Insert the plug into the only remaining 1½” Female Pipe Thread port on the bottom left corner of the water container
7. Install Optional Parts if Desired
The completed DIY Portable Camping Shower at this point is fully functional as a gravity shower and 10 gallon camping water container. Though not necessary, you may consider adding some of these optional accessories depending on your needs and how you intend to use your DIY camping shower.
1. 12v Electric Pumps
These 12 volt electric pumps can be powered from any 12v vehicle power source, and will add the benefit of pressurized water to your DIY camping shower:
Option 1: 12v Mini-Pump:
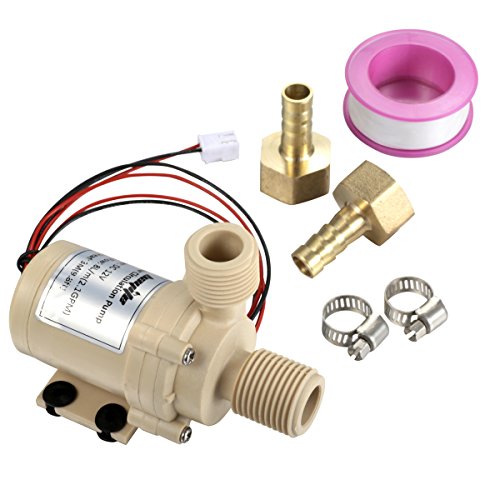
Pros:
Small
Consumes less power than a standard self-priming water pump
Comes with ½” Female Pipe Thread to ⅜” Barb adapters, so it can be easily installed into the existing ⅜” water hose in-line (alternatively the pumps ½” MPT inlet can be installed directly into the water tank’s ½” FPT port)
No Check Valve, this allows bypass for backfilling the tank and gravity flow when the pump is off (basically allowing you to use it as a gravity flow camping shower too)
Cons:
No Pressure Switch, so the pump will run continuously until you manually switch off the power to the pump
Not self-priming, so the pump must be installed very close to the water tank and below the water level of the tank - it cannot pull air from the water hose
Low-pressure - good enough pressure for a camping shower or doing dishes, but not sufficient for spraying mud off gear, bikes, etc.
Option 2: Standard 12v Self-Priming Pump:
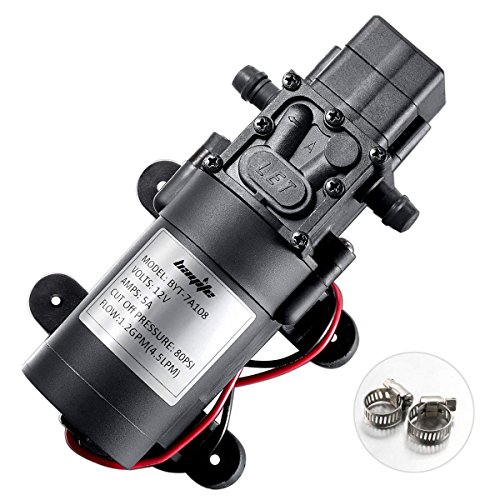
Pros:
Has ⅜” barb attachments so it can be easily installed in-line on the water hose
High-pressure output makes cleaning mud off gear, bikes, etc easier
Has a pressure switch, so that once a pre-set water pressure is reached the pump will shut off automatically when water is not being used
Cons:
Uses more power than the mini-pump when in use
Louder than the mini-pump
Has a check valve that prevents bypass for backfilling the tank or using gravity flow when the pump is off (so you won’t have the option of using it as a gravity flow camping shower)
2. Spray Nozzle & Adapter
The Double Male Hose Adapter can be inserted into the female end of the Flexible Shutoff Hose Adapter allowing you to attach any number of garden-style spray nozzles. We recommend the Little Big Shot Super Nozzle because of its compact size and solid construction - plus it’s made in the U.S.A. by disabled veterans.
3. Tank Strap
Though designed for carrying paddle boards & kayaks, this strap’s loops can be fitted around the DIY camping shower’s water tank to make transporting or moving the tank easier when full (for instance, if you’re unable to back your vehicle up close enough to the water source to fill the tank while it’s still inside your vehicle).

Walk-through OF THE DIY Camping Shower & Water Container :
This budget DIY portable overland camping shower and camping water container has proven to be a very versatile part of our truck camping and overland travel setup, and we hope it will prove valuable to your own camping adventures as well!
Let us know if you have any questions in the comments section below, and if you found our site helpful be sure to SUBSCRIBE for future blog post updates.
Thanks for reading!
Related Posts:
Looking for a Portable Camp Shower? Here’s Why The Road Shower is The Best
How to Conserve Water When Wild Camping
Pin Me!
We’d love a share! Thanks!