The Truth About The Tailgater Tire Table

For years we’ve struggled with the camping table options on the market. They’ve always been a compromise between form, function, and cost. While there are literally thousands of camp tables out there to choose from, none of them have seemed like the right fit for our family truck camping and overlanding setup.
While it’s not perfect, the Tire Table solves a lot of the shortcomings the other camping tables we’ve used have suffered from, so in this post we’ve outlined everything you need to know about the Tailgater Tire Table to decide if it’s the right camp table for your camping adventures.
*(This post contains affiliate links. This means we may receive a small commission, at no additional cost to you, if you make a purchase through a link. See our full disclosure.)
What is the Tailgater Tire Table
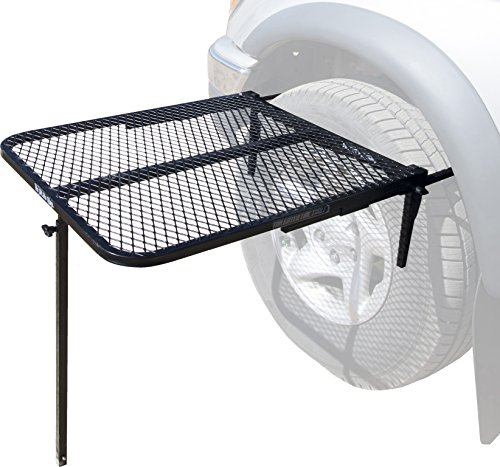
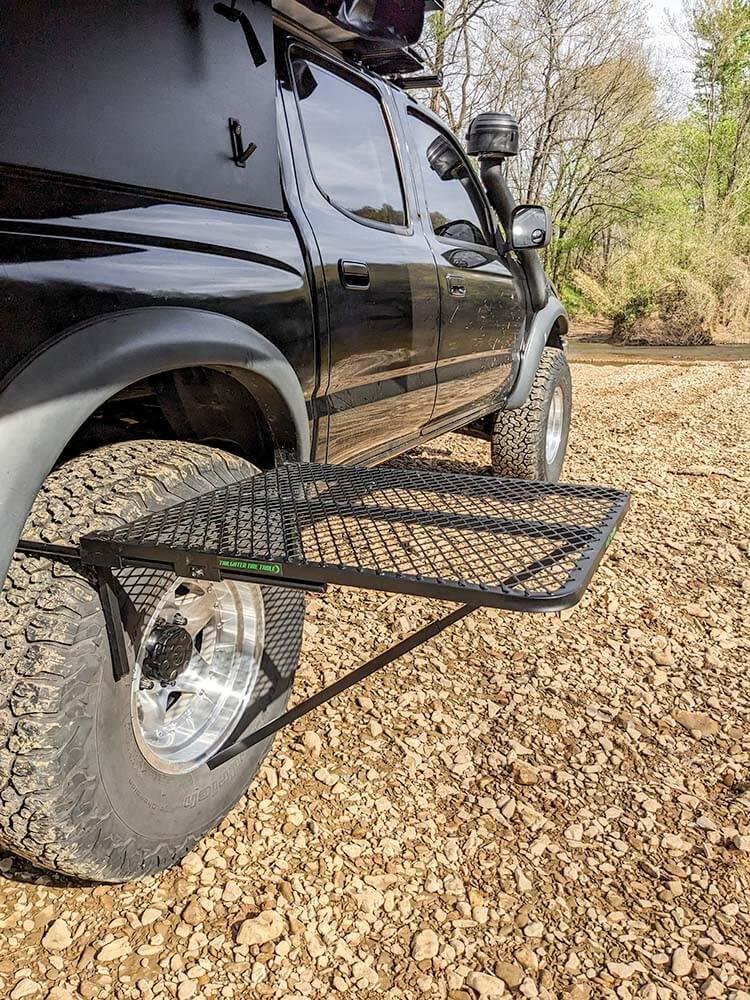
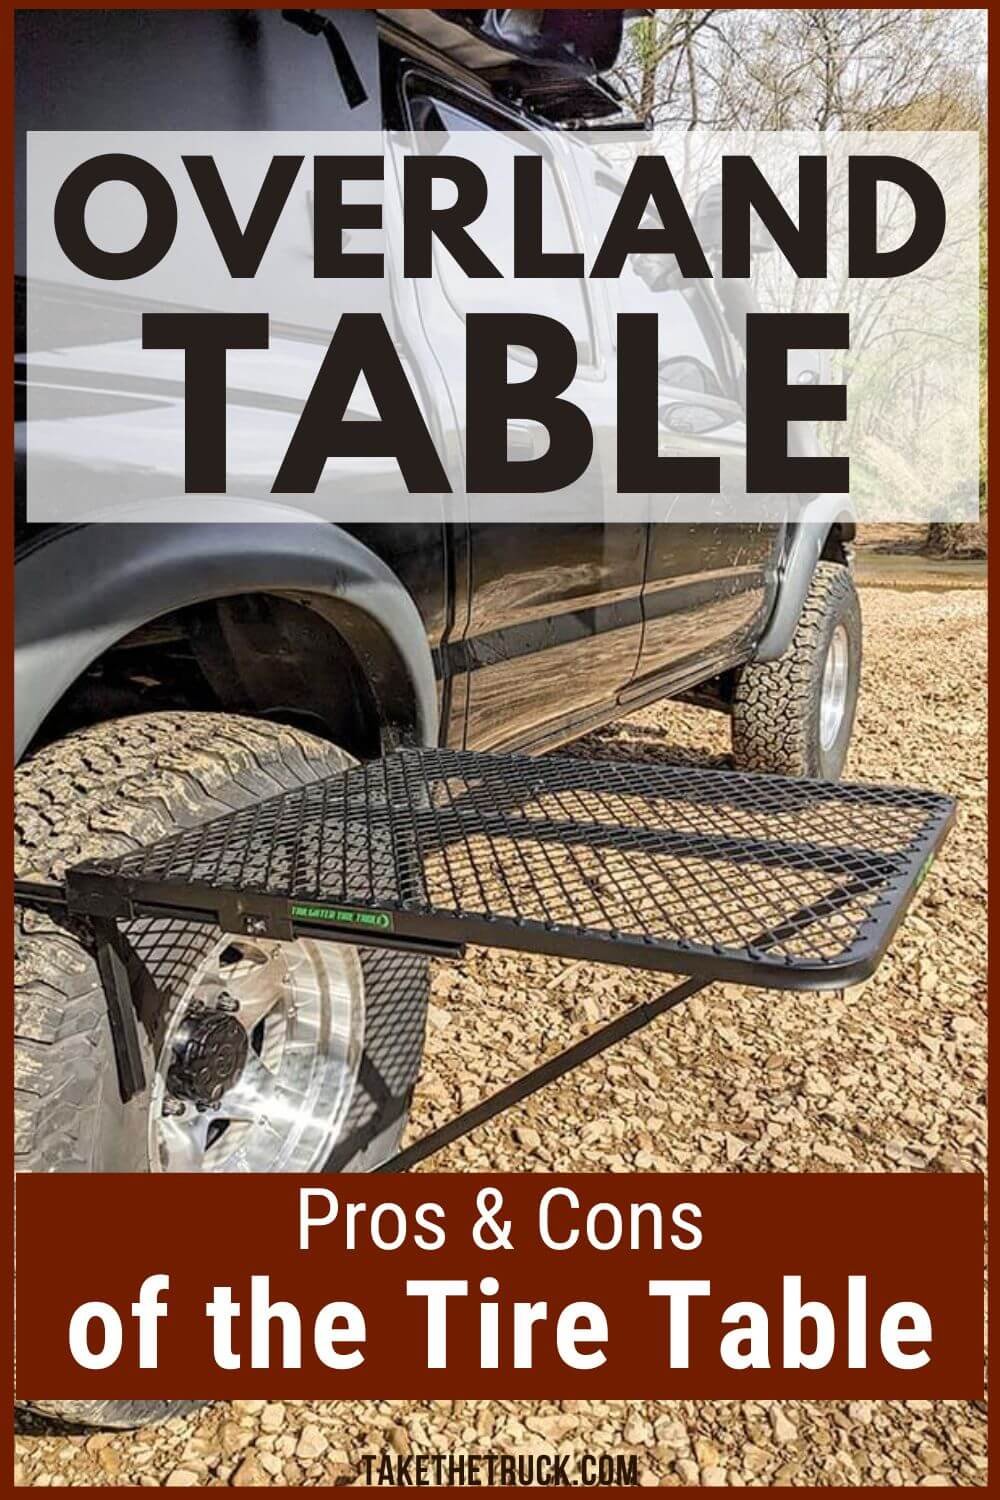
The Tailgater Tire Table (or Tyre Table to our friends down under) is a unique portable camping table that mounts to your vehicle's tire and uses a single leg to provide added stability by either supporting the table vertically from the ground or in a triangular fashion off the vehicle’s tire or wheel. This design allows the Tire Table to be used in a variety of terrain conditions, such as sand, snow, mud, and other soft or unlevel ground.
Tire Table Specs:
Materials: Powder Coated Aircraft Grade 6061 Aluminum or Steel
Dimensions: Standard - 29” L x 23 W x 1.5” H, Large - 33.5” L x 28” W x 1.5” H
Weight: 5.5 - 8 lbs (aluminum models) or 13 - 16 lbs (steel models)
Capacity: 50 lbs (standard size) or 75lbs (large size)
Compatibility: Fits Tire Sizes 14” and up (for tire sizes above 35” the large version may be preferable)
Setup Time: <1 minute to install to your vehicle’s tire
Self Contained (all components collapse or store in the table when not in use)
Tire Table Models:
The Tire Table comes in four versions so you can pick one that fits your needs, vehicle’s tire, and budget. We personally opted for the standard aluminum model for our truck camping setup.
What Makes the Tire Table Great for Truck Camping and Overlanding
Self supporting camp tables have their place (we used one for years), but if you’re car camping, truck camping, or overlanding the Tire Table’s ability to remain functional in a variety of mixed terrain conditions is truly a game-changer. The Tire Table also makes a great work bench for trail repairs while off roading, and when combined with the Mountain Hatch Tailgate Panel offers a ton of prep space for meal prep while camping. Below are the pros and cons we’ve found in our time using the Tire Table so far:
PROS:
Stable and level on uneven terrain
Fast to set up
Easy to clean
Stores Flat
Plenty of Capacity (stated at 50lbs, but we’ve pushed this a bit on a few occasions without issue)
Aluminum models are light and corrosion resistant
CONS:
Powder coating on the aluminum model is less-than-stellar
Green Sticker/Logo is kinda ugly (but It’s removable with some elbow grease)
Less “packable” than the other collapsible camp tables we’ve used in the past
It’s not portable, so if you don’t have an awning and you’re parked in the sun you can’t move it into the shade
How to Use Your Tailgater Tire Table
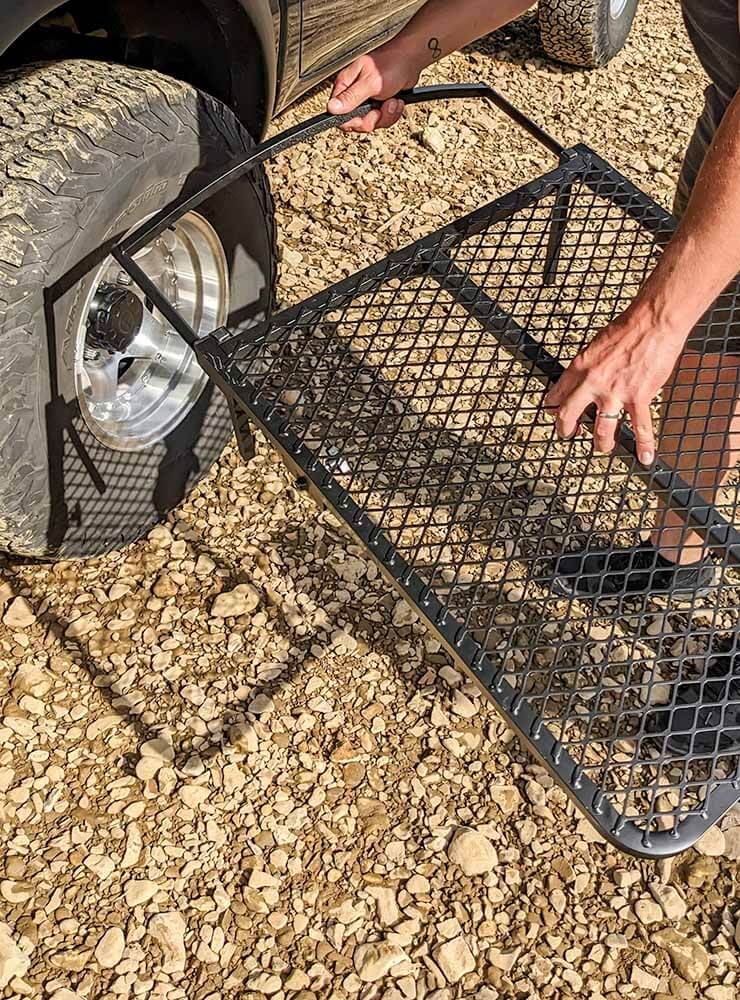
Setting up the Tire Table is a breeze and, after a couple practice runs, only takes about 30 seconds. Here’s how to do it:
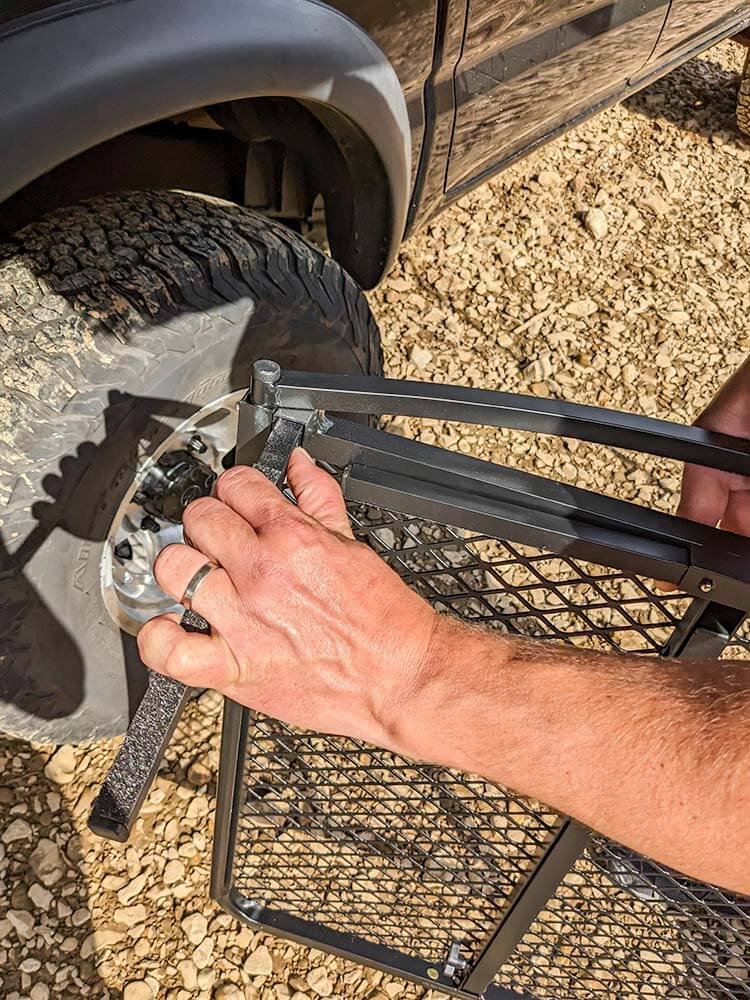
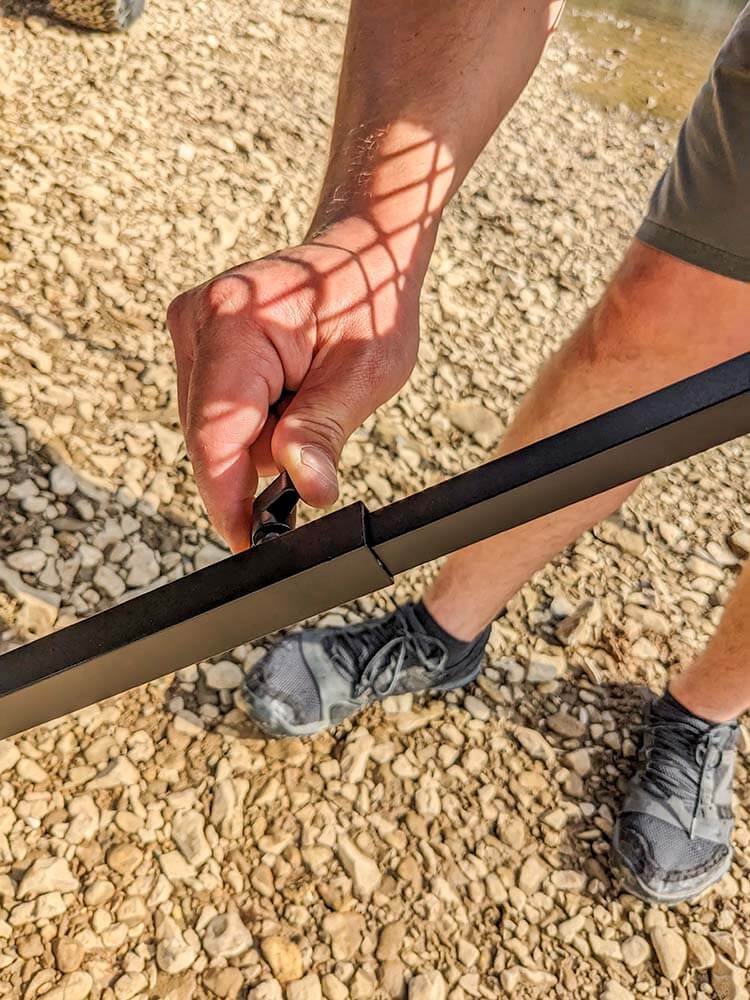
Remove the short tire support legs from their horizontal storage holders and insert them into their vertical position.
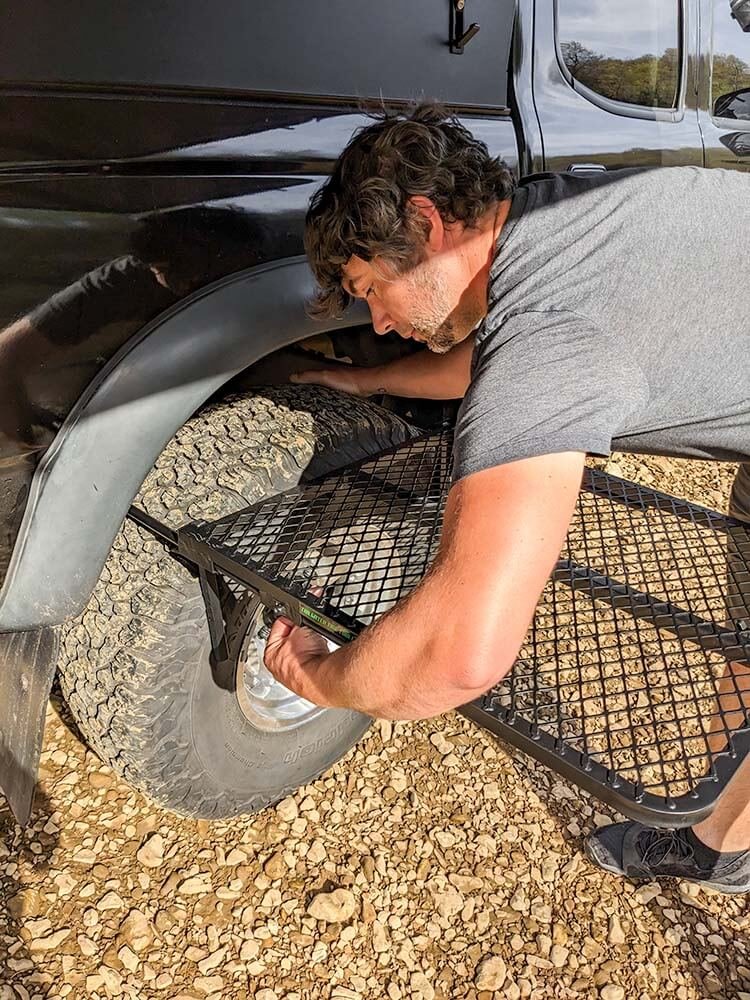
Loosen the two knobs that secure extendable tire clamp and extend it out and over your vehicle’s tire. **Note for added support, you can remove and reverse the U-shaped tire clamp for additional purchase on the tire.
Close the tire clamp tightly against the back of the tire, sandwiching the tire between the U-shaped tire clamp and the short tire support legs. Then tighten the knobs that secure the extendable tire clamp.
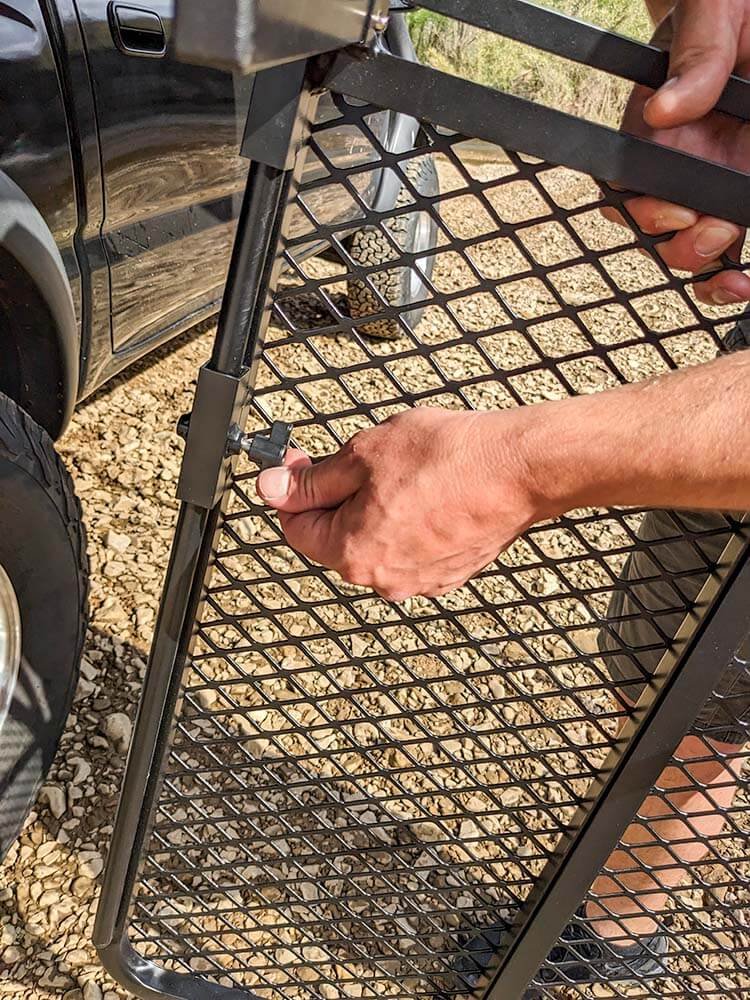
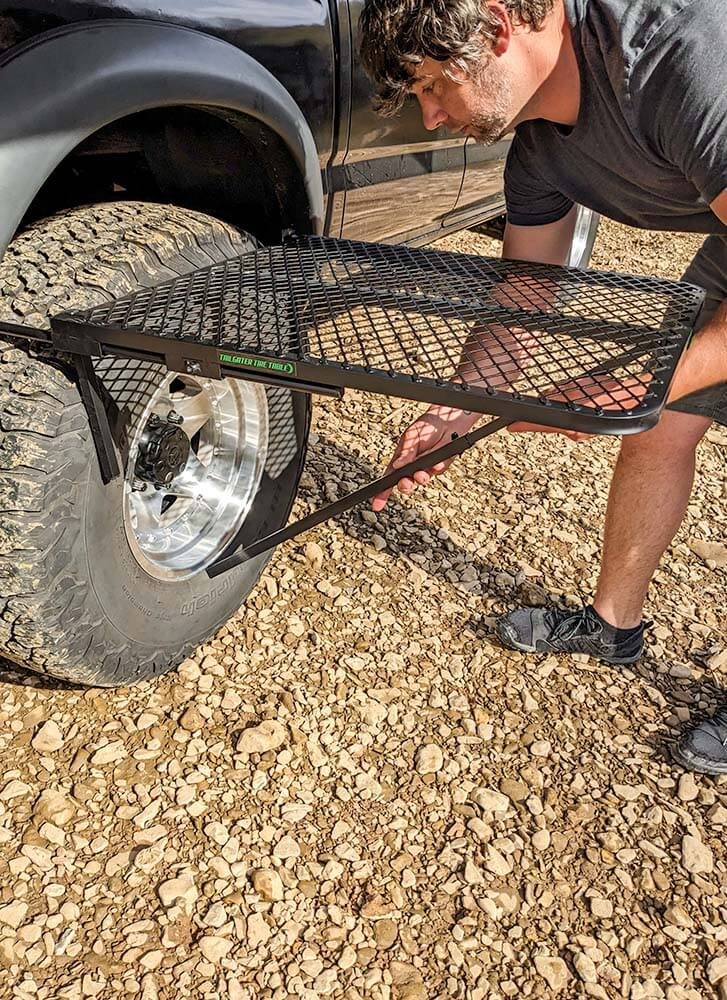
Next you can release, lower, and extend the primary support leg to either your vehicle’s tire (forming a triangular support for the Tire Table), or to the ground, and secure it by tightening the knob on the primary support leg.
At this point your Tire Table should be nice and secure, and ready to use!
Tip: Be sure to never over-tighten the knobs on the Tire Table, especially on the aluminum model, as this can damage the knobs, threads, powder-coating, and/or aluminum supports. And double check that all knobs are secure before placing anything onto the Tire Table.
The Best Tire Table Accessories
Below are a couple things we’ve found that can help make your Tire Table even better!
Tire Table Storage Bag* - this is a convenient storage bag for your tire table to help keep it from getting scuffed or damaged when stored in your vehicle.
Mini Bubble Level* - can be attached magnetically to the steel Tire Table or to the aluminum model with some double-sided gorilla tape*.
S-Hooks* - these are handy for adding hanging storage to the perimeter of your Tire Table; they’re great for hanging things like utensils while cooking, lanterns* at night, towels, or any number of other camp gear from the tire table or other spots
Clamp-on 360 Degree Cup Holders* - these can be clamped on the perimeter of the tire table to provide a convenient spot for storing drinks and water bottles.
Non-Slip Drink Coasters* - these non-slip coasters are great for keeping drinks from slipping on the surface of your Tire Table
The reality is that, while the Tire Table isn’t the perfect camp table, it’s pretty darn close, and we hope this guide has helped you decide if the Tire Table is right for your next camping or overland adventure.
For more helpful truck camping, overlanding, and family travel tips and guides be sure to SUBSCRIBE to get our bi-monthly blog updates right in your inbox.
And as always thanks for reading!
Related Posts:
Pin Me!
We’d love a share!