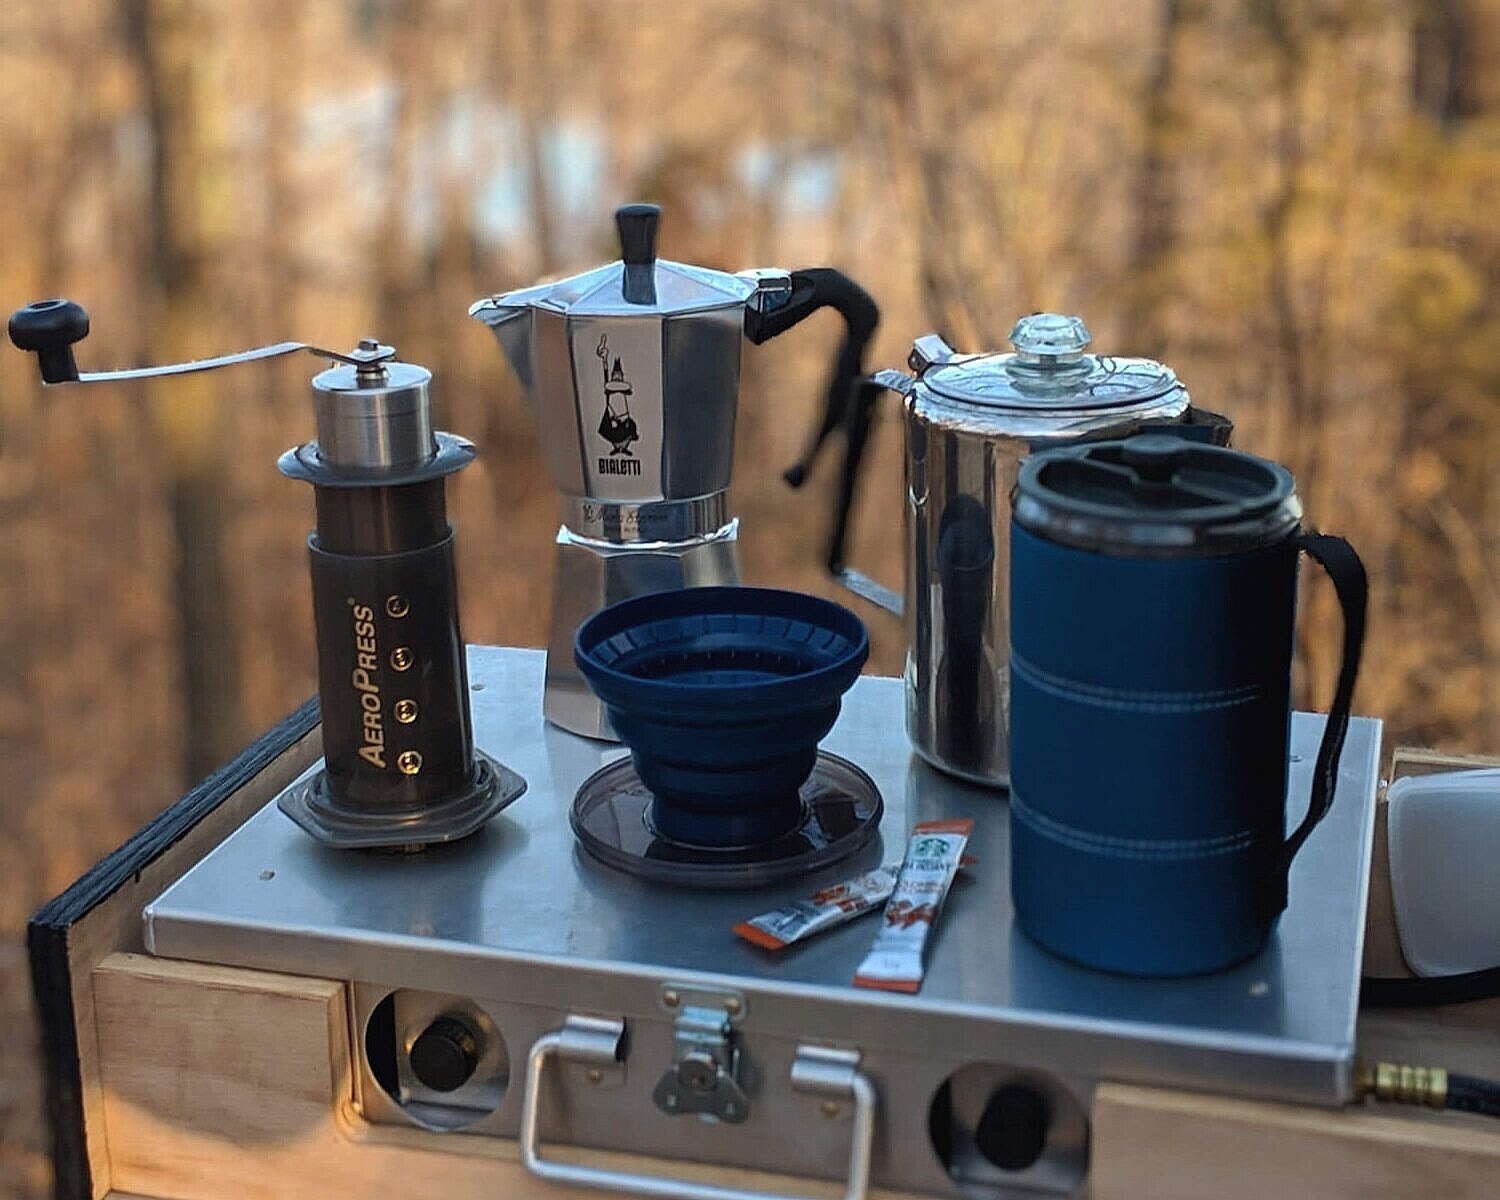
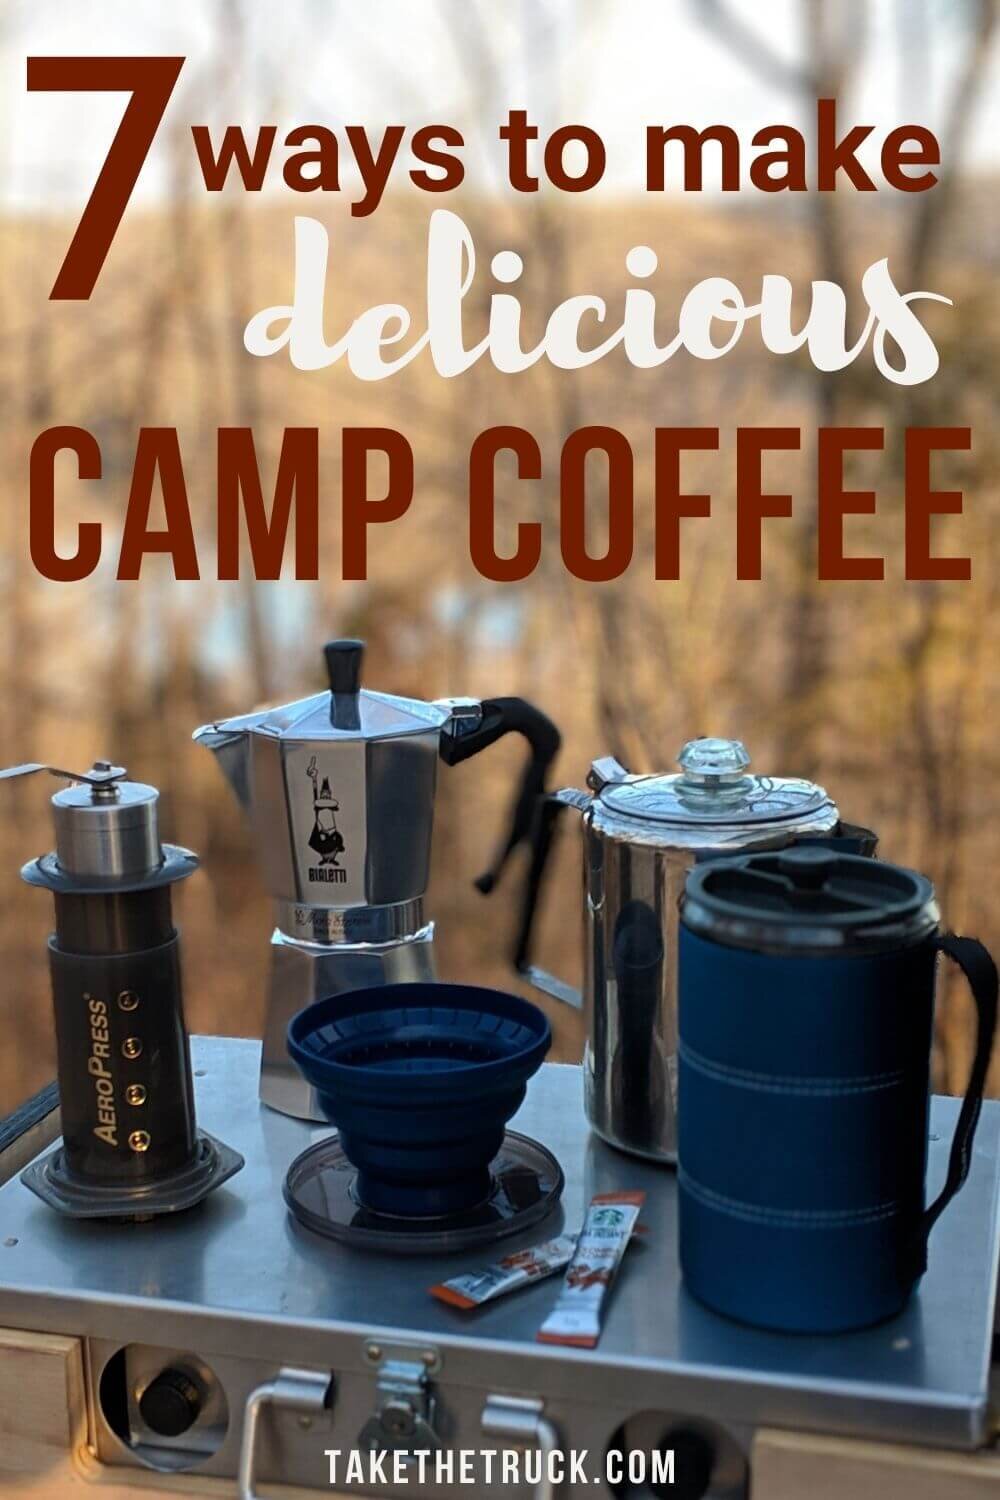
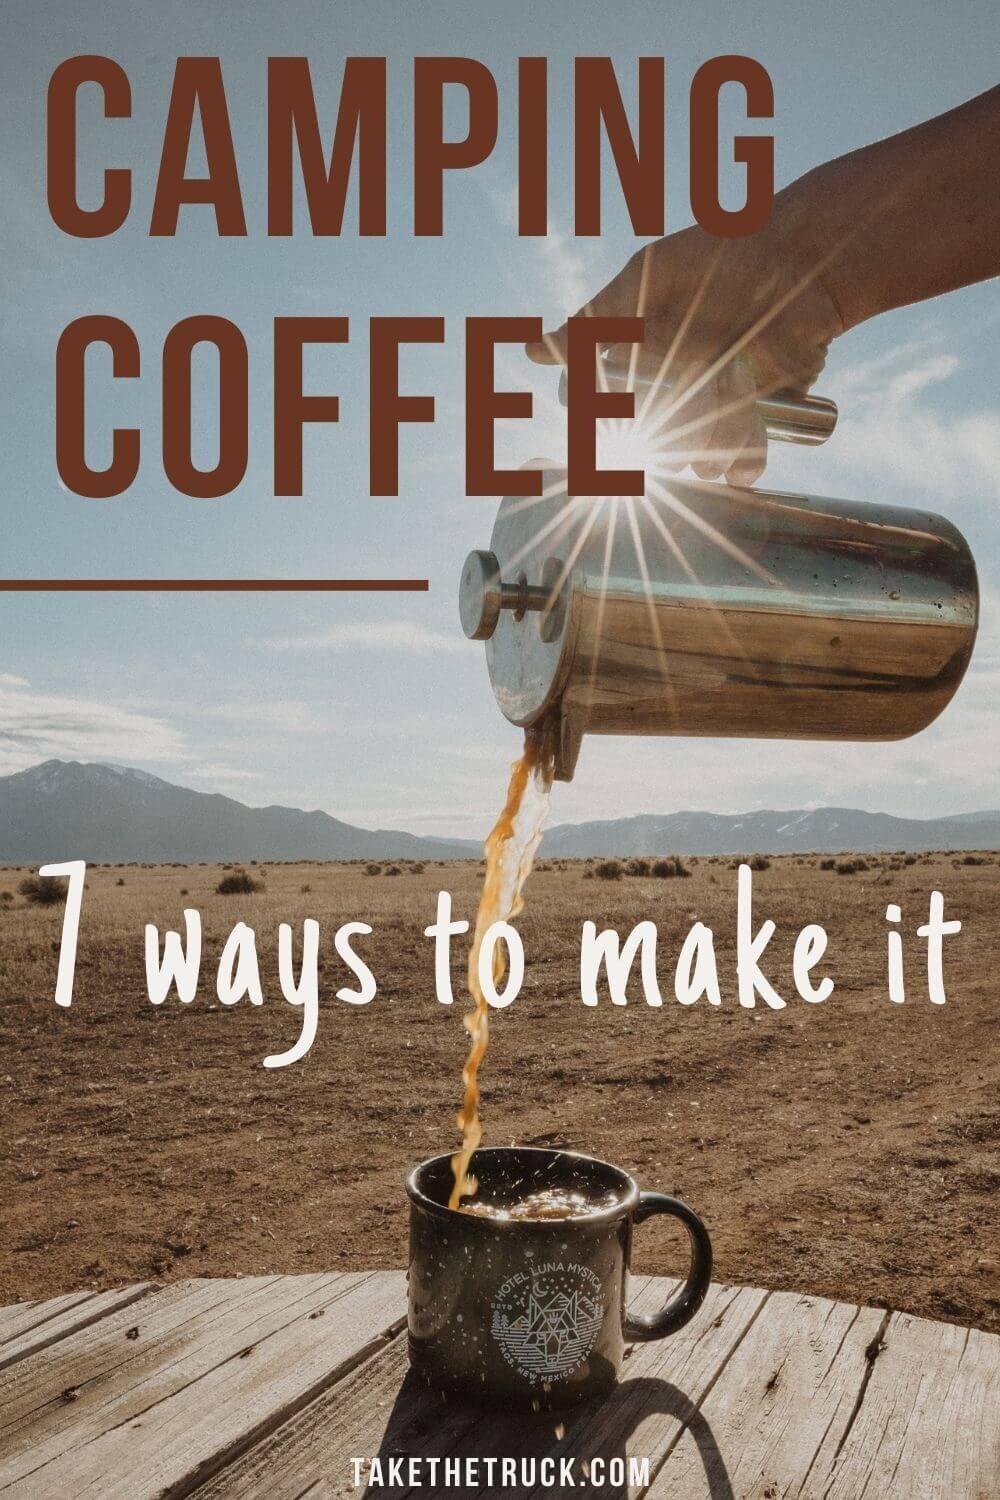
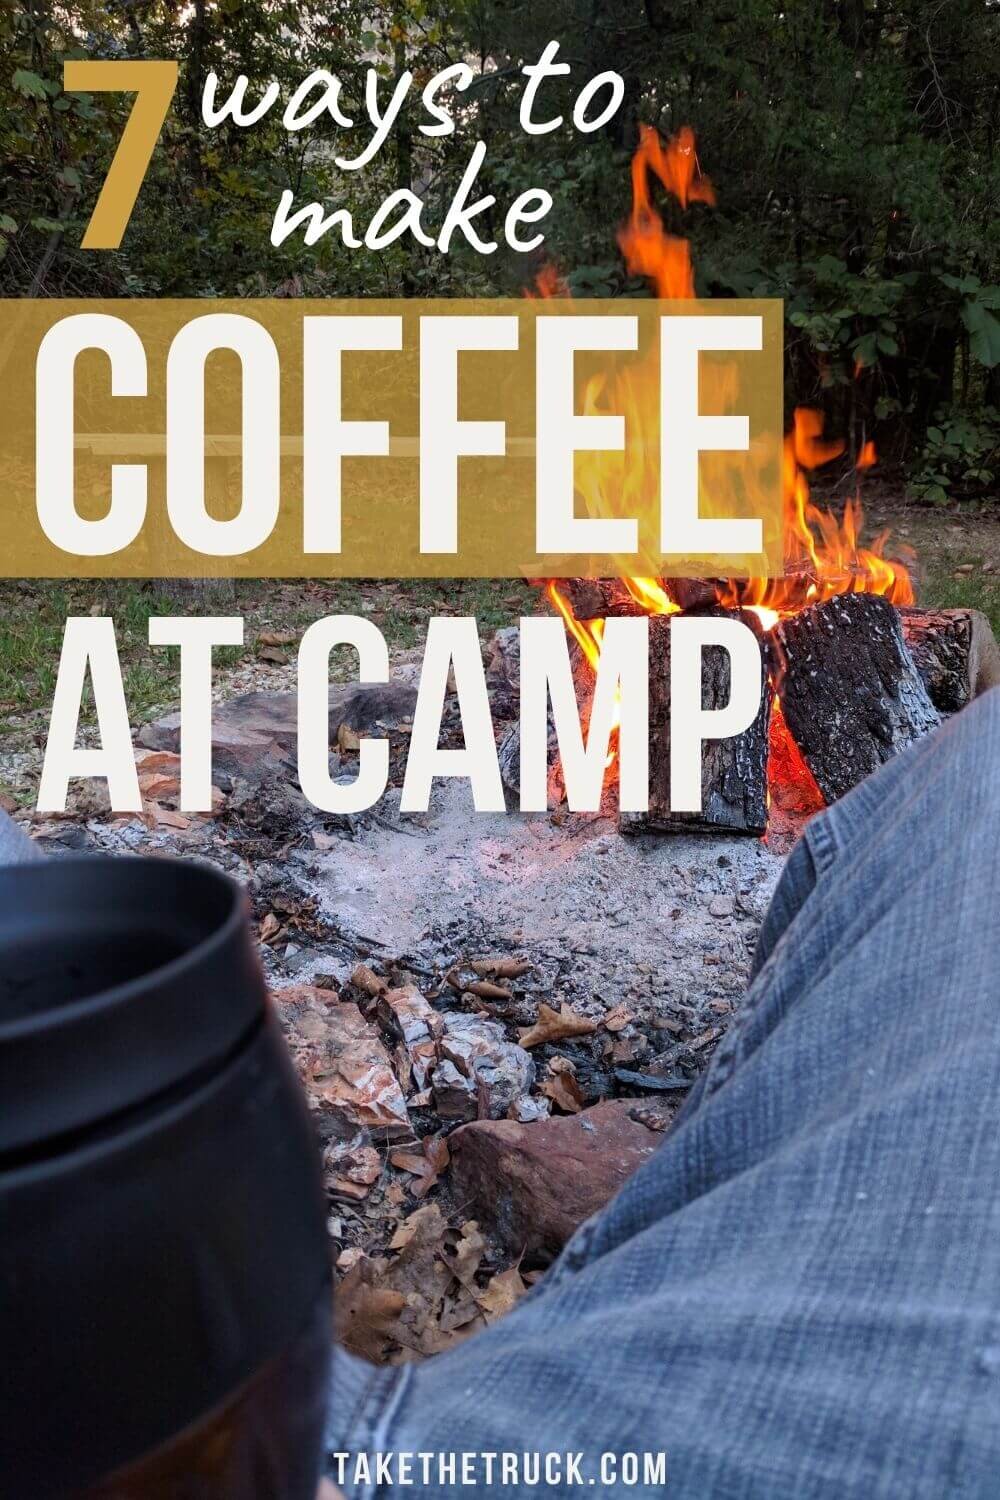
7 Ways To Make Incredible Camping Coffee
There’s something magical, almost transformative, about that first cup of coffee on a cold early morning as you sit by the campfire.
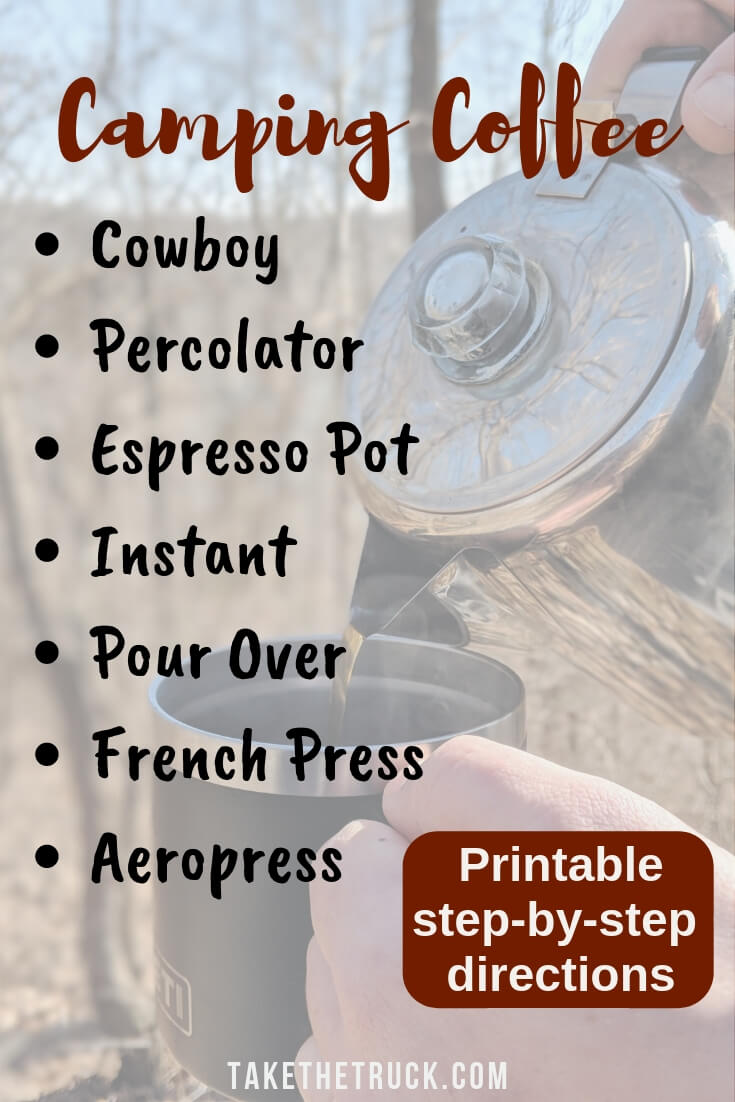
Over the years we’ve experimented with just about every method there is for making camping coffee in an effort to perfect the craft. It’s a process we really enjoy, so we wanted to share 7 of the ways we’ve found to make incredible camping coffee.
First, The 3 Cardinal Rules to Brewing Camp Coffee
These three cardinal rules for brewing better camping coffee apply almost universally:
Use high-quality coffee
The old adage “you get what you pay for” is never more true than with coffee, good news is that the brew-it-yourself will never cost as much as that drive-thru coffee
Ideally use whole beans and grind immediately before consumption
Toting around a grinder may not be everyone's cup of...coffee? But coffee’s flavor degrades as it’s exposed to air, and ground coffee has more surface area exposed to the air, so it degrades at a faster rate.
So if you can, and have the space for a hand grinder like the Porlex Mini (more on this below), we highly recommend it.
Never boil your camping coffee
Seriously, don’t do it. The optimal brewing temperature is between 200 and 205 degrees Fahrenheit.
If boiled (212 degrees F depending on elevation), especially for prolonged amounts of time, the coffee will take on a burnt taste.
*(This post contains affiliate links. This means we may receive a small commission, at no additional cost to you, if you make a purchase through a link. See our full disclosure.)
Cowboy Camping Coffee
Ever since the Boston Tea Party in 1773, coffee has been a staple of Americana.
And as the new world expanded west the frontiersmen and women who traversed the wilds of early America brought coffee westward with them (holding as much or more esteem for it as their tobacco and whiskey!). Anytime they stopped to make camp, coffee offered the jolt to begin the next day’s adventure.
The de facto method of brewing their camp coffee was simple - uncomplicated by all the gadgetry we’ve come to know (and love) in modern life.
As the west was settled, and ranchers took root across the plains, the cowboys that ran cattle and camped each night beneath the stars continued to find solace in their daily cup of camp coffee.
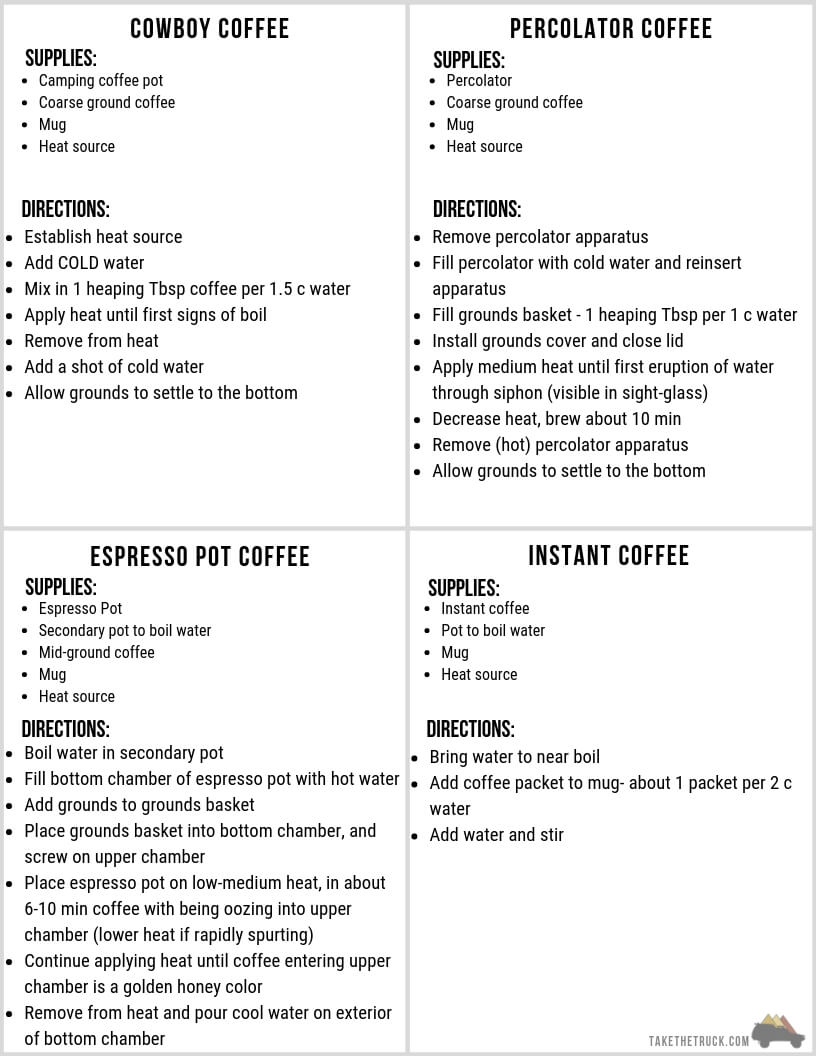
Supplies needed:
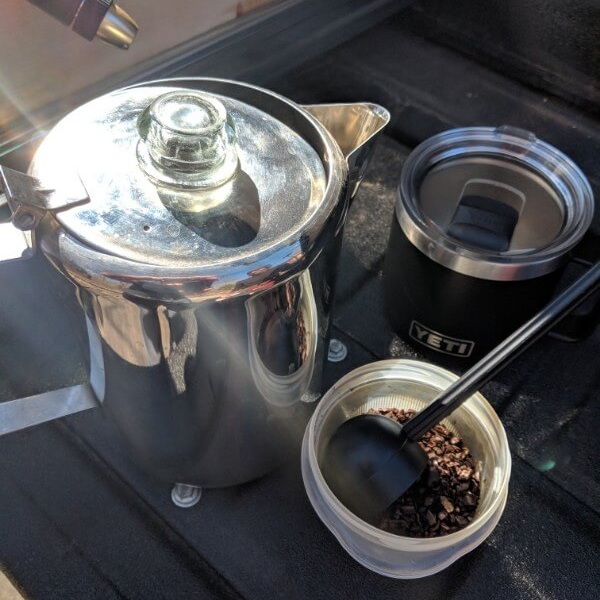
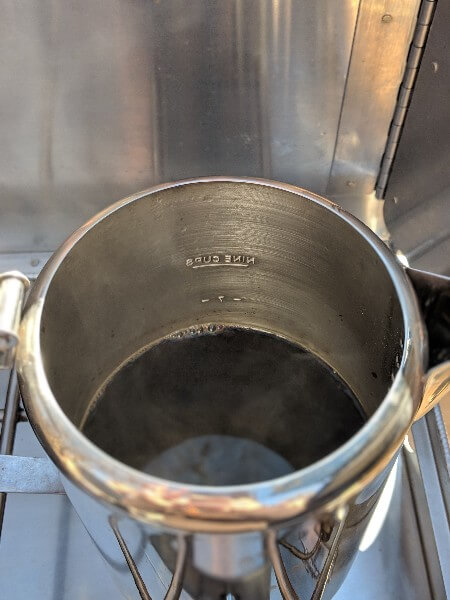
Camping coffee pot - we’ve used a simple 9 cup stainless percolator* (sans the percolator apparatus) for years, or the MSR Titan Kettle* is great for single servings.
A favored coarse ground coffee
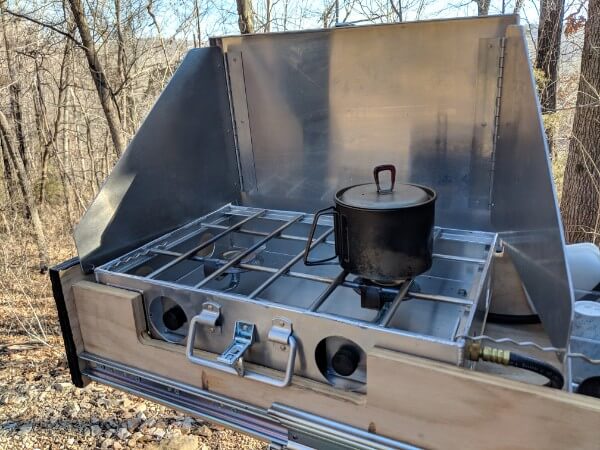
Heat Source - a campfire’s hot coals if you want the traditional experience, but any camping stove will do
How to Make Cowboy Camping Coffee


Establish your heat source
Add COLD water to your camping coffee pot
Mix in 1 heaping tablespoon of coarse ground coffee per 1 ½ cups water
Optional: It’s tradition to also add an egg shell or two from breakfast to the pot to add body. John Steinbeck even refers to this in his “Travels with Charley”
Apply heat until the desired brewing temperature is achieved.
Note that if you’re using a fire, the cook time will likely be longer because of the inconsistency of heat. Because you likely won’t have a thermometer to tell when the water has reached that optimal 200-205 degrees, we recommend monitoring closely and removing from heat at the first signs of boil - DO NOT let it reach a rolling boil
Remove from heat, add a shot (1oz or so) of cold water, and allow the grounds to settle (usually takes about 5 minutes or so)
Pour and enjoy! Just as the frontiersmen and cowboys before you!
Clean Up: Dispose of grounds (they are biodegradable) that remain in the bottom of the pot, wash the camping coffee pot, done. This is probably the 2nd easiest method of camping coffee to clean up (behind instant).
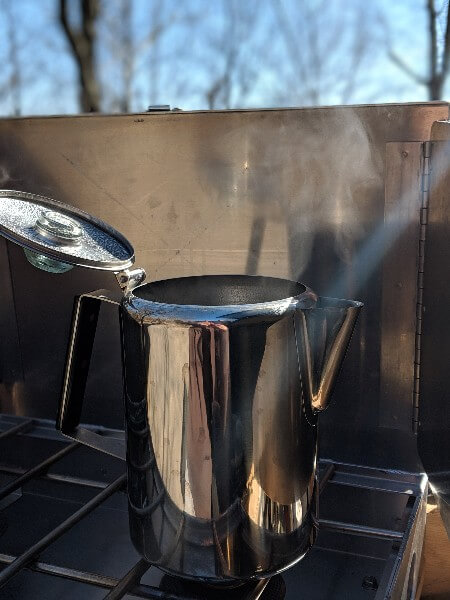
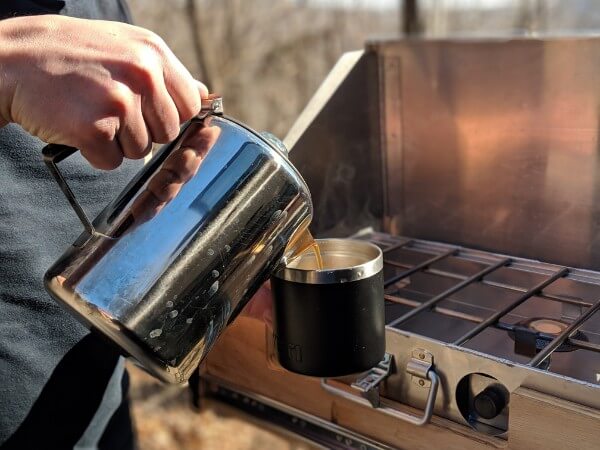
Percolator Camping Coffee
When I was very young, I can recall taking camping trips with my grandparents in the Sierra Nevada Mountains of Northern California. And every morning, before daybreak, I remember my grandfather brewing his morning cup in an old enamel percolator over his ancient Coleman gas stove.
To this day I can almost still smell that delicious aroma that permeated the campsite as we’d crawl sleepily out of our tents.
The percolator brewing method is your grandparents’ camping coffee. And similar to the times in which they lived, it has the propensity to be somewhat dry and bitter, especially when not executed properly.
However, it can render a very rich hearty camp coffee that one day even your own grandchildren will remember fondly.
Supplies needed:
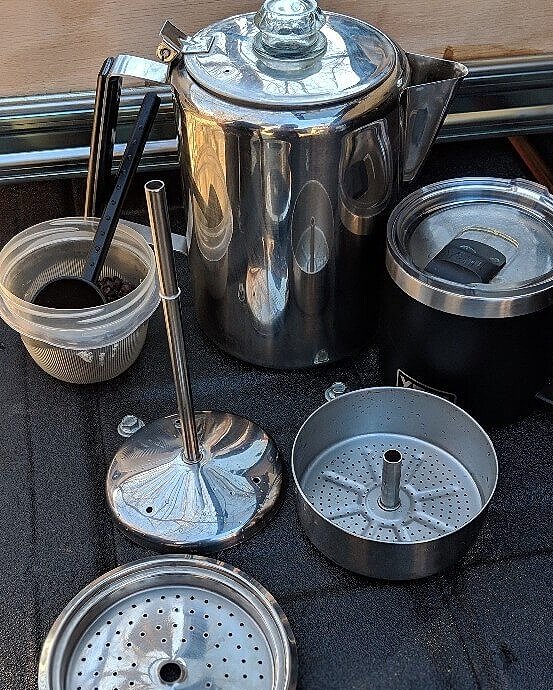
Percolator - Coletti 9-cup stainless steel*
A favored coarse ground coffee
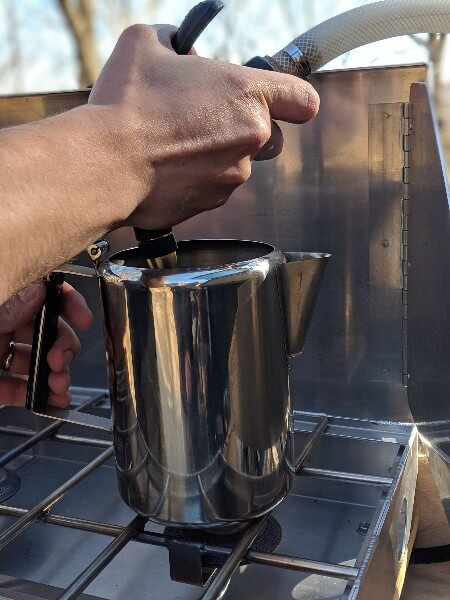
Heat Source - a campfire’s hot coals can be used with this method as well, but we recommend a traditional camping stove for heat consistency
How to Make Percolator Camping Coffee
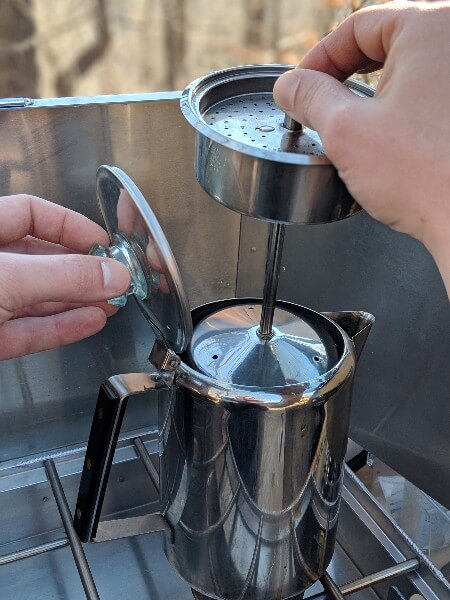
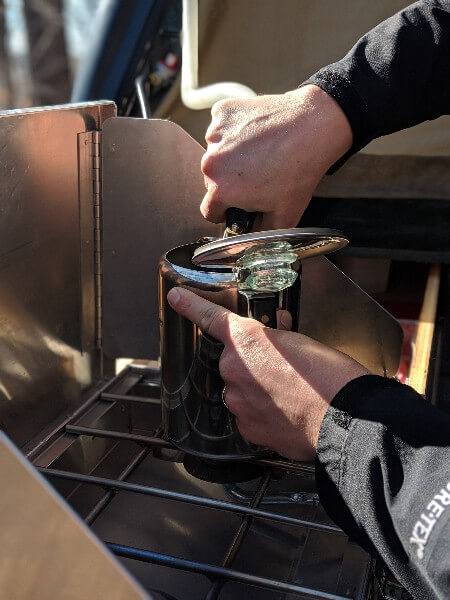
Remove the percolator apparatus and fill with cold water
Reinsert the percolator apparatus
Optional: You can wet and insert a disc filter into the grounds basket at this point if you wish
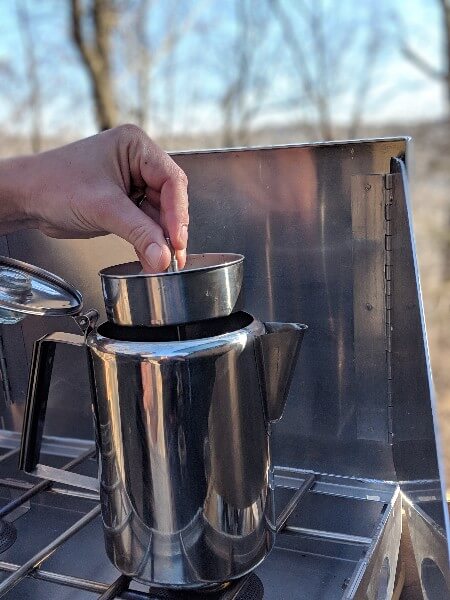
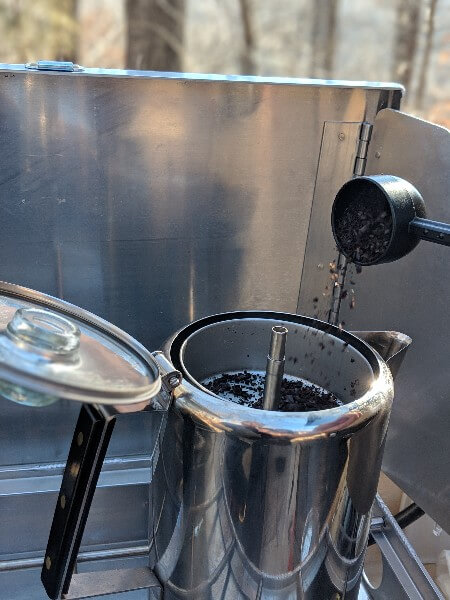
Fill the grounds basket with coarse ground coffee (we recommend 1 heaping tablespoon per cup of water), install the grounds cover, and close the lid - making sure to align the siphon stem with the sight-glass
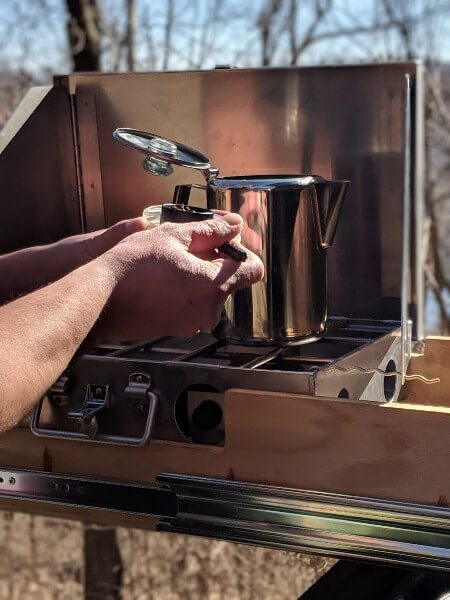
Apply medium-heat until the first eruption of water through the siphon is visible in the sight-glass (Don’t break cardinal rule #2!)
Decrease heat (or remove from the fire) and let it sputter - we’ve found that 10 minutes is a good brew time with this method
Once brewed to your liking, open the lid and remove the percolator apparatus CAREFULLY as it will be hot!
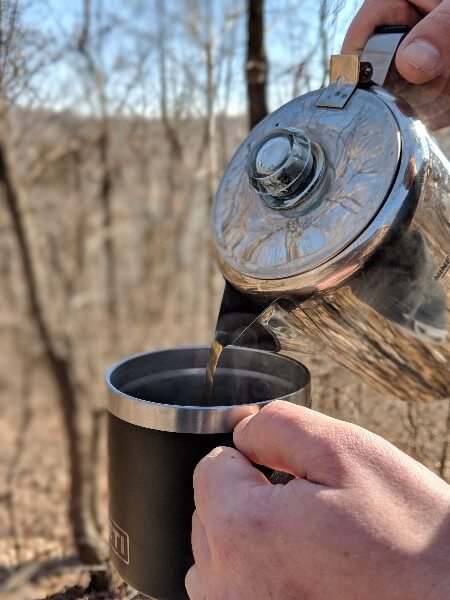
Allow a couple minutes for any grounds in the coffee to settle, then pour and enjoy! Best served with a smoldering campfire, bacon, and eggs - just like grandpa and grandma used to make!
Clean Up: Dispose of grounds (and disc filter if you choose to use one) by dumping the grounds basket into the trash, disassemble the percolator apparatus (siphon, grounds basket, basket cover), and wash all parts along with the pot. This is definitely one of the more difficult to clean up out of the seven methods of camping coffee.
And check out our in-depth guide on how to Master the Art of Using a Camping Coffee Percolator for more help with perfecting this camping coffee method!
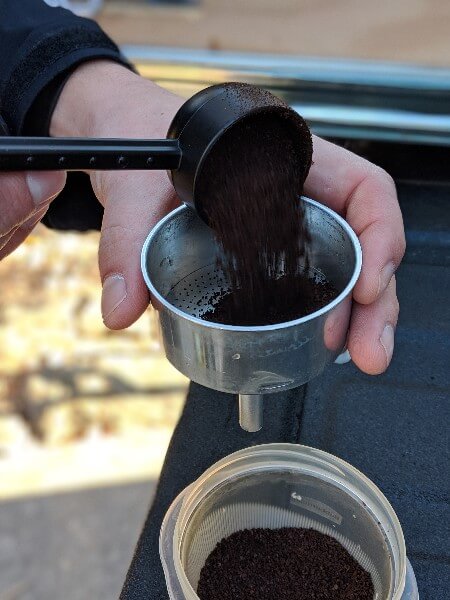
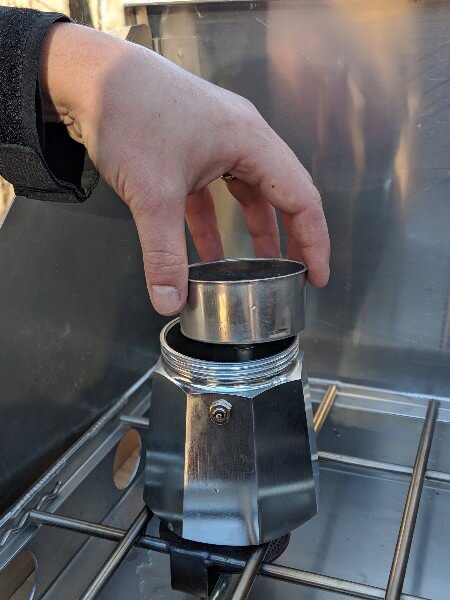
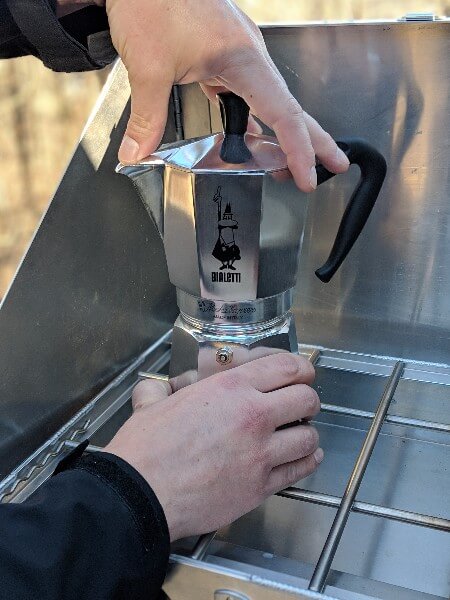
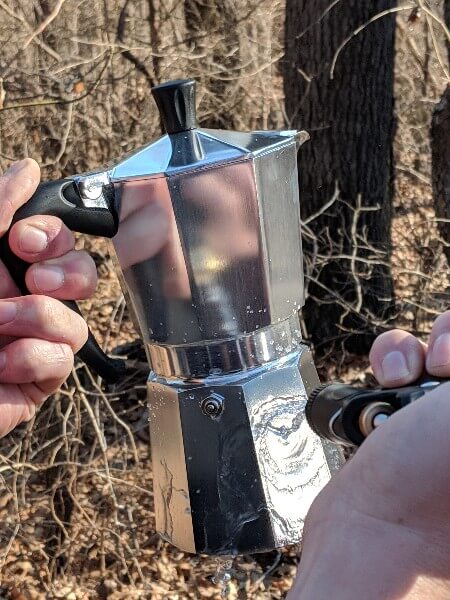
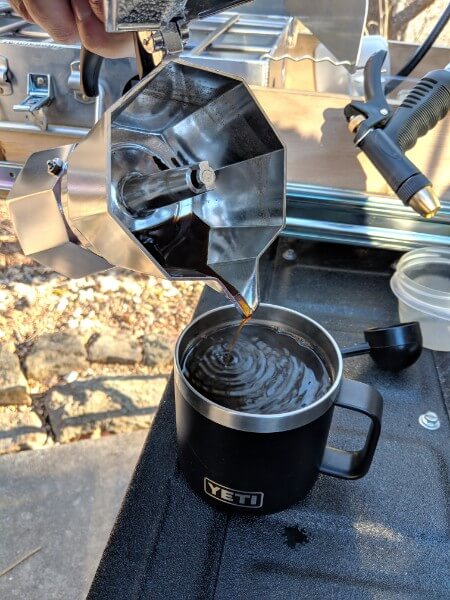
Espresso Pot Camping Coffee
Sometimes, when camping, you need caffeine.
Maybe you hiked The Mount Whitney Trail the day before and those 6100 ft of elevation gain are hitting you like a freight train. Maybe it’s 4am and you want to catch the sunrise on Cadillac Mountain.
Or maybe you just want to putter around your campsite like a tweaker for an hour.
In any of these scenarios espresso pot camping coffee is one of the best delivery methods. But it does take some practice to master.
Supplies needed:
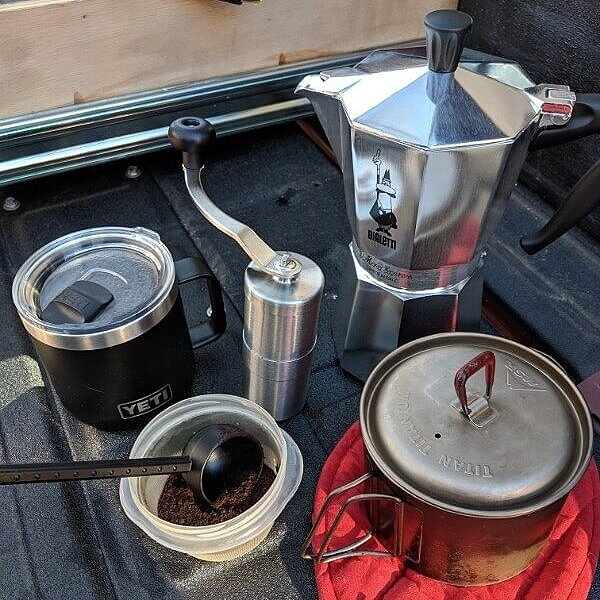
Espresso Pot - The Bialetti Moka Express* is the gold standard and has been in use for almost a 100 years with 1, 3, 6, 9, and 12 cup sizes available, or GSI makes the highly regarded Mini Espresso* in 4 cup and 1 cup varieties
A secondary pot to boil water in - like the MSR Titan Kettle*
A favored mid-ground coffee, somewhere between espresso and course
Heat Source - for this you’ll want to use your camp stove
How to make Espresso Pot Camping Coffee
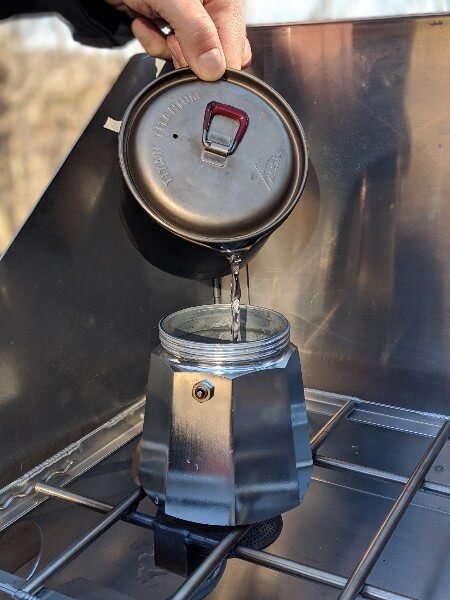
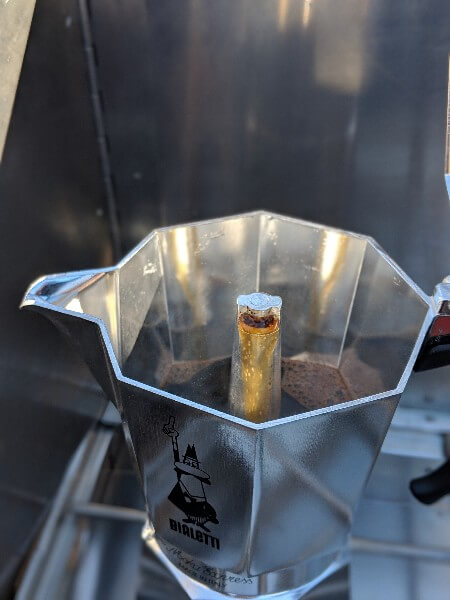
Using the secondary pot, bring water to a boil
Fill the bottom chamber of the espresso pot with the just-off-the-boil water to the fill line
Fill the grounds basket, and level out the grounds with your finger (do not compress the grounds)
Place the grounds basket into the bottom chamber and screw on the upper chamber (or spout, in the case of the GSI MiniEspresso)
Place the espresso pot on low-medium heat (emphasis on the low) and watch for that delicious coffee to begin oozing into the upper chamber - In our experience this generally takes about 6-10 minutes
**If it’s spurting like a volcano, your heat is too high
When the color of the oozing coffee coming into the upper chamber (or cup in the case of the GSI MiniEspresso) turns a golden honey color, it’s time to remove the espresso pot from the heat
Pour a bit of cool water over the exterior of the bottom chamber to stop the brewing
**This step, along with pre-boiling the water in step 1, helps prevent your camping coffee from taking on a metallic taste from the potPour and enjoy the rush of a delicious camp coffee espresso - or make an Americano by mixing with 50% hot water
Clean up: Disassemble the upper and lower chamber, remove and dump the grounds basket, rinse, wash with biodegradable soap, repeat rinse, and dry
If you love espresso, be sure to check out our in-depth guide on how to Master the Art of Using a Camping Espresso Maker for more ways to make your espresso while camping.
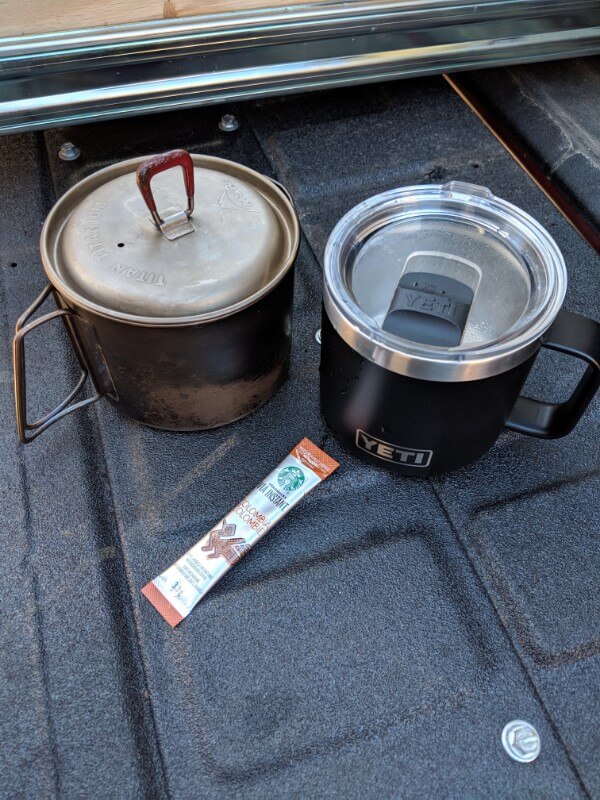
Instant Camping Coffee (OR Steeped Camp Coffee)
There are times when the energy is just not there, when all the fuss and accoutrements that make incredible camping coffee seems WAY too difficult.
A bit too much whiskey the night before, a bit too frigid outside the sleeping bag, or maybe you’re just feeling lazy.
That’s OK, instant camping coffee is here to sooth you easily into your day. And the good news is, it’s a whole lot more delicious than it used to be!
Supplies Needed:
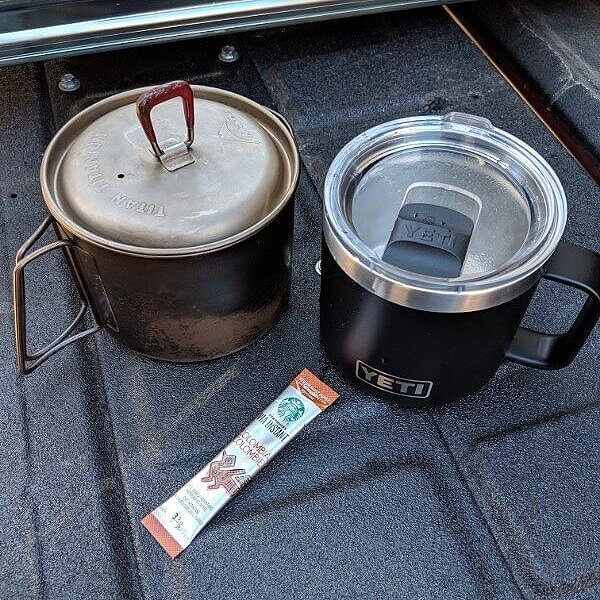
Instant Coffee - our de facto choice for years has been Starbucks Via Instant Columbia*, but lately we’ve been really enjoying the extra kick that Death Wish Coffee Co.’s Dark Instant Coffee* provides while camping.
Steeped Coffee - An awesome alternative to instant camp coffee, but equally as easy and delicious, is to use Steeped Coffee Bags* though we’ve found they tend to make a weaker brew.
A pot to boil water - again the MSR Titan Kettle* is our favorite for serving 1-2 people
Heat Source - Are you kidding? A fire takes way too much effort this early in the morning! Light the stove, you savage.
How to make Instant Camping Coffee

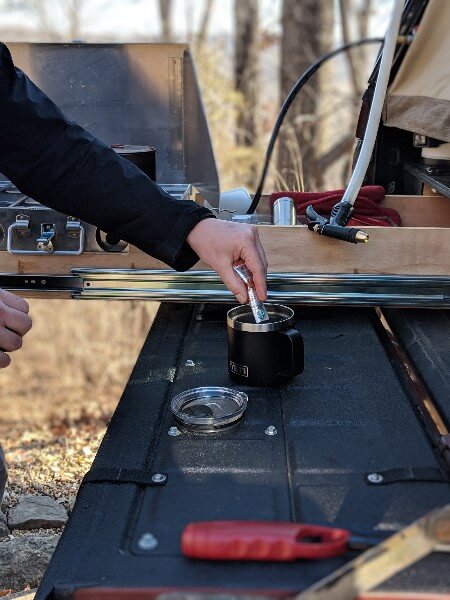
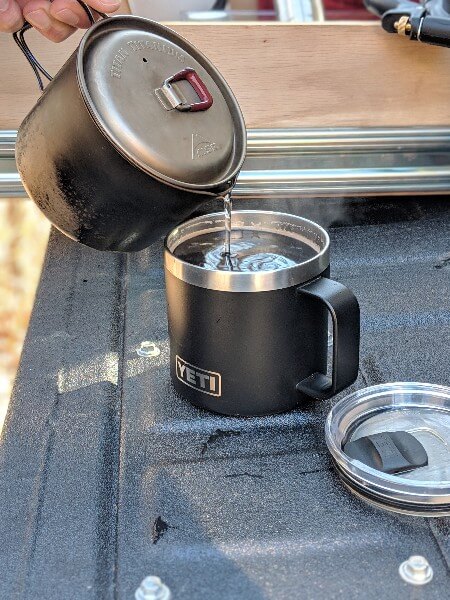
Place your pot on the heatsource and bring to just barely a boil (again 200-205 degrees F is perfection)
Rip the top off that instant coffee packet and pour your preferred amount into your camping mug. We like strong coffee, and find that one full packet to 2 cups of water is just right.
Add water, stir, allow to set for a minute, stir once more and you’re done!
**If you’re making steeped coffee, we recommend adding the steeping bags to the hot water in your camping mug and allowing them to steep for 5-6 minutes for a nice strong brew
Enjoy!
Clean Up: Throw the packet or steeping bag away, and done!
Check out our guide to The Best Instant Coffee for Camping, Travel, or Just Being Lazy for a more in-depth look at instant coffee, including our top 12 favorite instant coffees and even how to make your own at home using your favorite whole bean coffees!
Pour Over Camping Coffee
Second only to Instant, the pour over method is one of the simplest and fastest ways to make an incredible cup of camping coffee.
And it's great for making coffee for larger groups - provided you have a large enough camping carafe to hold it all.
When executed properly the process is mesmerizing, almost meditative, and the result is an exceptional cup of camp coffee.
Supplies Needed:
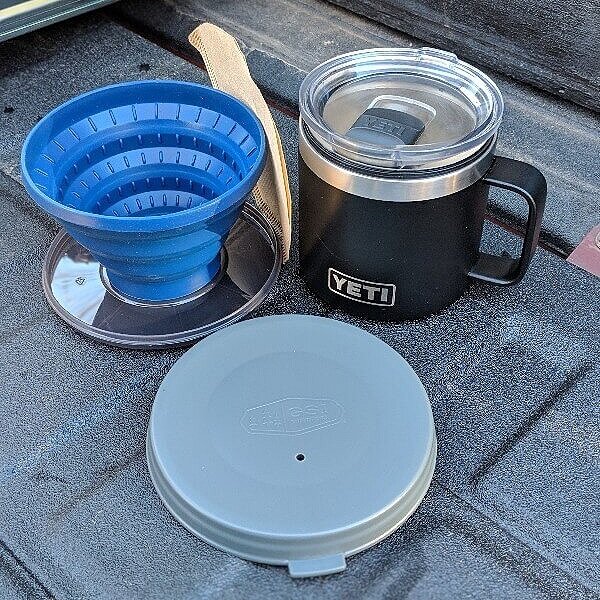
Pour Over Coffee Dripper - the GSI Collapsible Javadrip* is great and takes up WAY less space than most camping coffee kits, or if you don’t want to deal with filters the Sea-to-Summit X-Brew* is another great option
A pot to boil water (MSR Titan Kettle* for 1-2 people)
Your choice of fine to medium ground
A camping mug or carafe*
Heat Source - anything that can bring water to a near-boil
How to make Pour Over Camping Coffee
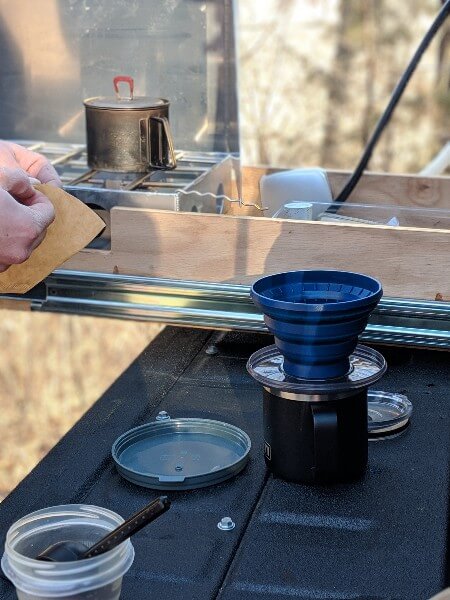
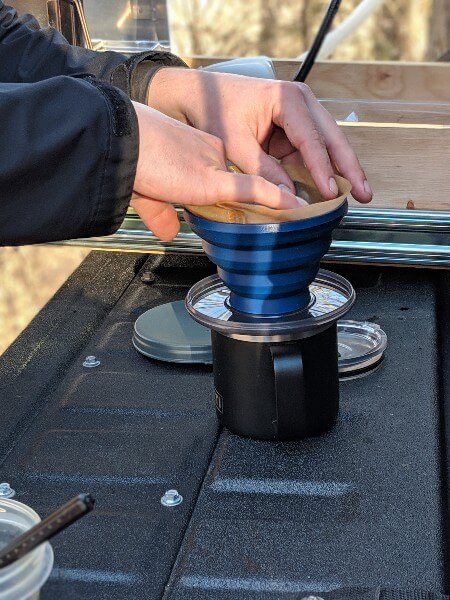

Assemble (in the case of the GSI Javadrip) and place the pour over dripper onto your camping mug or carafe
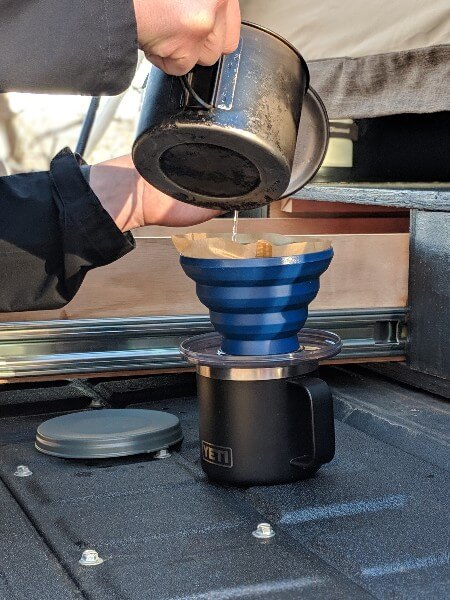
Begin heating your water to optimal near-boil temperature
While water is heating, wet the filter and place it into the dripper
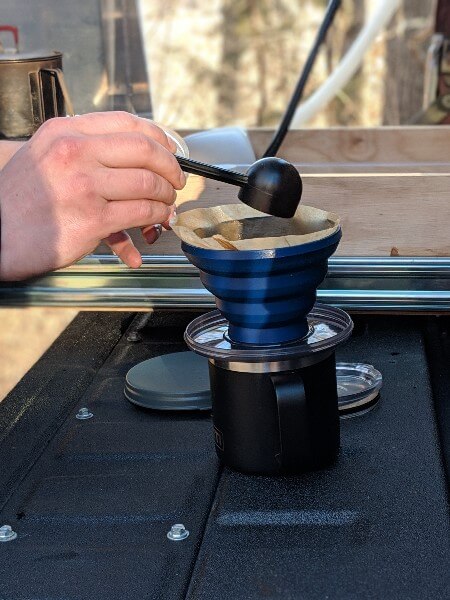
Add 1-2 heaping tablespoons of grounds per cup of water, and tap the dripper gently to level the grounds out
Remove your water from heat and, beginning at the outside edge of the grounds, pour approximately a ¼ cup (or just enough to wet the grounds) slowly over the grounds in a spiral towards the center
Gaze contemplatively at the sun rising up just over the pines in the distance and consider the great beauty of these wilds (or wait approximately 30 seconds)
Now begin slowly pouring the remainder of the water, starting at the center spiralling outward to the edge and back again toward the center - this helps to rotate the grounds. Pause to allow the waterline to drop to just above the level of the grounds and repeat this process 2 more times - pouring approximately ⅓ of your water each time
Remove the dripper and enjoy your camping coffee in a zen like state of delicious euphoria as the morning fire crackles and the creek boils in the background (or get ready for the kid(s) to wake up and wreak havoc on your morning)
Clean Up: Remove the #4 biodegradable filter with grounds and place in the trash, rinse and wash the dripper with biodegradable soap, repeat rinse, dry, and done.
You can check out our complete guide, Master the Art of Pour Over Camping Coffee, for a more in depth walk-through of this camping coffee method as well as some more great ways to make it!
French Press Camping Coffee
French Press camping coffee holds a special place in our hearts. It’s the method we used throughout our second and most adventurous trip across the American West - serving countless cups of delicious and often much needed coffee.
It was also our first foray into the real world of coffee, a world beyond the lack-luster machines that regularly adorned our parents’ homes growing up.
So French Press camping coffee took on all the thrill, excitement, and adventure of our journey and that time in our lives. And we hope it does the same for you on your next adventure!
Supplies Needed:
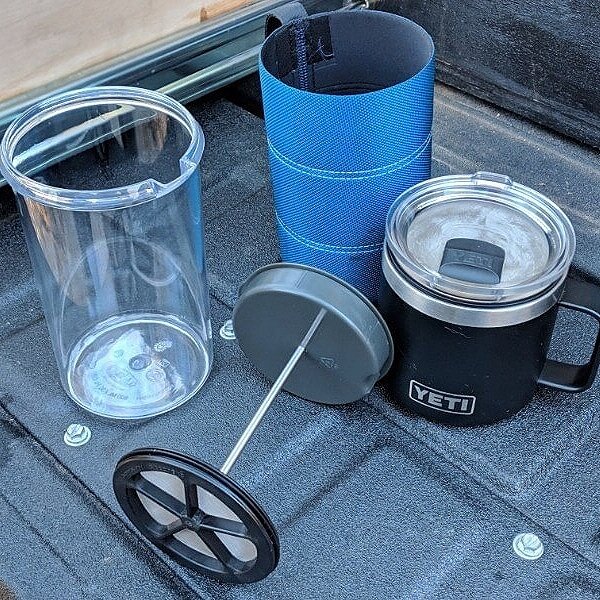
A French Press - The GSI JavaPress* is great for camping coffee - it’s small, affordable, and comes with it’s own koozie to keep that black gold nice and hot
A pot to boil water (MSR Titan Kettle* for 1-2 people)
Medium ground coffee
Heat Source - anything that boils water
How to Make French Press Camping Coffee
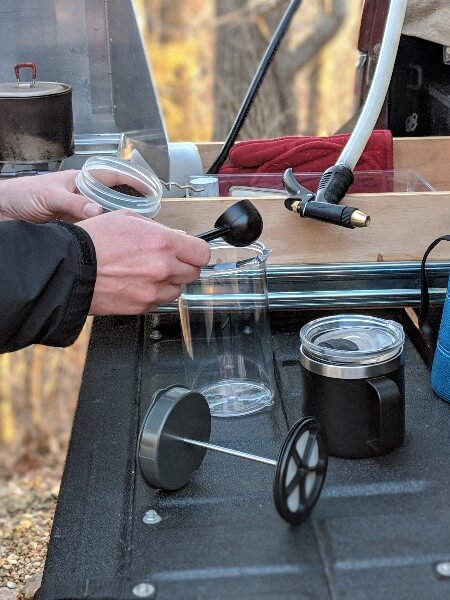
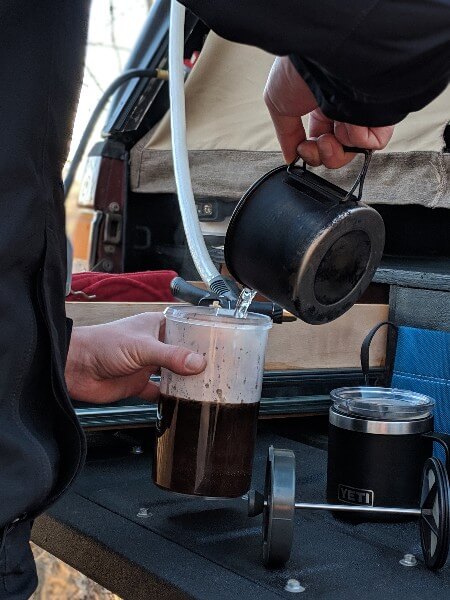

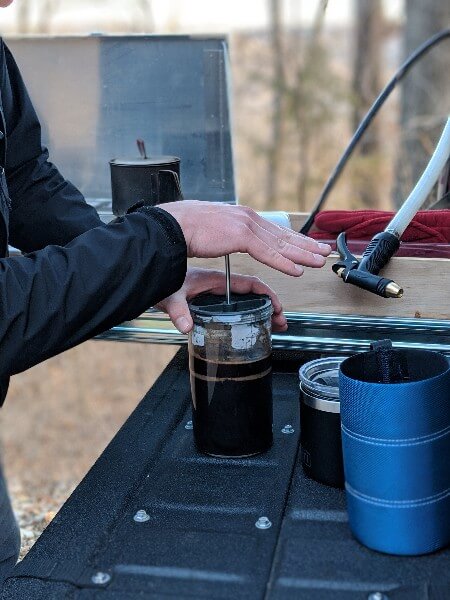
Heat water to desired near-boil temp
Remove the plunger from the French Press
Add medium ground coffee in a ratio of 1.5 tablespoons per cup of water to the brew chamber of the French Press
Add water to desired amount and stir gently for approximately 10-15 seconds
Reinsert the press plunger and allow it to rest just above the water/grounds
Allow to sit and brew: we’ve found that a brew time of about 4 minutes is good for us, but adjust this to your liking
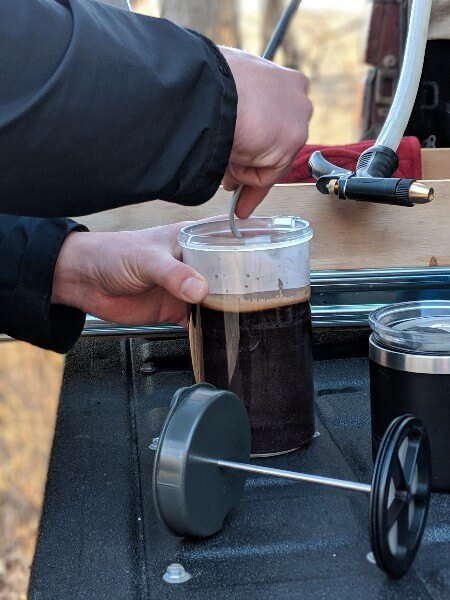
Put slow downward pressure on the plunger to “press” the grounds from the coffee - this should take about 10-15 seconds
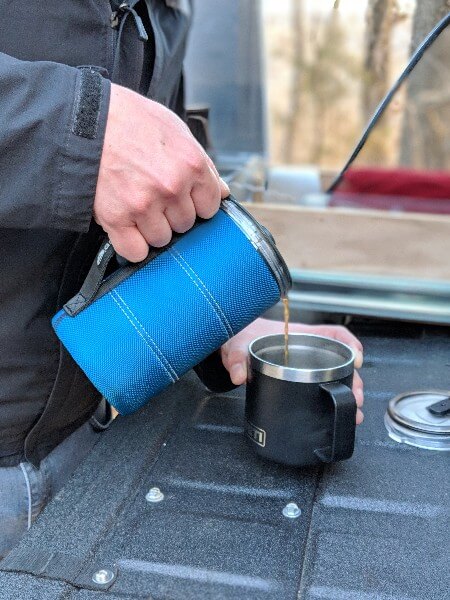
Once pressed to the bottom (plunger in place), you’re ready to pour a delicious cup of french press camp coffee!
Clean Up: This is one of the more tedious methods to clean up, primarily because the grounds routinely become ingrained in the mesh plunger. Remove the plunger from the brew chamber, dump grounds from the brew chamber into the trash, rinse the brew chamber and plunger and wash thoroughly with biodegradable soap and water, repeat rinse, and dry.
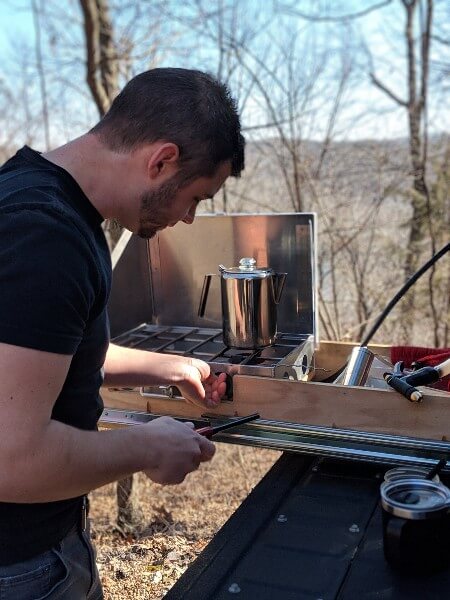
Aeropress Camping Coffee
Aeropress has become our go-to method of brewing our camping coffee, so much so that it’s made our Top 10 List of Truck Camping Gear and Accessories!
Though we have and do still enjoy each of the methods discussed in this post, there are several reasons Aeropress stands out as our method of choice: The brew is highly adjustable - everything from a mild morning brew to a rich espresso is achievable, it’s very compact as everything (including our Porlex grinder) nests nicely together, and because of the air-gap process in the press, clean-up is a cinch! It’s also inexpensive!
Supplies Needed:
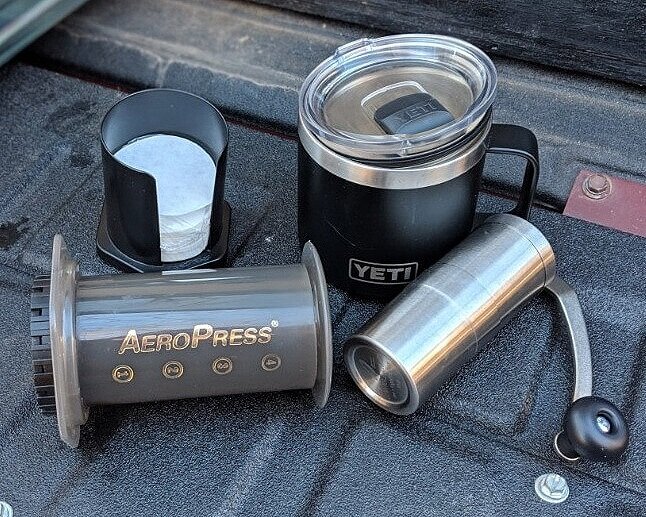
Aeropress* - we recommend getting this full size kit, but for solo camping they do make a travel model - the Aeropress Go* - that is slightly more compact and includes a mug.
The primary parts consist of: the plunger, brew chamber, and filter basket
Aeropress filters (come in the kit) - though they make mesh reusable filters*, we prefer the biodegradable filters as they retain water in the brewing chamber more effectively
Medium-fine ground coffee
Pot to boil water in (MSR Titan Kettle* for 1-2 people)
Heat Source - any thing that brings water to boil will do
Optional: The Porlex Mini Grinder* is basically designed for this method, is highly adjustable, and good quality (**Note** Make sure you get the newest model of Porlex Mini as they made a significant improvement to the handle attachment-point design)
How to make Aeropress Camping Coffee
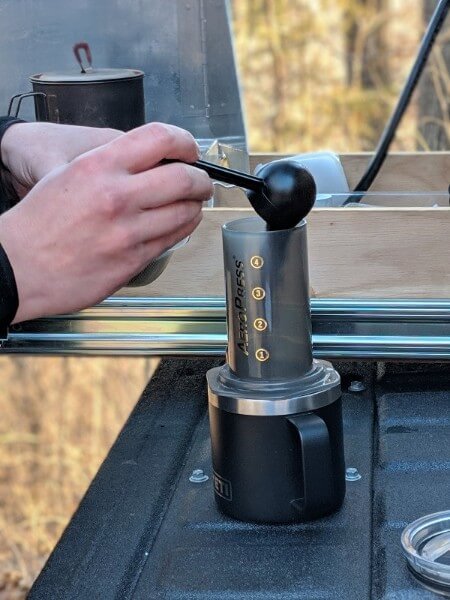
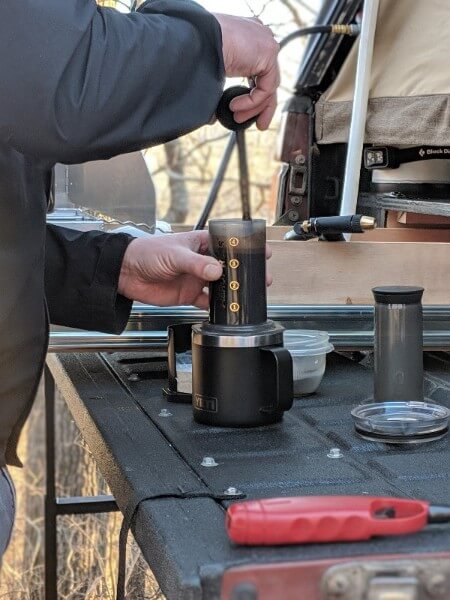
Heat water to desired temperature (200-205 degrees, or just off boil)
Insert filter in filter basket and attach basket to brew chamber
Place assembled brew chamber/filter basket on your camping mug
Add medium-fine ground coffee - we use 1-2 tablespoons per cup water
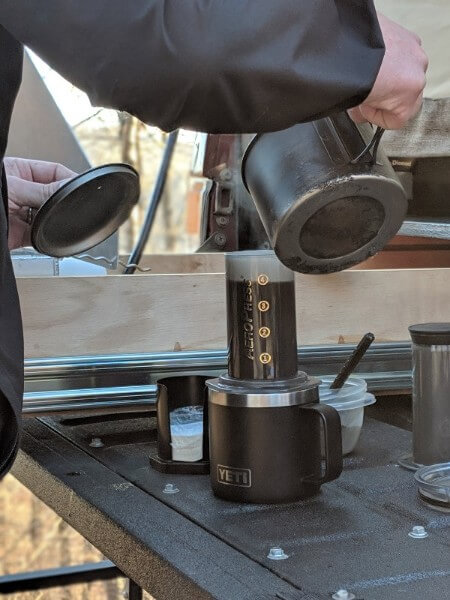
Fill brew chamber with your just-off-boil water
Stir for 10-15 seconds and allow to settle and drip
Top off with remaining water as brew chamber drains
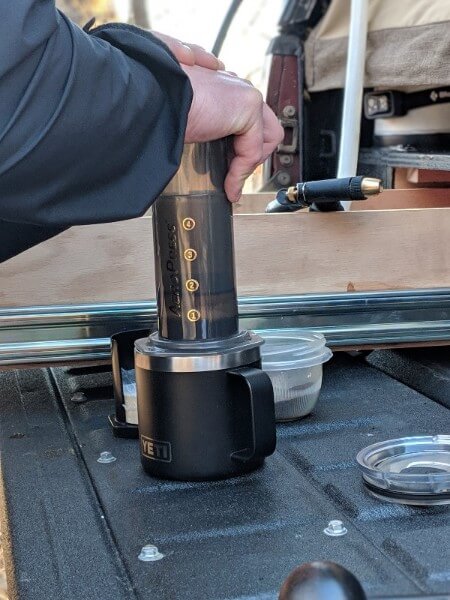
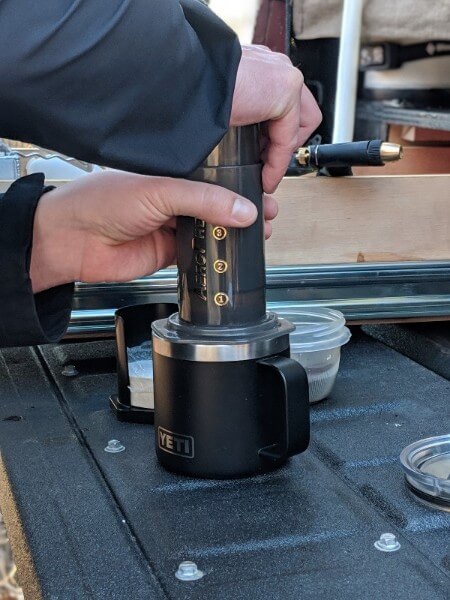
Insert plunger and apply slow downward pressure until it bottoms out (should take about 10 seconds) and you can hear the air pressing through the grounds
Remove the aeropress from your camping mug and enjoy!
Clean Up: Invert the Aeropress so that the filter basket is up, remove the filter basket, and press the grounds and filter into the trash. Then rinse the plunger, basket, and brew chamber, and you’re done! (We do wash with biodegradable soap and water every third use or so).
Be sure to check out our complete guide, Master the Art of Aeropress Coffee While Camping for a more in depth walk-through of this camping coffee method.
Ultimately, exceptional camping coffee is largely impacted by personal preference and by the ambiance and beauty of the place in which you get to enjoy it.
We hope that these 7 ways we’ve outlined help you in your journey to finding that perfect cup of camping coffee on your next adventure.
You can download a simplified 2 page PDF version of this guide by clicking below:

And if you’re curious about what else we’ve got in our camping kitchen check out our post - How to Set Up a Portable Camp Kitchen Box Today.
We’d love for you to SUBSCRIBE to get blog updates and to join us on our journey!
As always, thanks for reading!
Related Posts:
Pin these coffee making tips for later!

Sharing is Caring! Click Below!