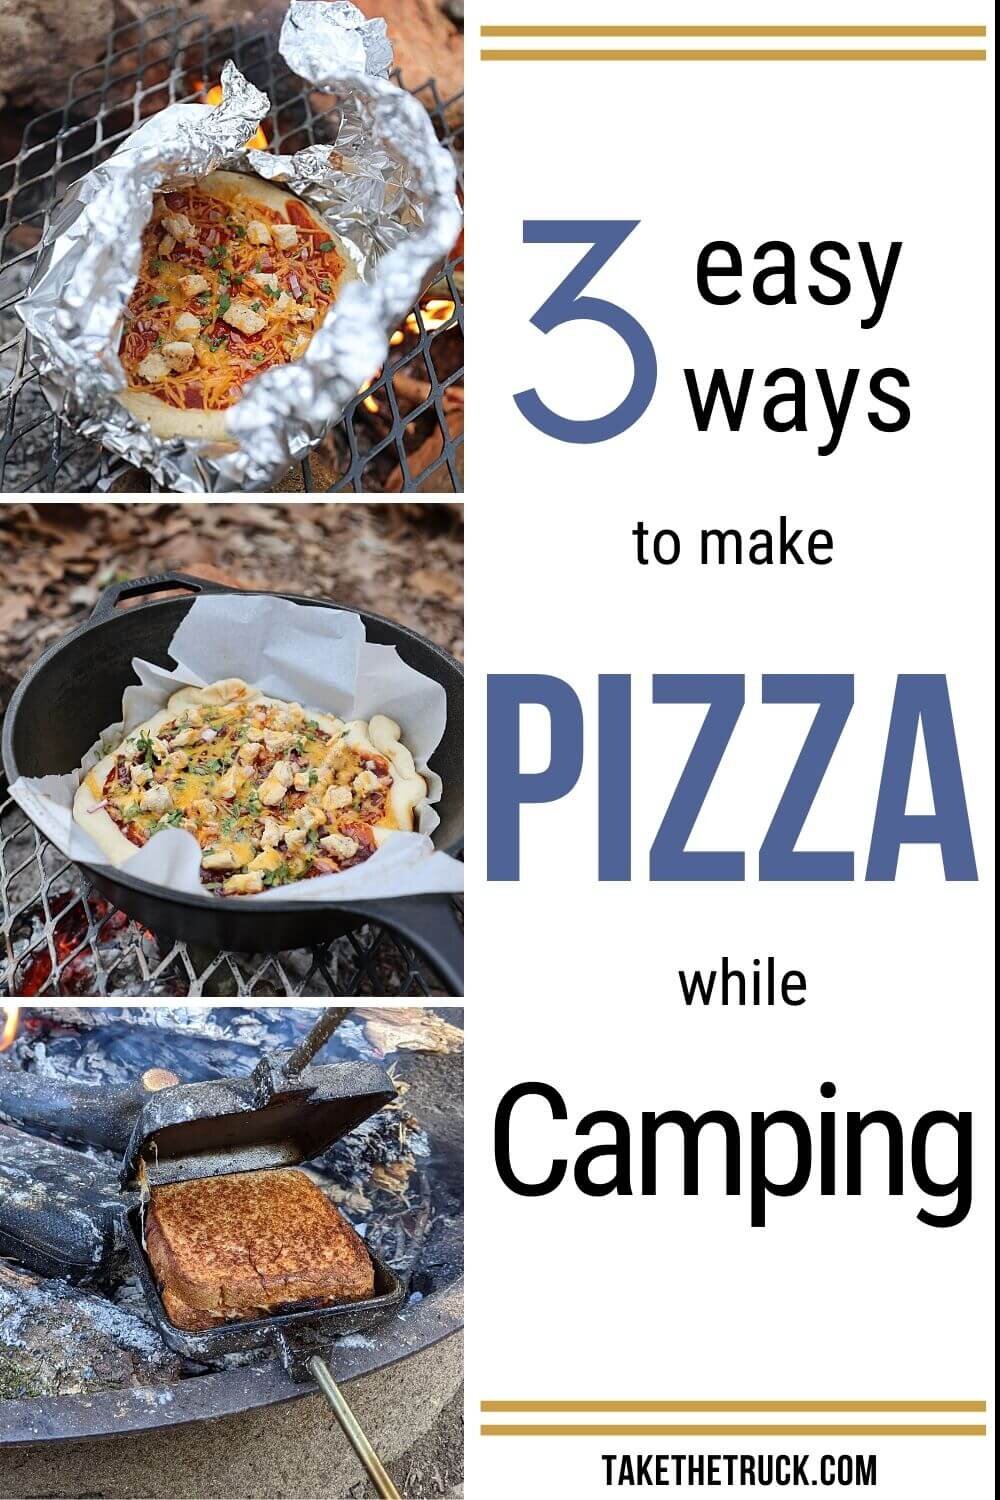
3 Easy Ways to Make Delicious Camping Pizza
Whether you camp solo, as a couple, with friends, or with your kiddos - there’s nothing quite like ending the night by eating delicious melty camping pizza around the fire!
But seeing as most people don’t go camping with an oven in tow, camping pizza isn’t typically on the menu. Today, we want to help you change that!
This post is organized to make camp pizza work for anyone! So no matter how involved you want your dough to be, what heating methods are available to you, or what type of toppings you want to use, we’ve got you covered.
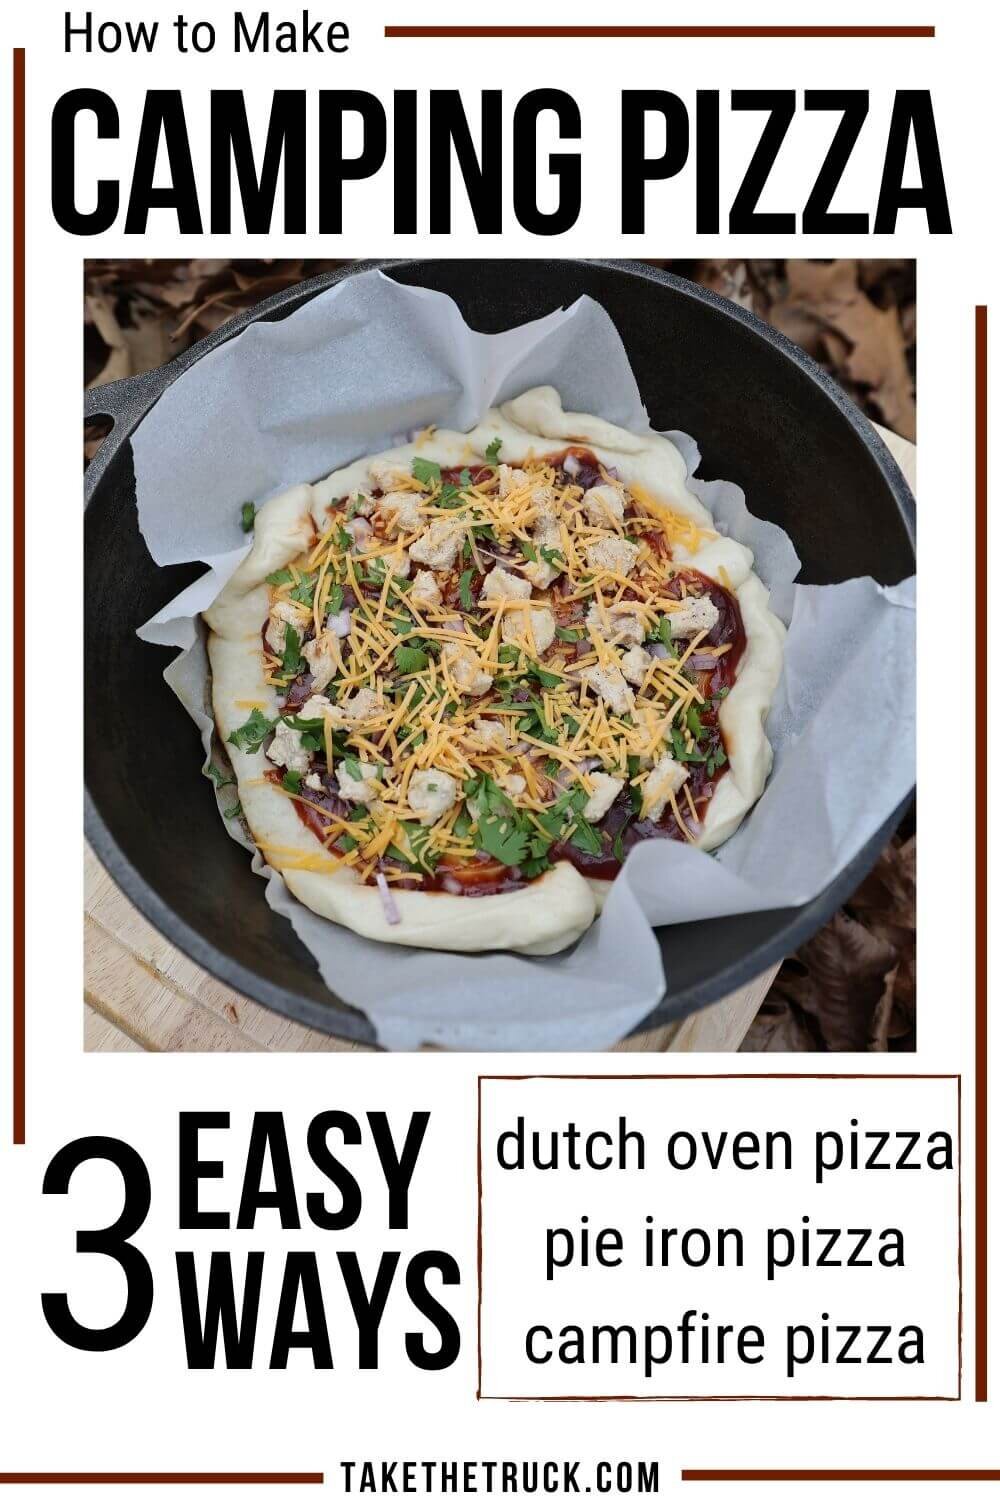
Dutch oven pizza? Check. Pie iron pizza (a.k.a. pudgy pie pizza)? Yup. Campfire pizza? Uh-huh.
Ready to dig in?
*(This post contains affiliate links. This means we may receive a small commission, at no additional cost to you, if you make a purchase through a link. See our full disclosure.)
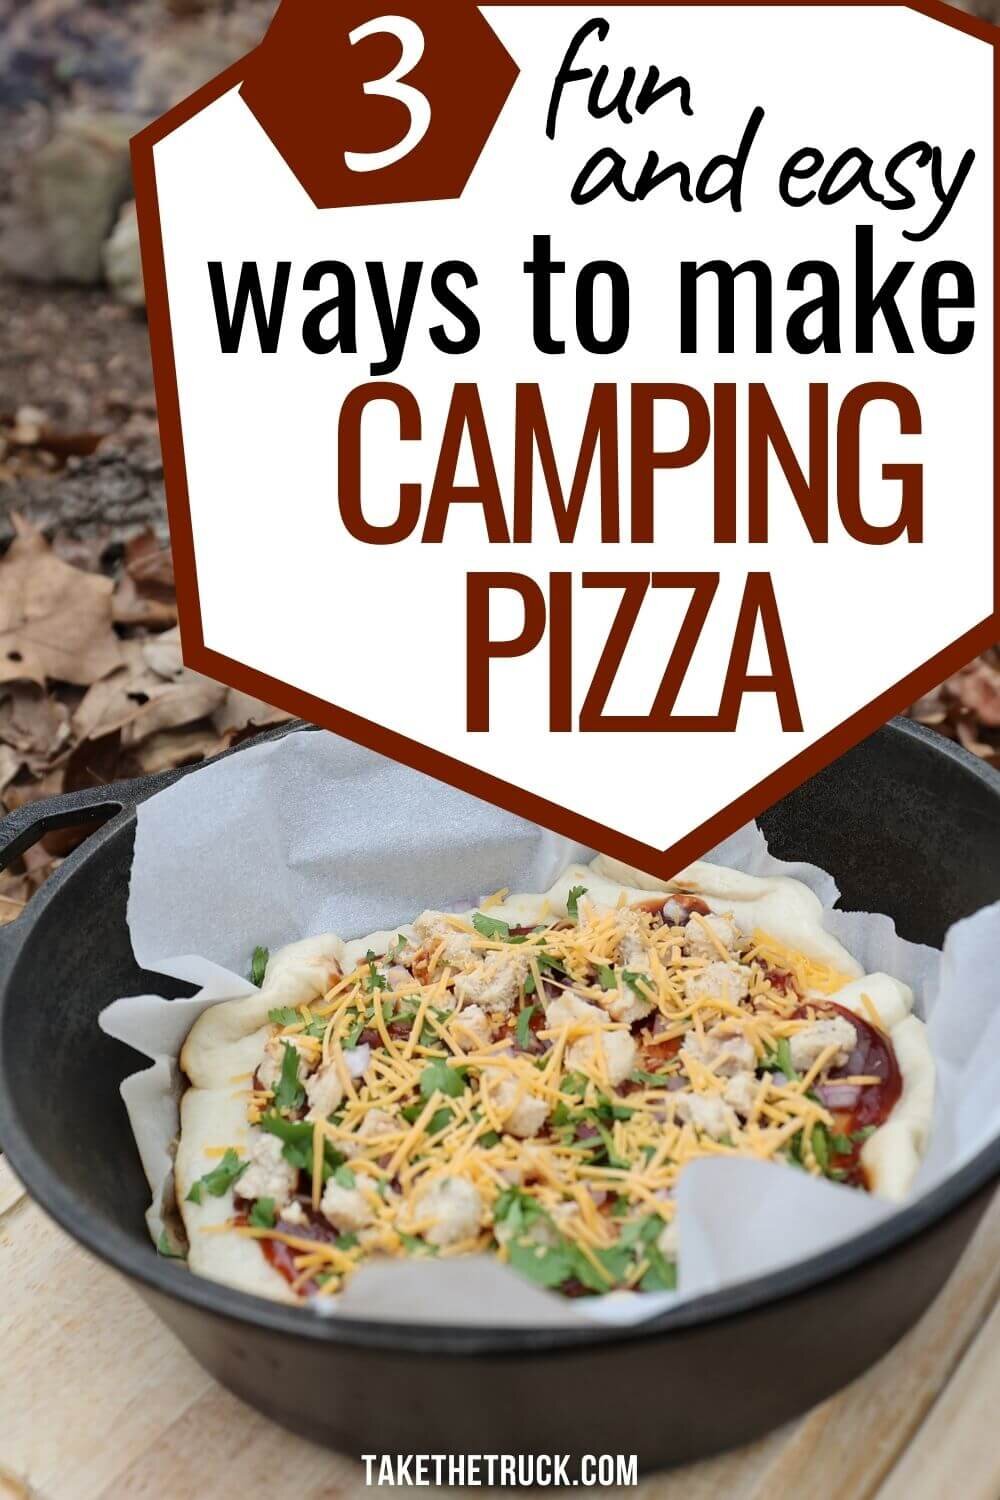
Dutch Oven Pizza While Camping
We were intimidated by the thought of using a dutch oven while camping for quite a few years. We finally got a cast iron set that works as a dutch oven, and love it! Turns out, the learning curve isn’t as steep as you might think.
Camp Kitchen Supplies Needed for Dutch Oven Pizza:
camp stove or campfire
parchment paper* (optional)
Best Dough to Use For Cast Iron Skillet / Dutch Oven Camping Pizza
This is the cool part - you can use any type of pizza dough when baking camping pizza in a dutch oven! Your cooking method will vary (more on this below), but any dough will do the trick.
Premade Pizza crust - make sure it’s small enough to fit in the bottom of your cast iron pan
Refrigerated pizza dough - cut to fit
Make your own from scratch!
How to Cook Dutch Oven Pizza
Be sure your heat source is set up to be low and slow. If you’re using a camp stove, have it on the very lowest heat setting. If you’re cooking your dutch oven pizza over a campfire, you’ll ideally have it over a metal grate with nice hot coals approximately 6” underneath and distributed as evenly as possible. Having very high heat and flames licking at your dutch oven will burn the bottom of your camp pizza and cook the toppings unevenly.
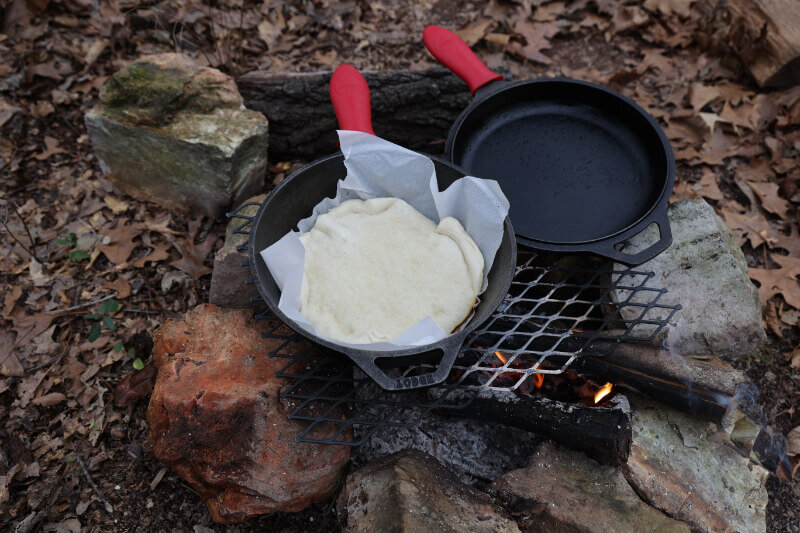

Add parchment paper to the dutch oven or cast iron pan for easy removal (and cleanup)
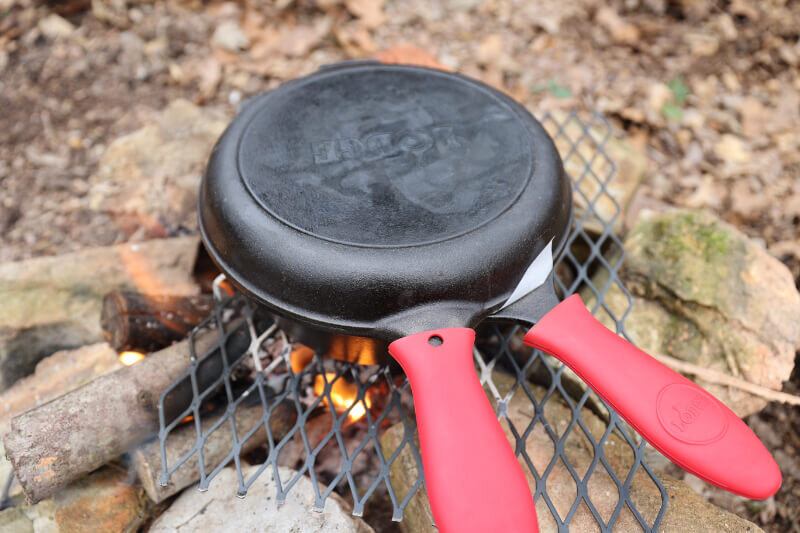
Begin by pre-heating the lid to your dutch oven over the stove or coals (this helps to evenly distribute the heat to the top of the camping pizza once you begin cooking)
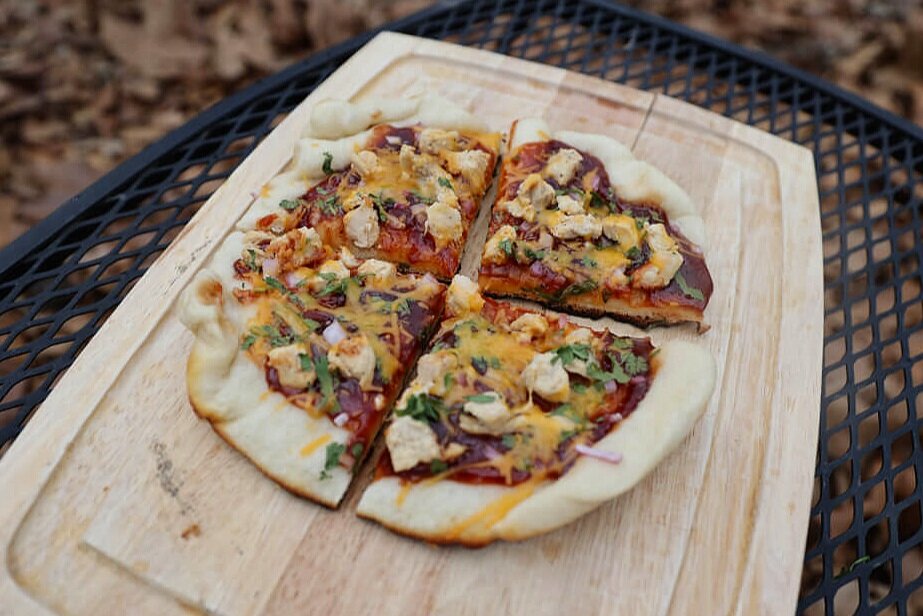
Put your camp pizza crust in the dutch oven. **If you bought premade crust go ahead and layer your sauce and ingredients on top now. If you made your own dough or used refrigerated pizza dough, coat it lightly with olive oil and add only the crust to the pan**
Begin baking your crust over the low heat, topping the pan with the pre-heated lid.
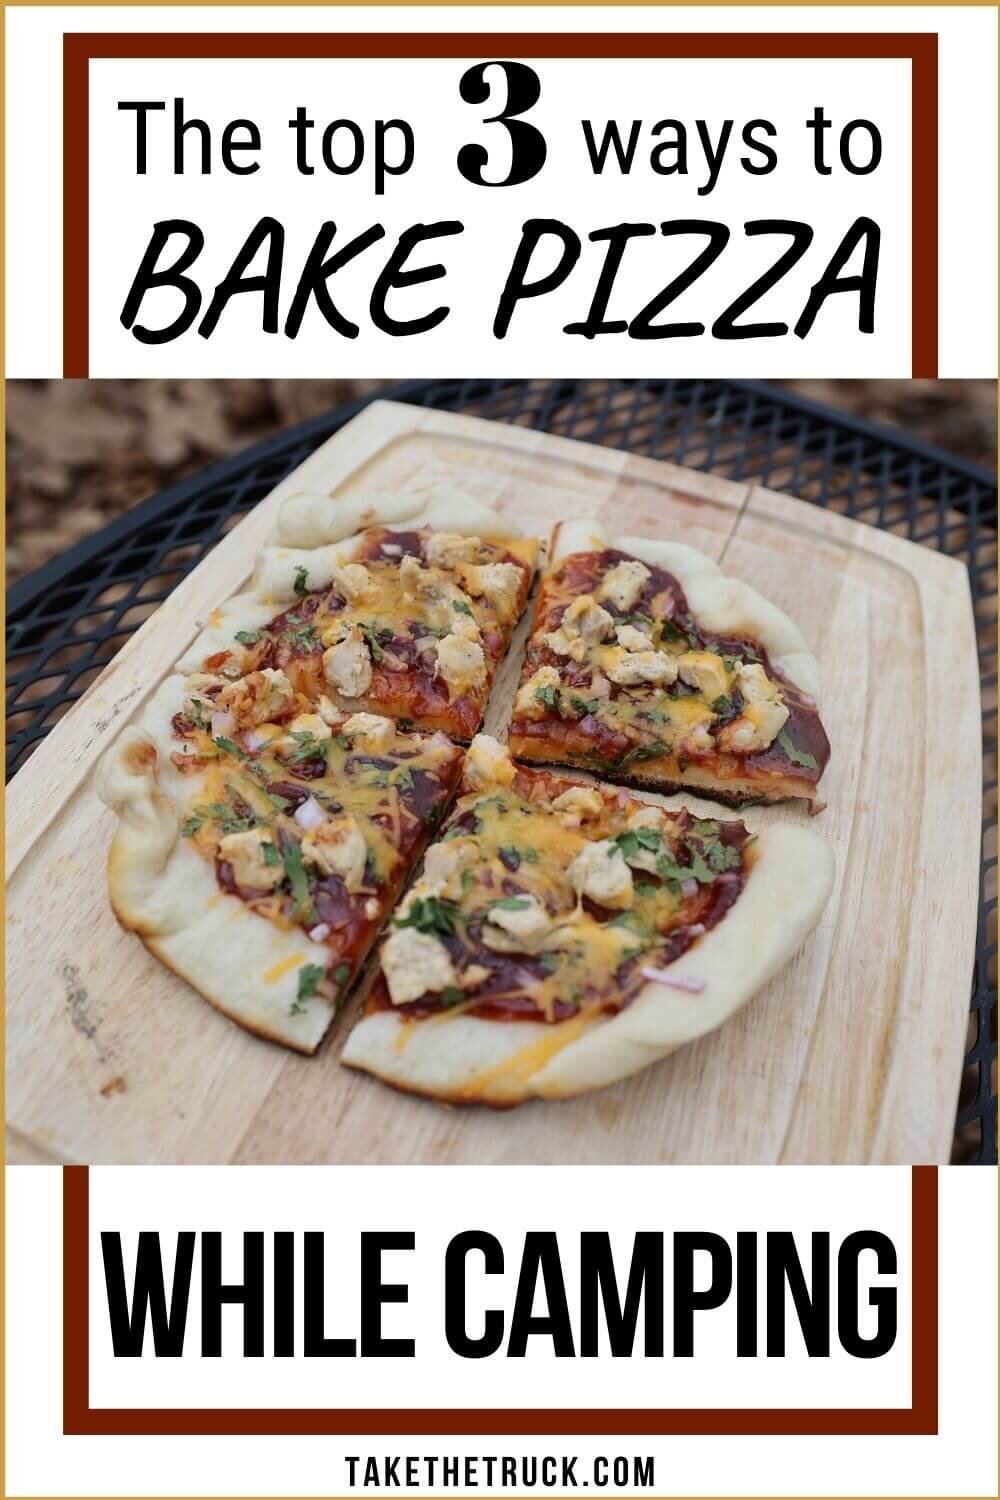
If you used premade crust, leave the pan over the low heat, occasionally rotating it to avoid hot spots. After about 10 minutes your camping pizza should be ready to eat! Your crust should be brown and crisp, and your cheese should be melty and delicious!
For homemade dough or refrigerated pizza dough, let it bake for about 6 or 7 minutes until the bottom is just starting to brown.
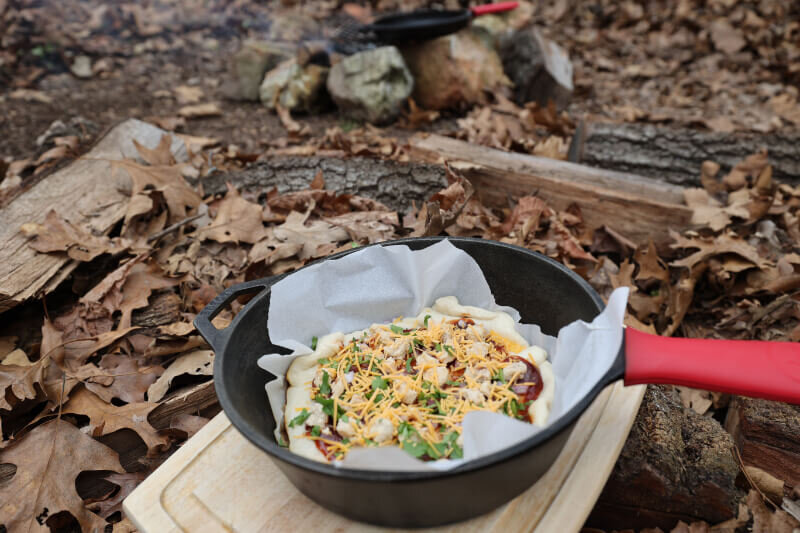
Remove the bottom of the dutch oven with the pizza crust from the heat. Leave the lid over the heat source so it’ll retain heat. Using the parchment paper to help, flip the crust over in the pan.
Now add your sauce, ingredients, and top with cheese! It’s best to use low moisture ingredients when baking pizza in a dutch oven, so that extra moisture isn’t trapped under the lid, making your camping pizza soggy.
Place the dutch oven back over the heat, replace the lid, and bake your pizza for another 7 or 8 minutes until the crust has browned and the cheese and other ingredients have melted together.
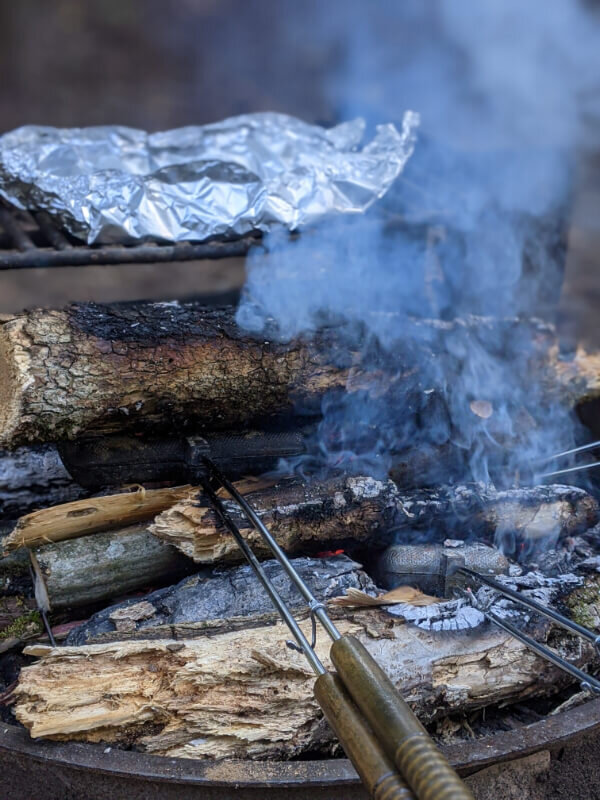
Campfire Pizza with Foil
Cooking over the campfire is another camping tradition that can be really fun, and often means you have very few dishes to clean up afterwards!
Camp Kitchen Supplies Needed for Campfire Pizza:
a campfire and campfire grate*
cooking spray or oil (optional)
Best Dough to Use When Making Campfire Pizza
We would not recommend using a dough that still needs to be baked when making a campfire pizza. They’re pretty tedious to cook properly and evenly in the aluminum foil.
Premade Pizza Crust (this could be store bought, or made from scratch and pre-baked at home)
English Muffins or Thin Bagels
Naan or Pita Bread
How to Cook Campfire Pizza
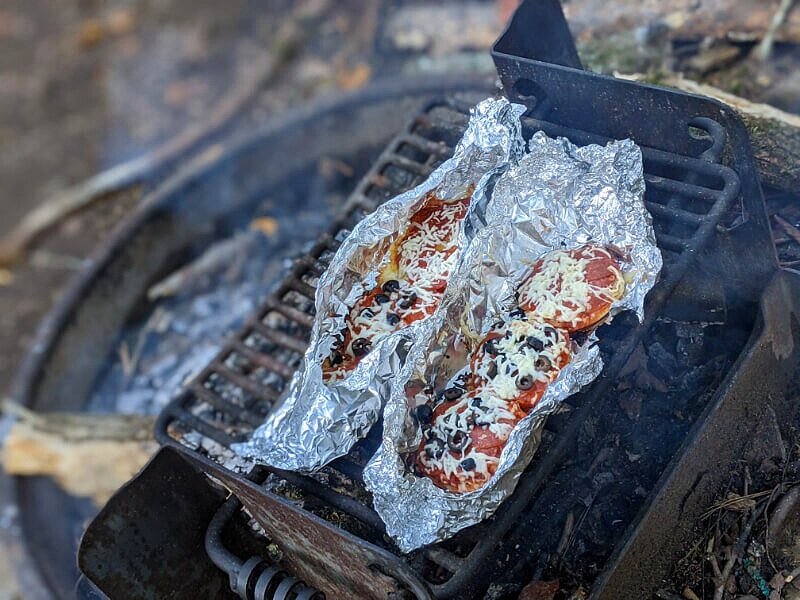
Again, this camping pizza will turn out best if you’re able to bake it over indirect heat. With flames licking the foil or with the foil directly in coals, the bottom burns too quickly.

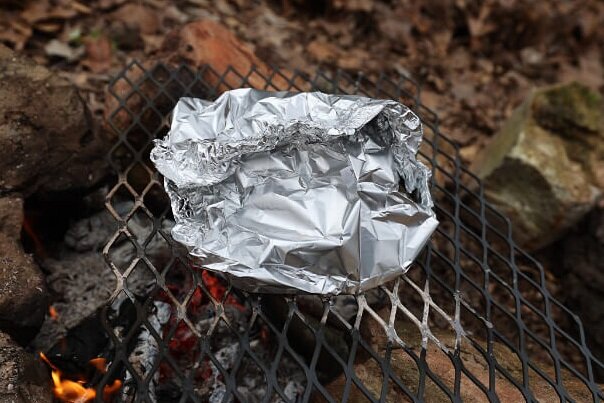

Lay a long piece of foil out and spray it with cooking spray if you have some on hand.
Assemble your pizza.
Wrap the foil around your pizza, tenting the top so it stays off the pizza.
Place your foil packet on a metal cooking grate above the coals.
Let the campfire pizza heat for about 10 or 15 minutes, rotating it every few minutes to ensure it’s cooked evenly over the campfire’s inconsistent heat. Once the ingredients are melted and the bottom is browned, it’s ready to enjoy!
Pie Iron Pizza (a.k.a. Pudgy Pie Pizza)
Pie Irons are an awesome addition to any camp kitchen! And when used for making pudgy pie pizza, the result is something resembling a large pizza pocket or calzone, rather than traditional pizza slices.
Camp Kitchen Supplies Needed for Pie Iron Pizza
pie iron* (if you have a group you’ll most definitely want at least two)
cooking spray
Best Dough to Use For Pie Iron Pizza
The traditional “dough” is just a couple slices of white bread, but anything can be used depending on how involved you want this recipe to be. The trick is that you want something that can seal all the gooey pizza goodness inside the top and bottom pizza crust layers.
Slices of bread
Refrigerated pizza dough cut to shape
Make your own dough from scratch and cut to shape
How to Cook Pudgy Pie Pizza
You’ll need hot coals for this camping pizza recipe as well, so start your fire a little early. You’ll want it to have time to burn down a little bit, leaving behind nice toasty coals.
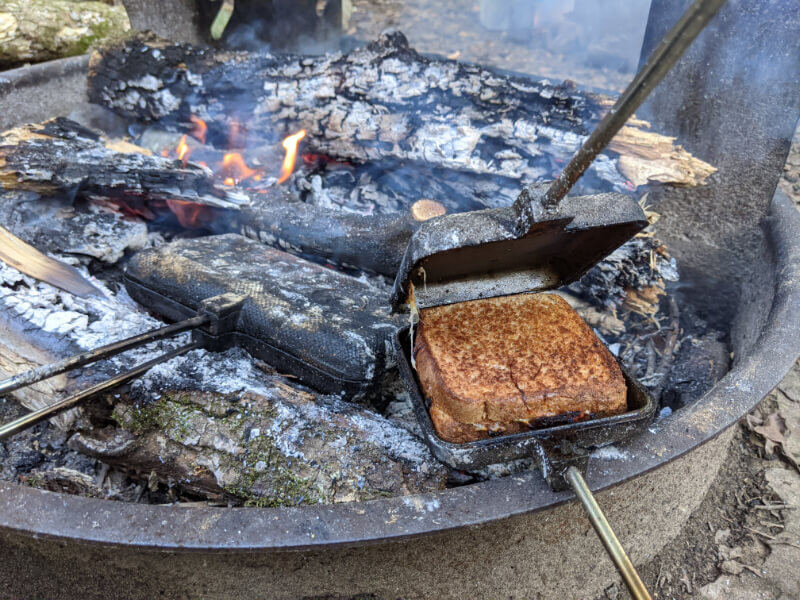
Spray your pie irons with cooking spray.
Line one side with your chosen dough, whether that’s a piece of bread or pizza dough cut to shape (If using dough, cut it into one long rectangular shape which you’ll fold over to create a pocket).
Fill with your sauce and toppings!
Top with another piece of bread or fold the dough over the top of your ingredients. If you’re working with dough, pinch the sides closed.
Close and latch your pie iron and put it directly in the hot coals. Be sure to flip your pie iron pizza in the coals every now and then to allow both sides to cook evenly.
Your pudgy pie pizzas should be ready to eat after 5 to 10 minutes in the fire! And if you’re like my family members you need this reminder - they’ll be very hot! Let them cool!
There you have it - 3 great cooking methods for making delicious camping pizza on your next trip! Enjoy hot pizza while camping and have fun!
As always, thanks for reading - we’d love for you to SUBSCRIBE to have new blog posts sent right to your inbox.
Related Links:
Pin Me!
We’d love a share! Thanks!